Wood flooring is made of natural wood. Wood provides this type of flooring with many benefits: it is warm, long-lasting, it has a positive effect on human health and is green (unlike carpets, wooden flooring do not accumulate dust and are easy to clean).Wood flooring typically comes in the form of separate planks, which are either nailed to the floor, or engaged with each other, depending on their type.
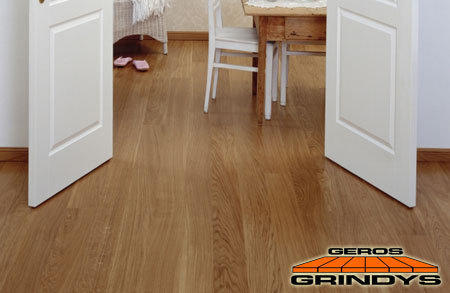
Wood flooring. Author's photo.
Types of wood flooring
Today, three types of wood flooring are distinguished: solid wood, engineered two-layer and engineered three-layer wood flooring. The last two belong to the engineered wood flooring group.
Solid wood flooring is a traditional type of floors. Each plank is made of solid wood. This type also includes long solid wood boards. Solid wood planks can be glued-down either to the leveled concrete floors or well-leveled wood boards. Such installation helps to prevent squeaking when walking on the floor. When glued-down, flooring boards are sanded, grounded, sanded again, and finally varnished.
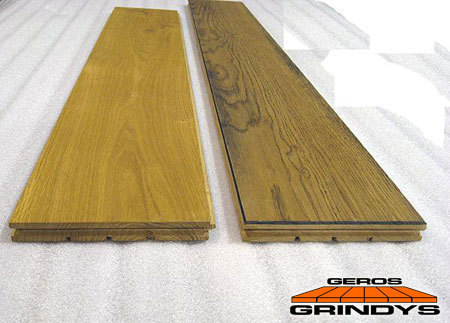
Solid wood flooring. Photo by Hermis Preikstas
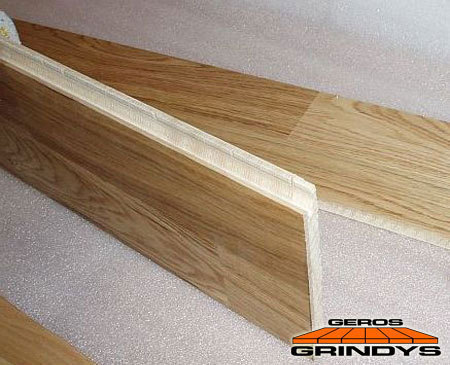
Solid wood flooring planks.
Solid wood planks joints.
Solid wood flooring has both benefits and limitations as compared to other types of flooring. The benefits include good heat-insulation properties, stability, possibility to install it in many design patterns, such as rhomb, fur and square patterns. There are some limitations as well: such flooring is prone to swelling if affected by moisture and contraction when overdried, which results in emerging gaps between two adjacent planks. Solid wood flooring should not be installed over radiant heating. Its installation and varnishing process is quite a challenge as it requires certain skills, time, labor and material costs.
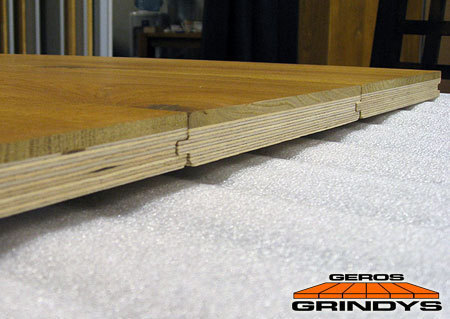
Two-layer engineered wood flooring is composed of two layers of wood, that is lamella (the top layer) and the core. Lamella is a layer of noble wood that is typically pre-finished. It is a 3-4 mm thick hardwood surface on which one walks. The core is a back layer made of plywood, OSB board or softwood. The core layer has special grooves and tongues designed to engage planks. Standard sizes for two-layer wood flooring planks can reach 7- 18 cm in width, 50-2200 cm in length and 10- 20 mm in thickness. Installation is very much the same as of solid wood floor: it can be glued-down to a well-leveled concrete or wood subfloor. In case you are installing bigger planks onto a wood base, you can either glue them down or nail them to the base. The benefits include perfect heat-insulation properties and low level of squeaking. Besides, it can be installed over radiant heating floor and can be laid in patterns. There are some disadvantages as well: material and glue costs are rather high, because this type needs to be glued-down to the subfloor.
Two-layer engineered wood flooring. Due to its thickness and structural properties this type is perfect for underfloor heating floors.
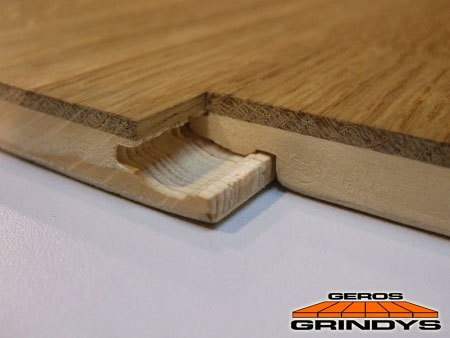
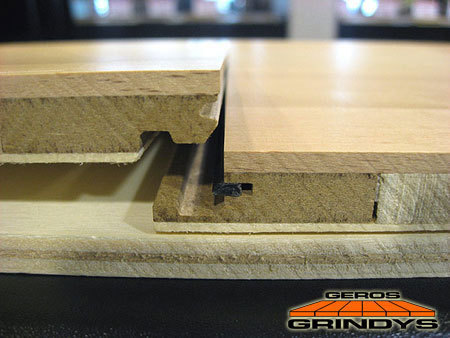
Two-layer engineered wood flooring. The back layer has connection grooves and tongues. Photo by Hermis Preikstas
Three-layer engineered wood flooring
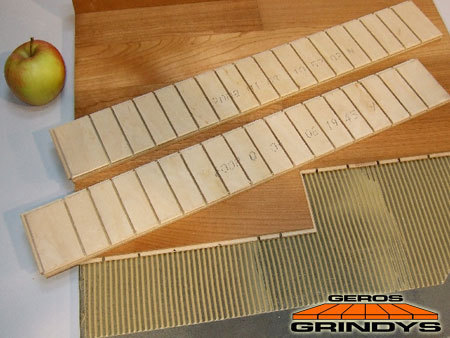
This type is composed of three layers of wood: the top, the middle and the back one. The top layer is made of noble wood finished with varnish for resistance. The middle layer is composed of several heartwood pine pieces (3-4 cm wide each). It has joint grooves and tongues. The back layer made of softwood holds the middle one, fixing and leveling it.
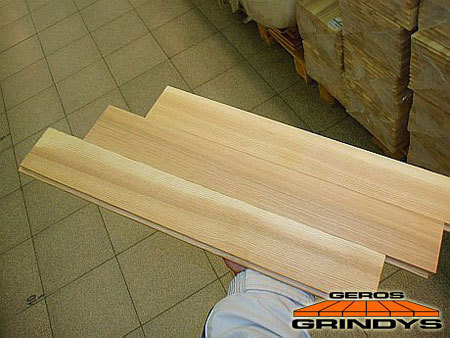
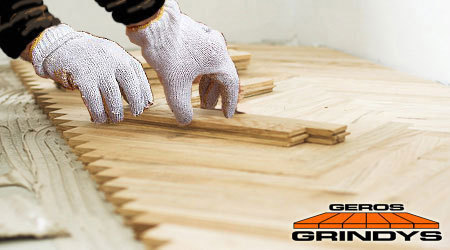
Three-layer engineered flooring planks.
Three-layer engineered flooring is gaining popularity due to its easy and cost-effective installation with no adhesives needed. Planks require neither gluing, nor nailing to the floor. No adhesives are used for joining planks. Instead, they are engaged with the so-called "click" system. One side of a plank has a groove, into which the tongue of another plank is inserted. This connection method is significantly easier as no tools are required. Such floor is also more stable – because planks hold each other, no gaps occur between them later on. One can lay 30 m² of three-layer engineered flooring per day. However, squeaking might be a problem if the subfloor or underlayment are not level enough.
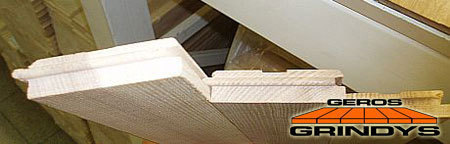
Durable and easy-to-use "click" system. Author's photo.
Ways of laying wood flooring (Theory)
Depending on the flooring type and floor flatness, there are several installation methods available, each of which requires different tools and materials.
1. For solid wood flooring, as well as two-layer engineered flooring, a simple installation method is traditionally used, according to which planks are glued down to the leveled and waterproof concrete subfloor. Concrete floor should be leveled, cleaned and covered with a vapour barrier. Solid wood planks (especially larger ones) should be glued down to concrete with special adhesives for wood flooring. In some cases, a special underlayment may be used seeking to achieve a higher level of comfort or to prevent vertical height differences. It can be an elastic rubber or cork underlayment, designed to minimize squeaking noise. Due to temperature and air humidity changes, natural wood tends contract or expand. Flooring underlayment is designed to soften such deformation, as well as to minimize stress in the adhesive layer. Underlayment is glued to the slab and then planks are glued-down over it.
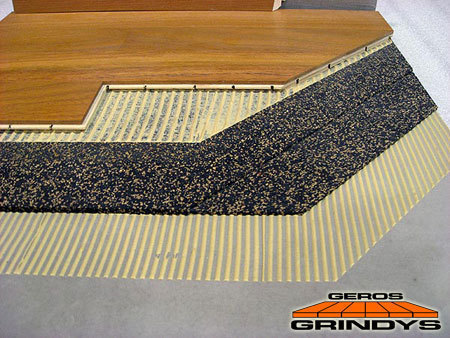
Two-layer wood flooring glued down to the underlayment. Photo by Hermis Preikstas.
2. If it is not possible to level your floor with compounds by using special tools, plywood or OSB underlayments are installed. They are nailed to the base, then covered with an adhesive, after which planks are glued directly to them.
It is important to make sure that plywood or OSB underlayment boards are not thinner than the flooring planks. Only in this case the subfloor will be able to stand natural deformation of the flooring. During the installation, leave 1 cm space between the boards. Nail consumption equals 10 nails per m². It is recommended to sand the nailed underlayment before you start gluing flooring boards. The disadvantage of this method is the increased heat resistance of the floor, which makes it unsuitable for radiant floors.
Seeking to increase heat and noise resistance, plywood or OSB boards can be installed over wood blocks. 5 cm thick wooden blocks should be nailed to the subfloor covered with a water-resistant compound. Leave a 60 cm space between every two pieces, and then fill them with rockwool.
3. For three-layer wood flooring, the so-called floating installation is considered to be the easiest and cheapest alternative. This method does not require any adhesives as flooring sits on the floor with planks engaged together by grooves and tongues instead of being glued or nailed to the subfloor. The necessary condition is to level the subfloor as well as possible. It should also be covered with a water-resistant sheeting and foam underlayment to compensate for floor unflatness and to minimize squeaking.
Instruction for the installation of engineered wood flooring
This instruction offers illustrated directions of how to install three-layer flooring using the floating method, as well as how to glue-down two-layer engineered and solid flooring. These two methods are totally different. While the gluing technology requires more materials and tools, let us begin with a common list of the necessary tools and materials for both methods:
Tools:
- Cutting tools– electrical saw, circular saw, hand saw
- Floor sander for concrete and wood
- Ruler, tape measure, level
- Pencil
- Wooden shims
- Hammer and a wood block (you can use a wooden or gum hammer instead)
- Pull bar
Materials:
- Water-resistant sheeting (or prime coat that can be painted)
- Underlayment (if necessary)
To install two-layer engineered and solid wood flooring (glue-down method), you will additionally need the following tools and materials:
- Notch trowel for spreading adhesive (4 mm between the notches)
- Adhesive
- Adhesive remover. Wet cloth
Preparation before flooring installation
Before you start laying the flooring, make sure you level the floor.
Specifications call for subfloors are within a tolerance of 3 mm over a span of 2 meters. Old wooden subfloor with many bumps and dips can be leveled with leveling compounds. Sometimes, all you need is to sand it with a circular sander. Grit size of the sandpaper depends on how uneven the floor is. Flooring planks can be also installed upon an old wooden floor. Its surface should be leveled with a drum sander. Make sure you hammer all the nail heads. Remove all debris and dust after you finish.
Sanding of a concrete floor. Photo by ASA.LT

Sanding of a wooden floor. Photo by ASA.LT

Clean the dust thoroughly. ASA.LT
Installation of a floating floor
Keep the purchased flooring planks indoors for at least 2 days, allowing them to adjust to the room humidity. In winter time, it is recommended to keep them indoors for as long as 5 days. The relative humidity should not exceed 70% and the recommended temperature should be from 17 to 22˚C.
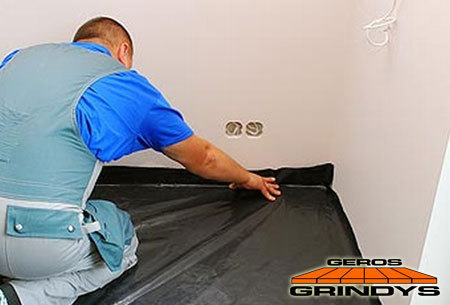
If the case you have just applied the leveling compound on your subfloor, or if you are installing wooden flooring upon radiant heating, you should lay plastic sheeting prior to planks installation. It acts as a vapour barrier. While laying the plastic sheeting, allow the edges of two adjacent pieces overlap by 20-30 cm, then duct-tape them. Leave 3-5 cm edges along the walls and fold them upwards.

Plastic sheeting installation. Author's photo.
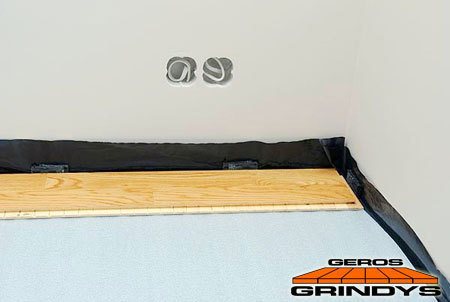
Along the walls, the edges are folded upwards. Photo by Hermis Preikstas.
The plastic sheeting is then covered by the foam underlayment, compensating for floor unevenness and minimizing squeaking.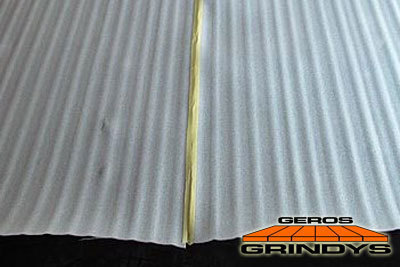
Plastic sheeting. Photo by Hermis Preikstas
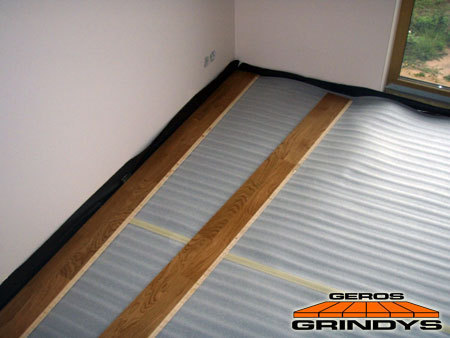
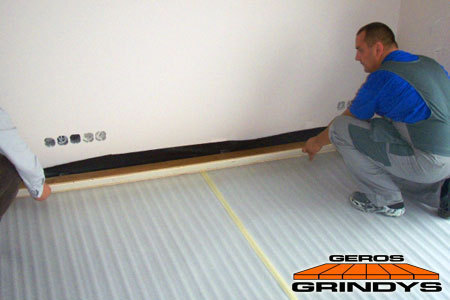
It is recommended to install planks in the direction of the window light – in this case the light falls upon the shorter, not the longer seams. As a result, their shadows stay almost invisible. Start laying the planks from the wall, from right to left. Professionals recommend to direct the side and end tongues of the first plank to the wall. Leave a 1 cm space from the plank to the wall for expansion of the flooring resulting from humidity changes. Use spacers (shims) to keep this space. The 1 cm space should be kept while laying all the subsequent planks.
Installation of the first plank. Tongues directed to the wall. Spacers are used for keeping 1 cm space to the wall. Photo by Hermis Preikstas
Holding the second plank at the angle of 30-40 degrees insert its end tongue into the end groove of the first plank and lower it, thus engaging the planks. The rest of the first row should be laid in the same manner. If the last plank is too long for the space left, it should be measured and trimmed to the necessary length.
The second plank in inserted at an angle into the groove of the first plank. Photo by Hermis Preikstas.
When you lay the plank down, it will engage with the first one. Photo by Hermis Preikstas
The seams of all boards in all the rows should be staggered. While cutting the boards, remember that their length should reach at least 40 cm.

For cutting planks only fine-tooth cutting tools are used. Photo by Hermis Preikstas
To start the second row, you may use the piece left over from the previous cut. Connect the planks end-to-end by inserting the tongue of each new plank into the groove of the adjacent one. Form the second row in that way.
End-to-end engaging of the planks in the second row.
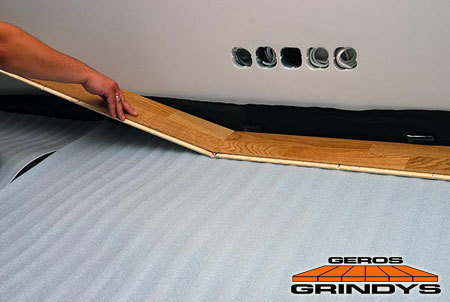
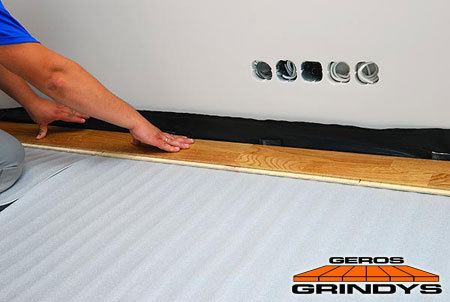
When the second row is ready, lift its one edge slightly at a small angle to engage the side tongues of the planks with the grooves of the first row boards and lower the second row, keeping the planks engaged.
Engaging the second row with the first one. Lift the row at a small angle, then lower it. Author's photo.
It is not always easy though to engage the whole row with the already-installed one, especially if the room is wide and you have no one to help you. This year, a specialty has been presented to the market, which in the course of time should start to be commonly used among flooring manufacturers. One side of a plank has a plastic strip integrated, while the second side has a special groove. This system has been presented by „Geros grindys" UAB Medžio apdaila
New connection system. Photo by Hermis Preikstas
The first row is installed in the way described above. For the second row, join the first plank side-to-side with the already-laid planks. Insert the side tongue of the next plank into the groove of the first row boards at an angle and lower the plank to the first board of the second row.
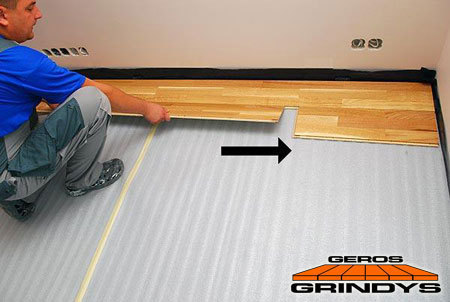
Photo by Hermis Preikstas
Then press the plank downwards for the spring plastic strip on the plank to engage the sides of the planks together.
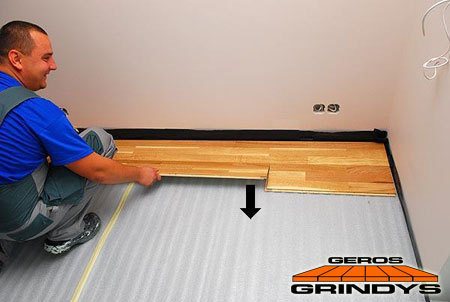
Photo by Hermis Preikstas
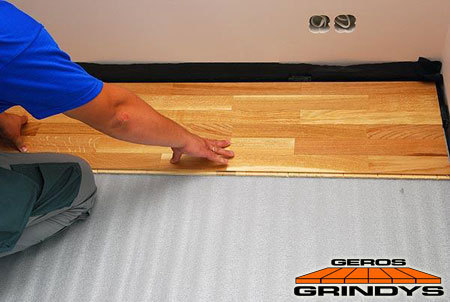
Photo by Hermis Preikstas
Using a wood block and a hammer, tap the side of the laid planks. By tapping a wood block, you can adjust all the joints of the boards if there have been small gaps left. Do not tap the planks directly with a metal hammer – this may cause their damage and deformation. Remember to use spacers for keeping 1 cm expansion space from the boards to the wall during the whole process of installation.
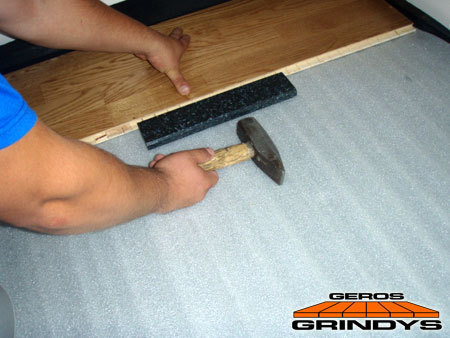
Tapping the wood block to adjust the joints for better engaging of the planks
Before laying the last row, rip the planks to width, taking into account the 1 cm space to the wall. Use a pull bar to engage the last row with the previous one. To install flooring around pipes, cut a hole in the plank that would be 8 mm larger than pipe diameter. This measure will help to prevent the flooring running into the pipe as it expands because of humidity. Cover the expansion gaps with pipe rings when the floor is complete.
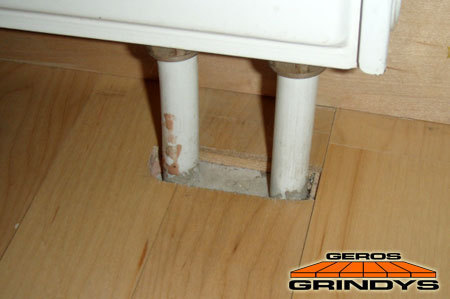
Around pipes wider holes are cut. Author's photo. 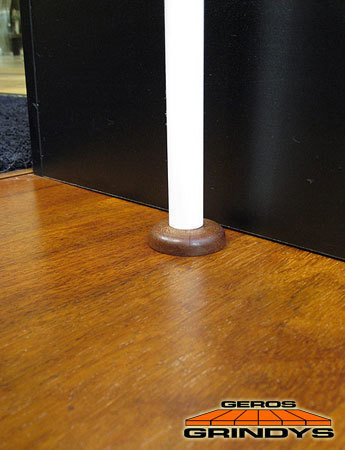
Holes are covered with rings. Photo by Hermis Preikstas
After you finish the installation, remove the spacers from the spaces between the flooring and the walls. Install baseboards along the walls. Do not press them firmly to the flooring to leave some room for expansion.
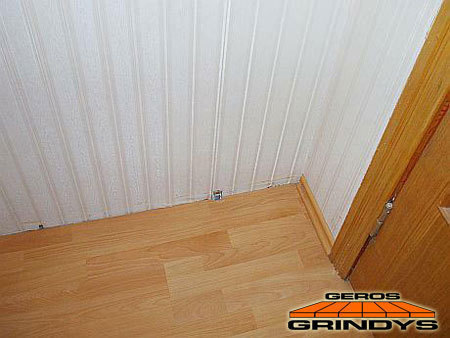
After finishing the installation, mount fastenings for baseboards. Author's photo.
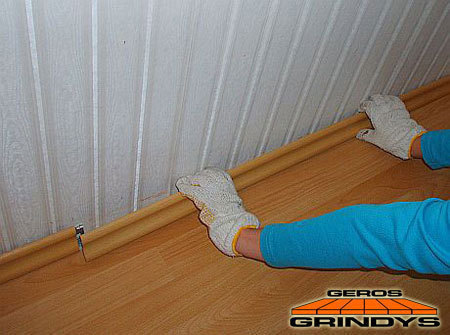
Install baseboards. Author's photo
To cover the rest of the open flooring sides (e.g. at doorways) or to match different heights of the floor in two adjoining rooms, special profiles are used. The flooring installed in the described no-glue manner can be used at once after the installation.
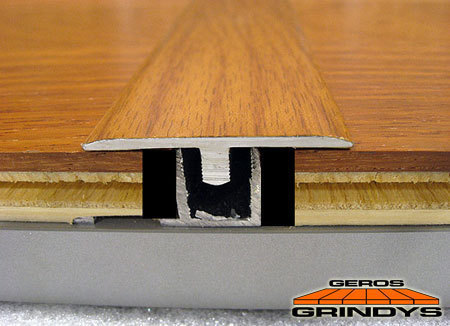
Photo by Hermis Preikstas
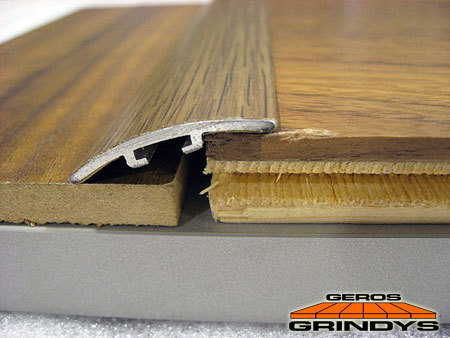
Special profiles used to cover open sides of the flooring and to create transition between different heights. Photo by Hermis Preikstas
To protect your floor from damaging, attach floor pads to you furniture and use vinyl mats for office chairs. 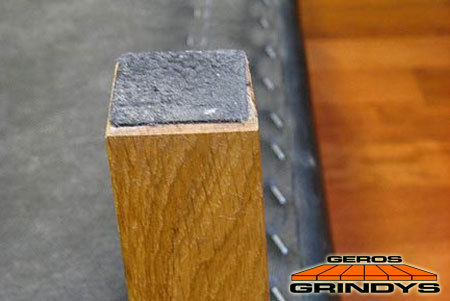
With floor pads attached to your furniture, you floor will last longer. Photo by Hermis Preikstas
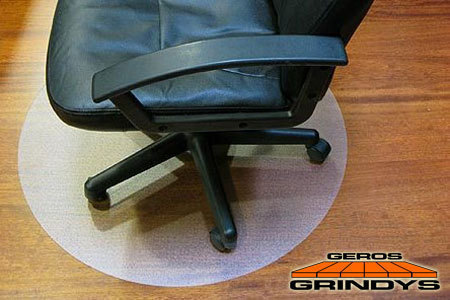
Vinyl mat protecting the floor from scraping. Photo by Hermis Preikstas
Gluing of two-layer engineered and solid wood flooring
Gluing is possible when the temperature indoors varies from 18º to 22º C, while the relative air humidity does not exceed 70%. The adhesive that you are using needs to be properly mixed. The average amount of glue required is approximately 800- 1200 g/m² depending on the floor levelness. Flooring boards should be laid on the subfloor covered with an adhesive and pressed firmly to it. To apply adhesive use a trowel with 4 mm distance between the notches. In case adhesive gets on the top side of a plank, clean it immediately with an adhesive remover specified in the directions for use.
Planks are installed onto the adhesive spread with a trowel over the subfloor. Author’s photo
To glue down wide solid wood flooring is a risky business. As a result of wood contraction and expansion, the gaps emerging between two adjoining planks will be much bigger in the case of wide boards. Moreover, there is a risk of boards de-bonding with the sub-floor. If you have chosen to glue down flooring boards wider than 12 cm, use the following method. Install an OSB or a waterproof plywood board over the concrete floor. Now you can either nail or glue solid wood flooring to the prepared subfloor. This is the best way to lay solid hardwoods.
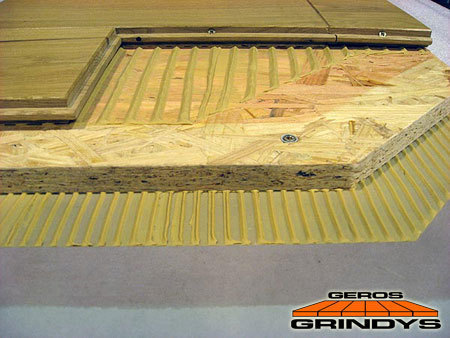
Solid wood boards glued-down or nailed to an OSB board. Photo by Hermis Preikstas
The type of an adhesive and undercoating depends upon the subfloor. For example, the top side of a non-sanded OSB board needs to be covered with undercoating before planks are installed on it. Seeking to avoid damaging of planks, do not use water-based glue. After the installation is complete, it is recommended to wait for 1-3 days for the glue to dry up before you begin to walk or place furniture on the new floor. If there is sanding planned, it can be performed only after the completion of the term specified by the glue manufacturer.
