How to Install a Shower Enclosure
Updated: 2022-01-17
Shower enclosure with a sloping floor. When you start to plan your bathroom, you should remember that in many cases it is better to install a shower enclosure with a sloping floor instead of using a shower tray. Such enclosures are commonly found in gyms and fitness centres, but can be applied at home as well. In order to make a shower drain (specialists call it a trap), first make a slight niche in the floor. Before laying tiles, make sure that you waterproof the surface, preventing water seepage. Tiles should be laid with a slight slope towards the drain outlet; this will prevent paddles of water collecting on the floor of the shower cabin. If you have decided to do it yourself, consult a professional, because this type of work requires specific skills and knowledge.

Notes:
* a sloping floor of a shower cabin will make cleaning easier;
* you will not stumble over the tray borders;
* you can make you shower enclosure as spacious as your bathroom allows;
* the highest point of the enclosure flooring is where it meets the bathroom flooring , while the lowest is the drain.
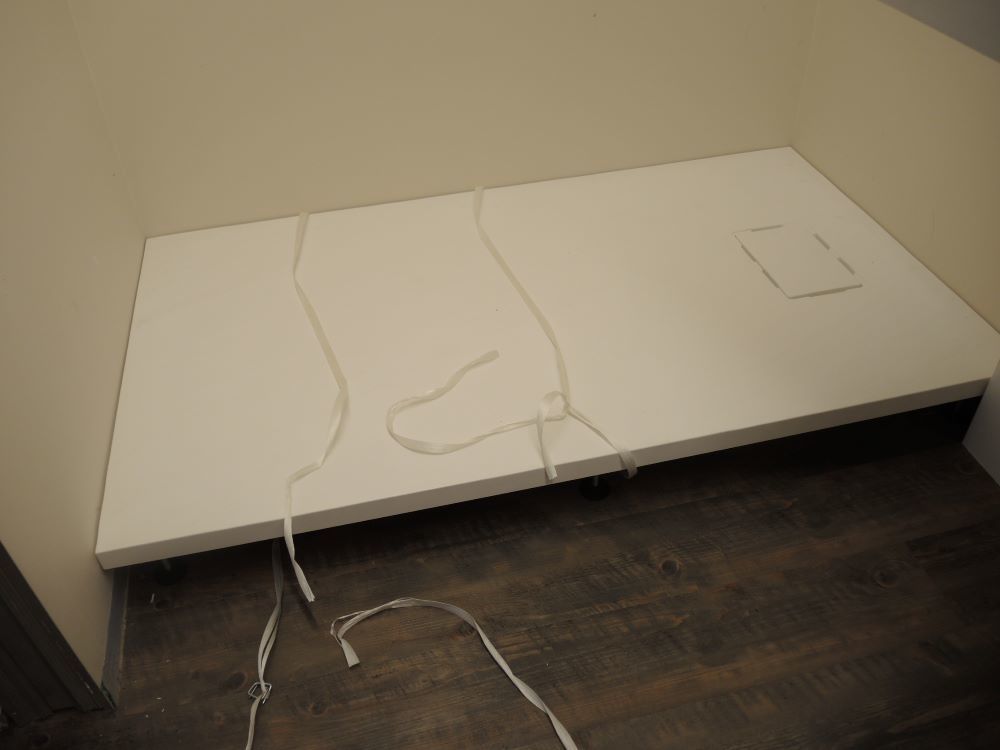
Shower enclosure with a tray embedded in the floor. You can also install a flat shower tray with low upstands. Before fitting it, prepare the base for it, making a niche of a necessary form and size in the floor underlayment.Next, determine the drain point. It depends on the location of the drain opening on the tray. The installation is quite a simple process: usually trays have legs that can be adjusted to the necessary height to align the tray. While fitting the tray, consider the thickness and the level of the bathroom flooring which will border the shower cabin. After the flooring has been laid, separate it from the shower tray using a special edging. The tray surface should have a little slope to secure unhampered water drainage.
Notes:
* tray is provided with a set of assembly details that make the process of installation easy even for a beginner;
* tray is easy to install thanks to adjustable legs;
* purchase a low edging to frame the perimeter of the shower tray;
* the advantage of shower enclosures with trays is that their installation does not require applying the sanitary/hygienic means that are necessary for cabins with sloping floor.
Shower tray installation. In fact, as a do-it-yourselfer, you can install a shower tray yourself, in case you prepare the base for it correctly. Usually trays come with details that are necessary for their installation. Prior to fitting, check whether the enclosure walls will be at the angle of 90 degrees, whether the edge of the tray will fit the walls tight and whether the waste pipe fits the drain in the tray. It is recommended to connect the lower part of the whole structure to the waste pipe as soon as possible.
- Attach the adjustable legs to the lower part of the shower tray, placing a sheet of paperboard under each of them.
- Before placing the tray into the niche in the floor, level the surfaces using a hammer and chisel.
- With the help of the standard ceramic tile check whether the angle of the shower room equals 90 degrees.
- If the angle is not right, level the wall on the height of the tray so that its edges would closely adjoin the wall.
- Install the waste pipes so that when you mount the tray, the opening of the pipe is right under the drain.
- Place the tray horizontally on the adjusted legs. Make sure you do not scratch the surface of the tray!
Walls of a shower enclosure. To separate shower from the rest of the bathroom, panel walls are mounted on the tray or sloping floor. They can be made of a wide range of waterproof materials, such as common glass, organic glass, plastic, glass blocks (they can be transparent, semi-transparent, frosted, or completely non-transparent). To visually increase your bathroom, it is recommended to choose transparent glass or plastic for enclosure walls.
You can either purchase a shower cabin as a whole unit, or assemble it from separate parts, combining them according to your taste. It all depends on your will, skills, and imagination. You can install the shower tray by yourself, tile the walls, then buy ready-made transparent wall panels and mount them. If you have decided to assemble your a shower enclosure from separate component parts, note that it can be either located in the corner of the bathroom, or mounted next to one of the walls. You will also need some tools and materials, such as a drill with a hammer function, a screwdriver, screws, and cement.
- Place a wall profile on the edge of the tray vertically (use a spirit level), then using a pencil mark points for drilling on the tiles.
- On the drilling points, punch out the upper surface of the tile carefully, using a centre punch. Make sure you do not to damage the enamel.
- In order to avoid the tile cracking, do not apply the hammer function of the drill until the drill has passed through the tile.
- Having drilled wholes to the depth matching the size of a dowel, screw the profile to the wall.
- Set wall panels, fastening their hinges to the profile. It is important not to over- tighten the screws, otherwise the glass will break.
- Before fastening wall panels, attach the doors to them. Adjust the hinges, so that when the doors are closed, the sealing strip is pressed to the edge of the tray closely.
Comments (0)
