There are a number of advantages of choosing a timber-framed house for your home. These include fast building, a relatively cheap construction method and the opportunity to achieve high energy efficiency. However, there are still a number of prejudices associated with timber frame buildings. Many of these prejudices arise from cost savings, where savings cannot be made, and the ignorance of craftsmen. In this article, I introduce the construction of a frame sauna, using the same materials and assemblies as would be used in the construction of a frame house. I would like to emphasise that this article is not an instruction on how to build a timber-framed house on your own. The timber dimensions, fixings and insulation thicknesses for each building should be calculated separately by the designer. However, you can safely adapt the sealing solutions used in this sauna.
Wood for the construction of a timber frame house
One of the prejudices of timber frame construction is that sealed timber decays. This is not true, as sealing films are vapour permeable. It is more about choosing the right timber. There are several alternatives:
- Buying dry timber, impregnating and cutting it on the construction site. This seems to be the cheapest option. However, those who understand the specifics of construction are well aware that it is not the timber that is most important, but the preparation and the craftsmen. The damper and less prepared the timber, the harder the work for the builders. Cutting is time-consuming, and once the timber has dried, it starts to change parameters and rotate during the process, which adds even more work. It is rare for wood to completely eradicate fungi, which can lead to decay when exposed to moisture.
- Buy dry and calibrated timber and cut it on site. Purchasing dry and calibrated timber is a good option. However, this is only “timber frame house construction 2.0”. Buying uncut timber leads to different ends, which increases the cost. Also cutting on site increases labour costs. Although it will be lower in the later stages of construction, as such timber has less rotation and minimal changes in parameters. Industrial drying also destroys various fungi and if the timber is additionally impregnated, then you will have a high quality and durable building material.
Dried and graded timber can differ significantly in their characteristics. Conventionally dried and graded timber is marked with grades which indicate the physical characteristics of the wood.
Dry and graded timber stamping. The properties of the marked timber will be fully sufficient for the timber of a frame house.
Minimum requirements for strength grades set out in EN 14081:2007
| EN 1912 Standard | C14 | C16 | C18 | C22 | C24 | C27 | C30 | C35 | C40 |
| Bending resistance (N/mm2) | 14 | 16 | 18 | 22 | 24 | 27 | 30 | 35 | 40 |
| Tensile strength (N/mm2) | 8 | 10 | 11 | 13 | 14 | 16 | 18 | 21 | 24 |
| Resistance to pressure N/mm2 | 16 | 17 | 18 | 20 | 21 | 22 | 23 | 24 | 26 |
| Modulus of elasticity kn/mm2 | 7 | 8 | 9 | 10 | 11 | 12 | 12 | 13 | 14 |
| Density kg/m3 | 200 | 310 | 320 | 340 | 350 | 370 | 380 | 400 | 420 |
- Cut dry and graded timber according to the drawing. In Western European countries, where labour costs are high, it would not be profitable to build a timber-frame house with on-site timber preparation. This is why prefabricated panel houses are popular there, or timber is cut to size immediately. The last method is perhaps the most suitable in Lithuania as well, as the speed of construction is comparable to that of a panel house, and there are more options for ensuring airtightness as well as avoiding thermal bridges. The calculation is simple - is it worth buying sawn timber, how much more will it cost to cut it? Then calculate how much a day's work for the builders costs. On average, it costs the same to cut the timber for a timber-framed house as a day's work for a construction team. However, it saves 4 to 5 days.
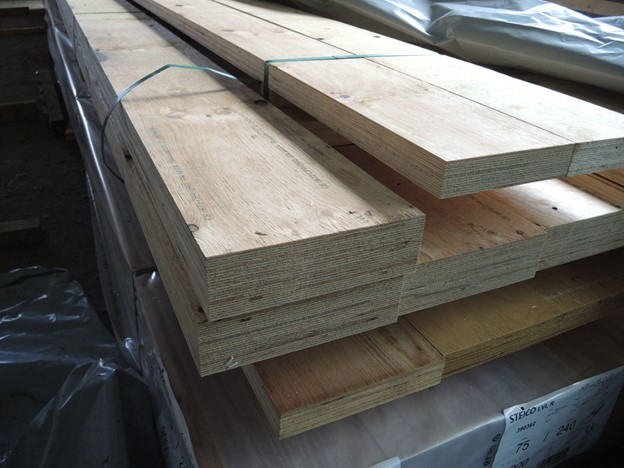
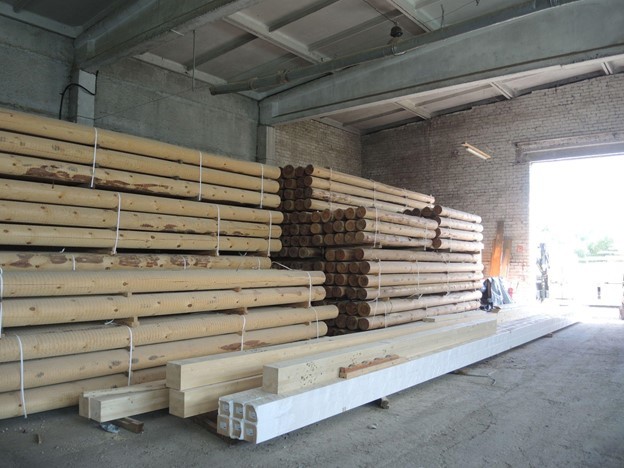
The wood for gradation cutting (usually 50 mm thick lumber of various widths) is dried in a drying oven until it reaches a moisture content of 17-20%. The timber is then trimmed precisely, with the most popular thickness of calibrated timber lumber for a timber-framed house usually being 45 mm. The width is 5 mm less than normal, and the cut widths are 45x95 mm, 45x70 mm, 45x145 mm, 45x195 mm, 45x245 mm.
The finished (calibrated) woodwork pieces go to a CNC factory. There, depending on the modernity of the machine, boards are cut to the exact measurements. The more cutting directions the machine has, the more complex the assemblies that can be cut.
Wood-cutting company sawmill is equipped with a CNC woodworking machine. The existing equipment and the large space allow for cutting non-standard lengths (up to 11 m) of structural timber. The six-directional machine enables the most complex joints to be made.
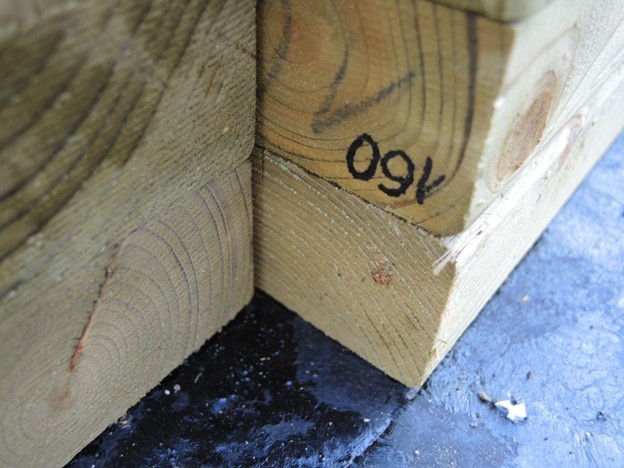
All structural timber is marked at a wood-cutting company and a structural plan of the timber-framed house is included.
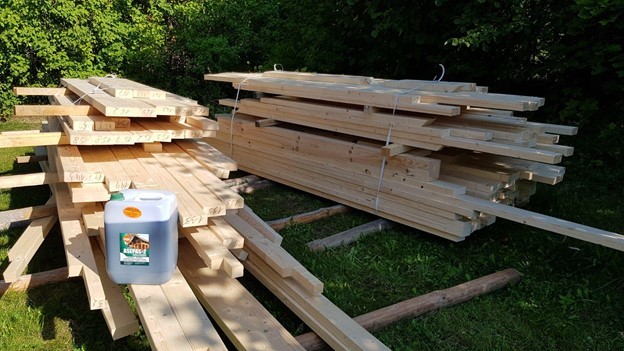
It is worth impregnating the timber, even though drying destroys fungi.
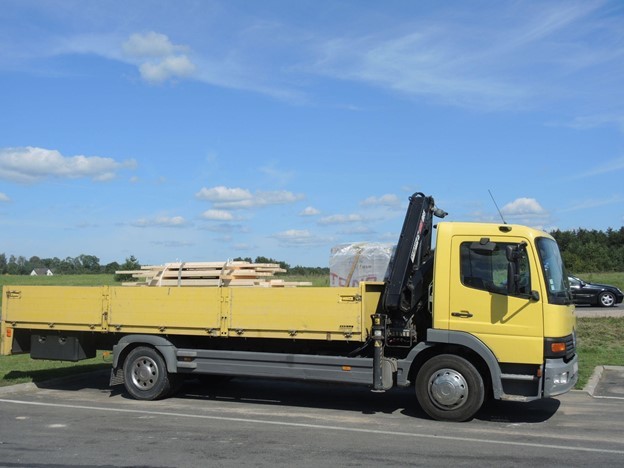
At a wood-cutting company sawmill, the sawn timber is numbered and stacked in piles of about 1 tonne each. A regular crane handler will unload such a bundle. Loading and unloading all the timber takes a few dozen minutes. A kilometre of transport costs around EUR 1 per kilometre, calculated both ways.
Foundation of a timber framed house
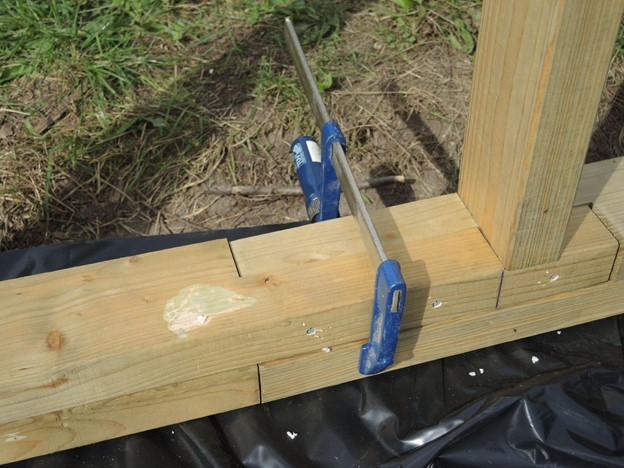
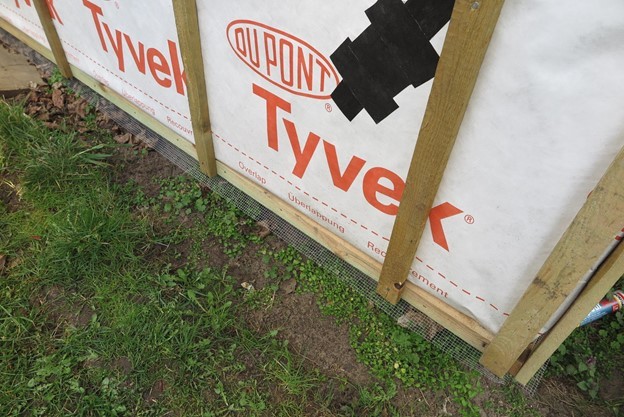
A timber-framed house or sauna is a very lightweight building and does not require a strong foundation. Strip or pile foundations can be prepared. For pile foundations, it is worth installing a concrete raft, although a wooden one is also possible. Ideally, the outer edge of the foundation should be the same as the outer edge of the timber raft of the timber-framed house. The concrete should be separated from the timber by a layer of waterproofing. The waterproofing may be applied or made of strips. Ruberoid or other waterproof materials shall be used for waterproofing. The advantage of strip waterproofing is that it can be installed immediately after laying the framing. However, the disadvantage is that the tape may shift, fray or tear during the installation of the frame. The advantage of applied waterproofing is that it will not move when the wall is ready for installation. The disadvantage is that it has to wait until it dries.
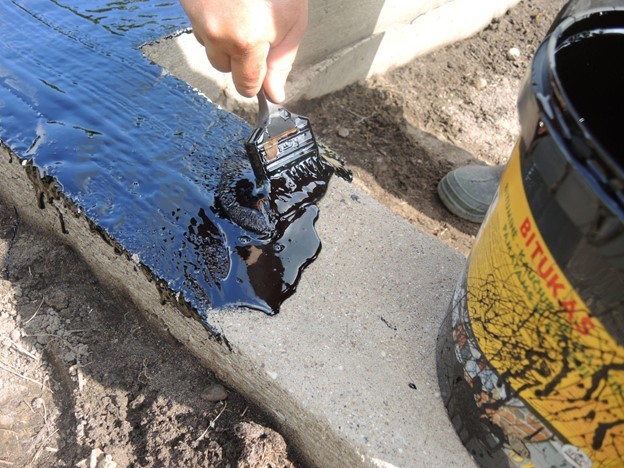
The applied waterproofing should be thinned with solvent. It then becomes tacky, easier to apply and dries quickly. Original mastic is usually difficult to apply and takes a long time to dry. It will be quicker to apply a thicker layer with a slightly diluted (1:10, 2:10) waterproofing mastic. It should be considered that other materials are quite difficult to apply to bituminous mastics. This may cause problems later on when applying the steam insulation mastic with which the raft will be sealed.
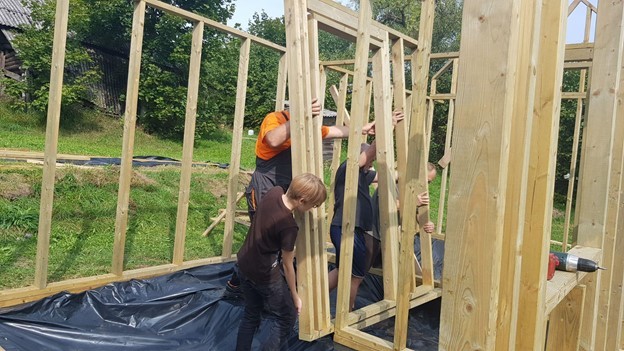
Installation of the frame of a timber-framed house
Installing cut timber is like a child's puzzle. Even an unskilled craftsman will put the structure together accurately and quickly. This saves a lot of money in the construction budget or money spent on better quality fasteners and sealing materials. The builder is provided with a blueprint showing the entire structure with specific tabular calculations. Finding the right table takes the most time. However, once the system is set up, by placing the points in zones, the finding is quickly simplified.
Impregnated timber is divided into zones or types. There are many identical points in the structure. For example, posts, rafters.
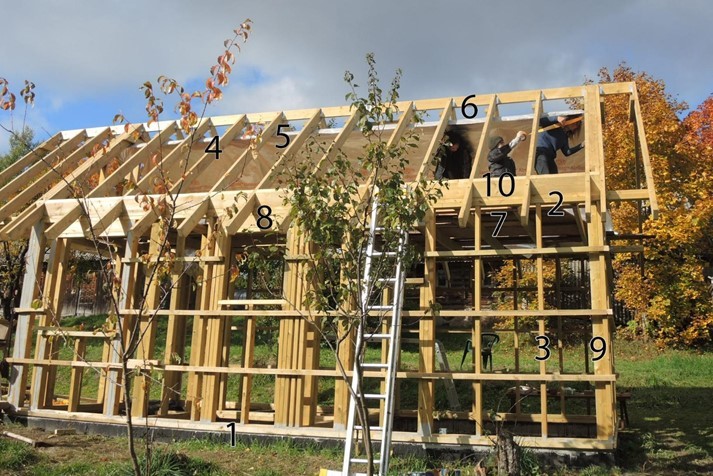
This is how the joints in a timber-framed building look:
- The two-pointed raft. Two 45x95 points are used for this sauna, connected by nails. It is laid on the waterproofing and fixed to the foundation. 45x145mm lumber is commonly used for timber-framed houses.
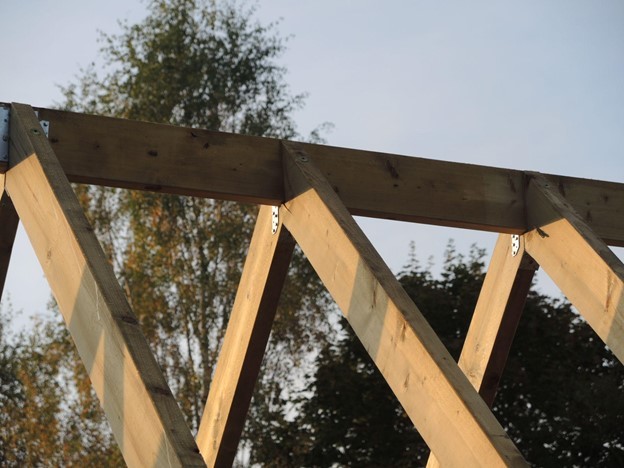
- The beam is also made of two 45x95 timbers (45x145 mm for a frame house). The beam is joined at the corners to support any structure. This is the structure which bears the heaviest loads. It is compressed and expanded by the weight of the roof covering transmitted through the rafters.
- Uprights. The load from above is distributed fairly evenly. Designers should calculate the loads to be borne and the required diameter. For this sauna, 45x95 joists were used. For a residential frame house, 45x145 mm lumber is required. The spacing shall be adjusted according to the width and thickness of the mineral wool used. In order to minimise heat loss through the timber, different types of struts are available. One of the most efficient is the double strut. Instead of a single 150 - 200 mm strut, two 70x70, 70x100 or other struts chosen by the designer shall be used. An air gap is left between them to divide the thermal bridge.
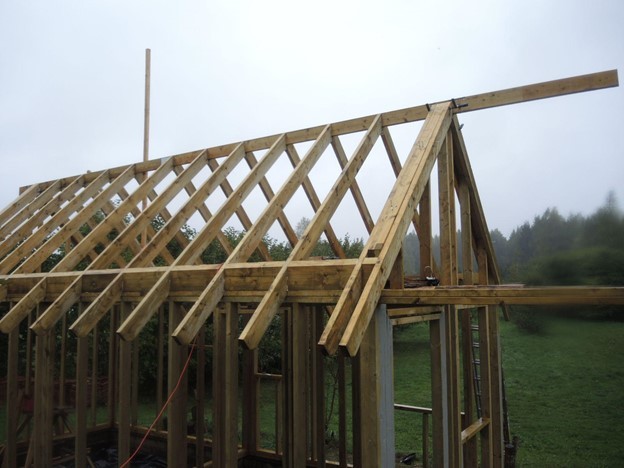
- The rafters are one of the most precise structural elements requiring precise measurements. Templates are used for cutting, but it is rarely possible to achieve perfect accuracy. The rafters cut by a cutting-wood company were of precise measurements. The inter-truss board (10) was particularly useful. It became the ideal reference for the spacing between the rafters.
- The strings take part of the expansion load of the rafters on the purlin.
- The ridge board, which supports the rafters. It also acts as an element to take part in the expansion load.
- The overlapping beams are fixed to, or on top of, the purlin. When fixed to the purlin and to the rafters, they shall be effective in preventing the structure from collapsing. Alternatively, they may be fixed only to the beam, in which case they shall also prevent the structure from rattling. In the latter case, more elements are used to attach the joists to the beam.
- The lintels above the windows and doors are quite an important detail. These prevent vertical loads from compressing the windows and doors.
- Diagonal wall studs between which insulation material is placed. At the same time, they act as an element to resist horizontal (wind) loads. It can replace the diagonal battens used in the construction of a dwelling house. Diagonal diagonals are important if continuous insulation with rigid windproofing stone wool slabs is to be used.
- Very practical inter-leaf boards. When cut, they become a very good size for the rafters. It also facilitates insulation and sealing work.
Sequence of installation of framing elements
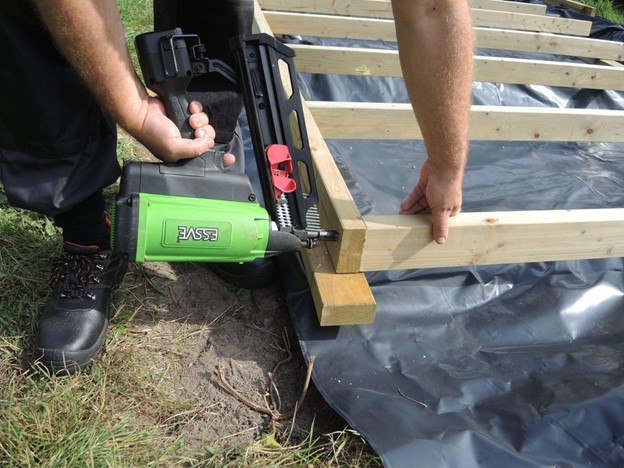
A few knurled nails are sufficient to secure the post. The fastest way to do the job is to use a gas gun.
Check with the designer if a few nails will be sufficient for the timber-framed house you are building, as conditions and loads may vary. Once the uprights have been secured to the upper raft board, the lower beam board is secured. Our sauna wall was long and the lower raft and the upper beam board were not fixed at once. They were fixed by lifting the two wall structures.
The rostrum is initially installed around the entire perimeter and the walls will be placed on top of it one by one. Ideally, the edge of the rostrum should be aligned with the outer edge of the foundation.

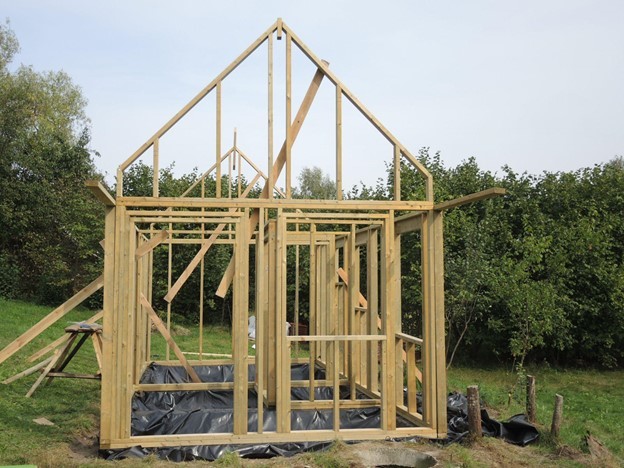
The rear walls are usually fitted with a pediment structure. This construction allows the ridge board on which the rafters are placed to be conveniently attached.
Fix the roof side to the wall with additional diagonals. The nails may not be able to support the weight when lifted. The frame should be levelled at this stage of construction. No matter how accurately the joists are cut, the framing may be tilted. Comparisons shall be made between leaning and nailing. After this step, temporary or permanent diagonals should be screwed in. Diagonal wall joists may also be nailed, which are necessary to support the statics and the insulation material on the outside.
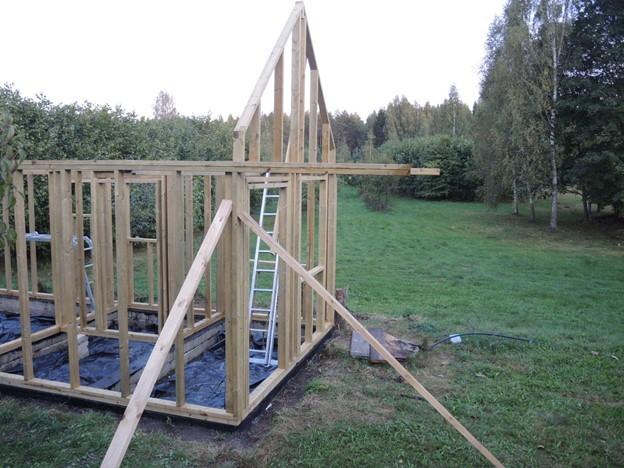
The frame structure has been levelled and reinforced with temporary diagonals. The floor beams are fixed.
The slab beams were temporarily fixed with a few screws. It is difficult to bypass the beams with a vapour barrier film. It is therefore possible to attach part of the vapour barrier film around the perimeter of the fixing before installation, and then to roll the beam brackets to it. We will remove a few screws and apply the film when installing the beams. This is not correct, but at that point we had not yet purchased the film. In the meantime, the joists are needed to make the rafters comfortable.
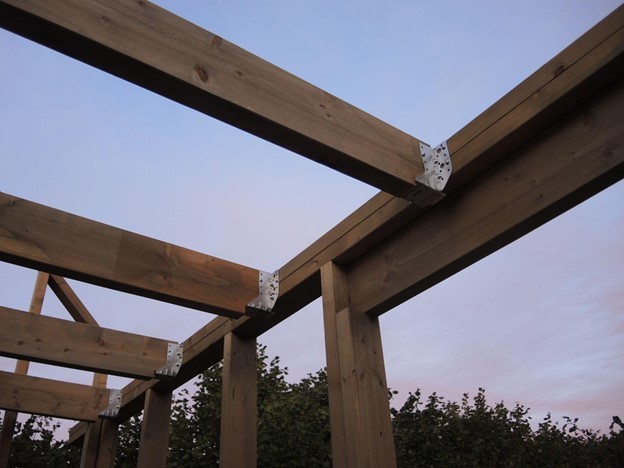
The bracket secures the wooden floor joint to the beam. This assembly not only holds the slab but also prevents the rafters from being subjected to the force of collapse.
In the original version, the joists were placed on the beam and connected to the rafters. This results in a very reliable assembly that prevents the building from collapsing. Now the beam bracket is screwed on with a few screws. I have only recently noticed these Essve beams with a reinforced head, sold by B&B Tools in Savanorių av. 191, Vilnius. You can't use regular wood screws for metal fastening, because it “cuts” them. These screws are special, made to the standard 4 mm hole diameter of the fastener. I would recommend contacting the designer for all fixings. He or she has experience of typical assemblies with calculations of the elements. This will cost very little compared to even minor problems caused by insufficient reinforcement.

The ridge board was cut in the factory because it would have been difficult to fit during transport. It had to be reassembled.
The same was done for the beam and rostrum boards. The joints are double-jointed, additionally glued with Soudal Purocol glue and reinforced with a metal plate on both sides. We were not worried about thermal bridging, as there will be a very thick layer of insulation material underneath. The ridge board is additionally supported in the middle because it has buckled under its own weight.
The ridge anchorage is perhaps the best place to justify the construction of a cut house. Once again, we thank the firm of the wood-cutting company.
The installation of the trusses is a very time-consuming job. The top has to be precisely aligned with the bottom. Meanwhile, the rafters cut with a computer machine could be assembled like a child's puzzle. The distance between the rafters was controlled by a rafter board. The board had to fit into a special groove that had already been milled. The position of the joint between the beam and the rafters was regulated to within fractions of a millimetre by a notch. On the top, all the cuts were also aligned with the ridge board. The boards, which have been impregnated and have been exposed to a little moisture, have become a little loose. Wood is wood. But a few clamps have put everything back in place. The ridges were fixed with a special long Essve wood screw with a stiffened and enlarged head. The guide holes were already made in the factory. The rafters were additionally reinforced with rafter brackets at the top and bottom. Externally with left and right rafter brackets, internally with a universal rafter fixing element. The rafter board also takes part in the loads. It is glued on one side with the proven Soudal Purocol glue. The glued area is not peeled off at the gluing point, but the timber is peeled off at the gluing point. It is also nailed or screwed with a reinforced head. This is another special Essve product that resists "shearing". It is best to show the design of the fixing assemblies to the B&B Tools managers and they will select the most suitable ones. Don't spare money on fasteners, wood, quality sealing materials. Quality materials save labour costs, which are now the most expensive part of construction.
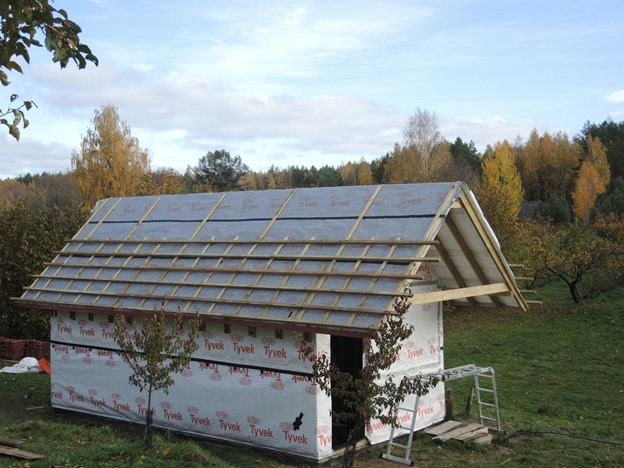
I assembled the main structure of the wooden frame sauna in 32 hours.
I have no experience, I was assisted by a 13-year-old child and a woman. Neighbours helped a little more with the walls. With skills, the job would have been done way faster. The ridges were millimetre by millimetre. Once the temporary slats had been removed, the frame had to be flattened again a little before the outer slats could be nailed.
The strings, which take part of the load on the rafters, were also cut by a wood-cutting company.
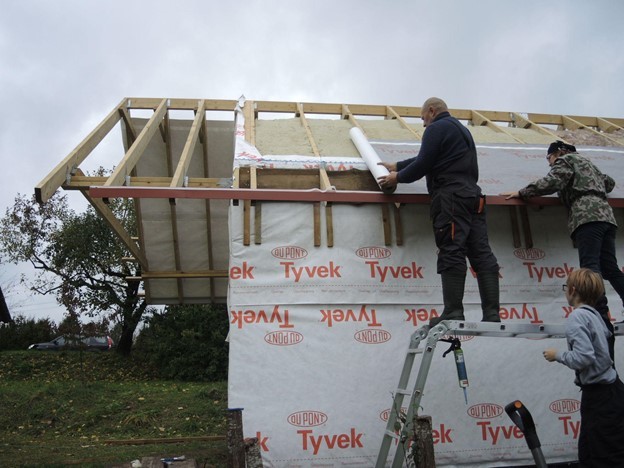
The strings are secured with a large nail and two Essve gussets to resist “shearing”. We immediately decided to insulate the roof with stone wool on the outside. Working from the bottom is more complicated and difficult in rainy weather. However, even with frequent rain, we managed to put the insulation material down without getting it wet.
Windows or doors in the wall against which the rafters are supported must be able to withstand high loads. If the effect of the load is not neutralised, the door or window sash will be difficult to open.
A lintel shall be installed above the openings by placing a board horizontally on the edge. Although the thermal insulation is significantly reduced at this point, the pressure resistance is increased several times. The sauna was designed with a tiled roof, which, when combined with snow, can create very high loads, especially at the rafter and beam junction. Additional rafter brackets purchased from B&B Tools were used, which are universal rafter brackets that can be attached from the inside.
Protecting elm trees from mice is one of the most time-consuming tasks.
As far as I can see, the nesting node is often ignored. Roofers leave it to the facade installers, wall installers say the roofers should do it. In the end, there are holes which reduce the airtightness. The film should be cut to create triangles at the bottom and top. The overlapping wings shall be applied with adhesive. I used Soudal Vapourseal glue. Top and bottom holes that are particularly difficult to patch are applied with mastic. I really liked Soudatight Hybrid, it adheres very well to many surfaces, even to bitumen.
The next step is to nail the points to the rafters while clamping the wings of the wind insulation film with glue.
A finishing board is nailed in place and the finish will be made of single-cut boards. Later, when the roof is closed, it will be quite difficult to nail the boards in place. It is also necessary to put on protection against mice. The top is in place because the area is full of yellow-footed mice, which know how to climb, and if there is a hole in the top it will be used. House mice and voles do not climb through the top. The foil is finally fixed with staples when the first layer of insulation material is laid. Several layers shall be applied, overlapping the seams. The bottom shall be cut at an angle.
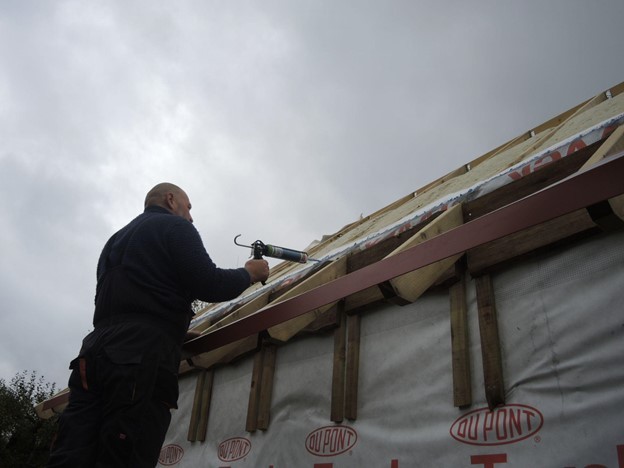
A batten is applied to which the roofing film will be glued with double-sided butyl tape. The film is unrolled and secured with staples every few rafters.
The joint between the wall and the roofing film shall also be coated with Soudal Vapourseal glue. This will ensure an ideal seal. The glue can also be used for perimeter joints between roof and wall film.
The roof sheets are connected at the bottom.
If a sheet is used without an adhesive layer, it is a useful option to use glue or double-sided adhesive tape. Some people think that there is no need for splicing at all, but it is worth noting the pressure on the backside of the house when strong winds blow. The air pulled from the insulation layer leaves it with the heat. Ideal air tightness is unlikely to be reached on the inside. Consequently, the air loss through those holes will increase again with the same heat. Top sealing is already a redundant solution. If an inferior sheet is used, it will become partially unglued quite quickly and dirt together with moisture will accumulate inside, resulting in a cavity. I used Vapourseal adhesive on the inside of the sheeting and field tape on the outside. The holes for the staples have also been sealed.
The next step is to attach the short lengthwise rafters and a few transverse rafters for easy access to the ridge. A third sheet will be started on the other side and its edge will be thrown over the ridge.
- Lerochem
- 2025-02-28 15:47:51