Dry floor installation requires less materials. A perfectly smooth surface is made that is suitable for any floor cover. Specific load-resistant plasterboards are usually used for dry floor installation. It is a quite simple technology, which allows you to install a quality floor on your own.
Main floor types
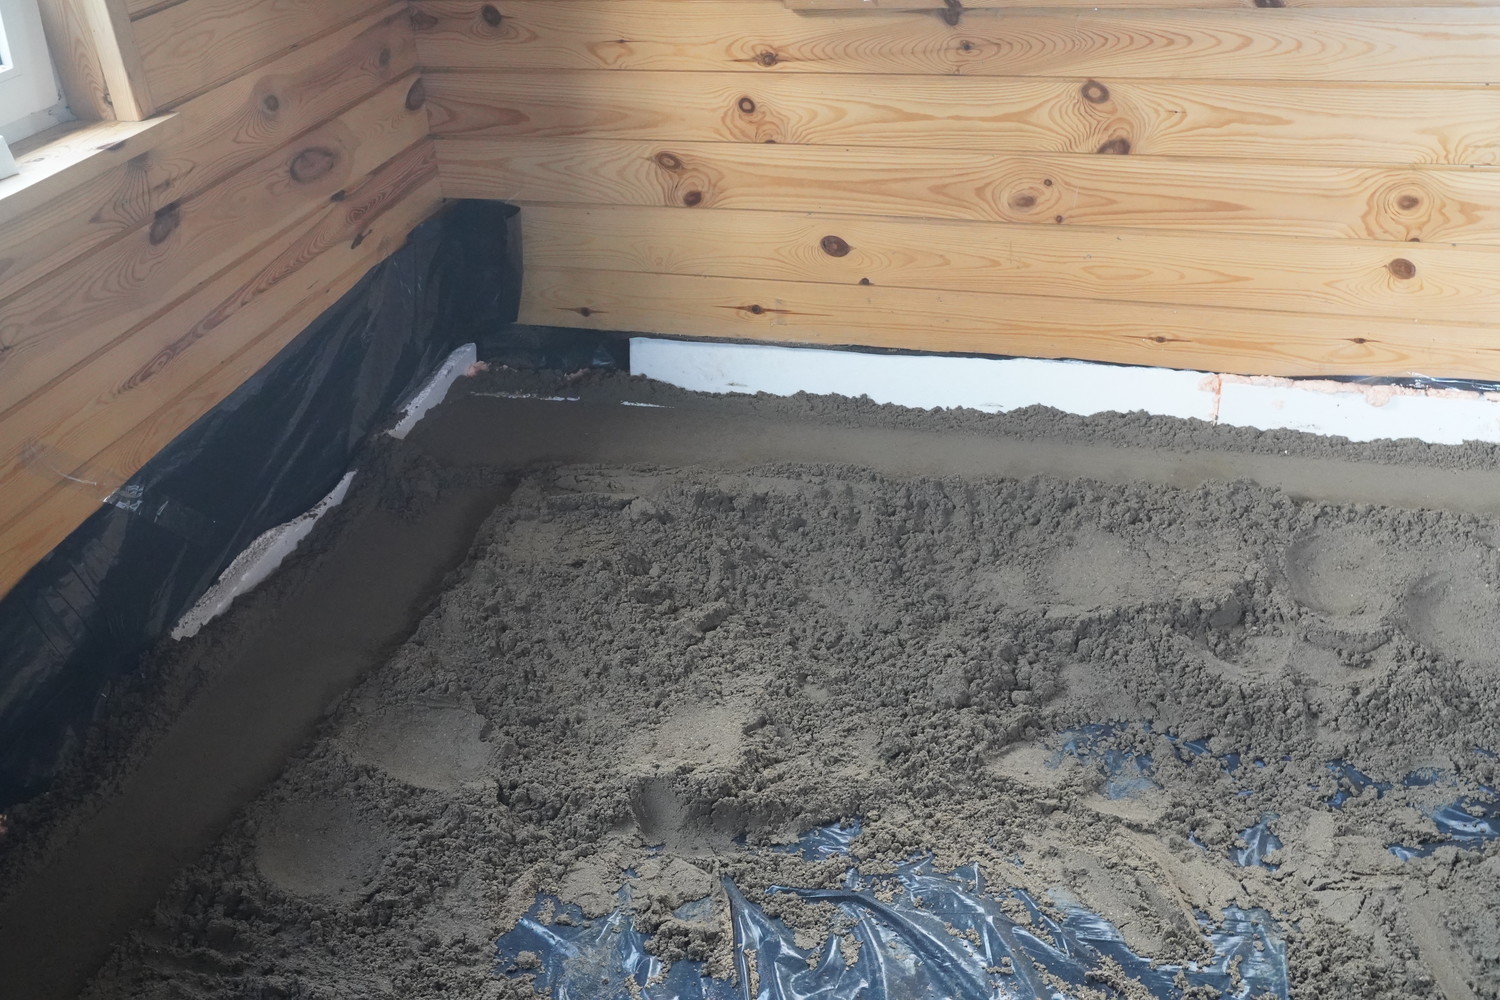
Dry floor can be installed on any type of base, the mounting schemes are similar. In a new low-rise building the floor is usually installed on the soil. A quite similar option is when the floor is put on an overlay under which is a cold premise. Such floor needs to be insulated additionally. In such a ‘sandwich’ it is important to protect the insulating materials and the plasterboard layer from humidity getting in. On the bottom, a vapour barrier membrane is fixated.
On the second floor in apartments, the overlays are usually put in between heated premises. Insulation is not required, even though an insulating layer helps protect from heat loss through the connection between the overlay and the walls. It serves as additional sound insulation, as well.
The floor construction differs between heated and non-heated premises. For episodically heated premises, it is important that the floor doesn’t accumulate cold. Heat accumulation isn’t required, either.
Floor smoothing
Most floors require ideal evenness. The top layer is usually evened by concreting. It is not an expensive option, however, concrete needs to dry out and it can take from 4 to 8 weeks. Additional concrete tonnage is also not very welcome in an apartment building’s ceiling and constructions. Another option is to even the floor under the insulating layer. If the floor is on soil, the soil may be evened. Vapour insulation is often laid on a thickened and evened soil. Then, gravel is poured on the membrane, after that, it is thickened and evened.
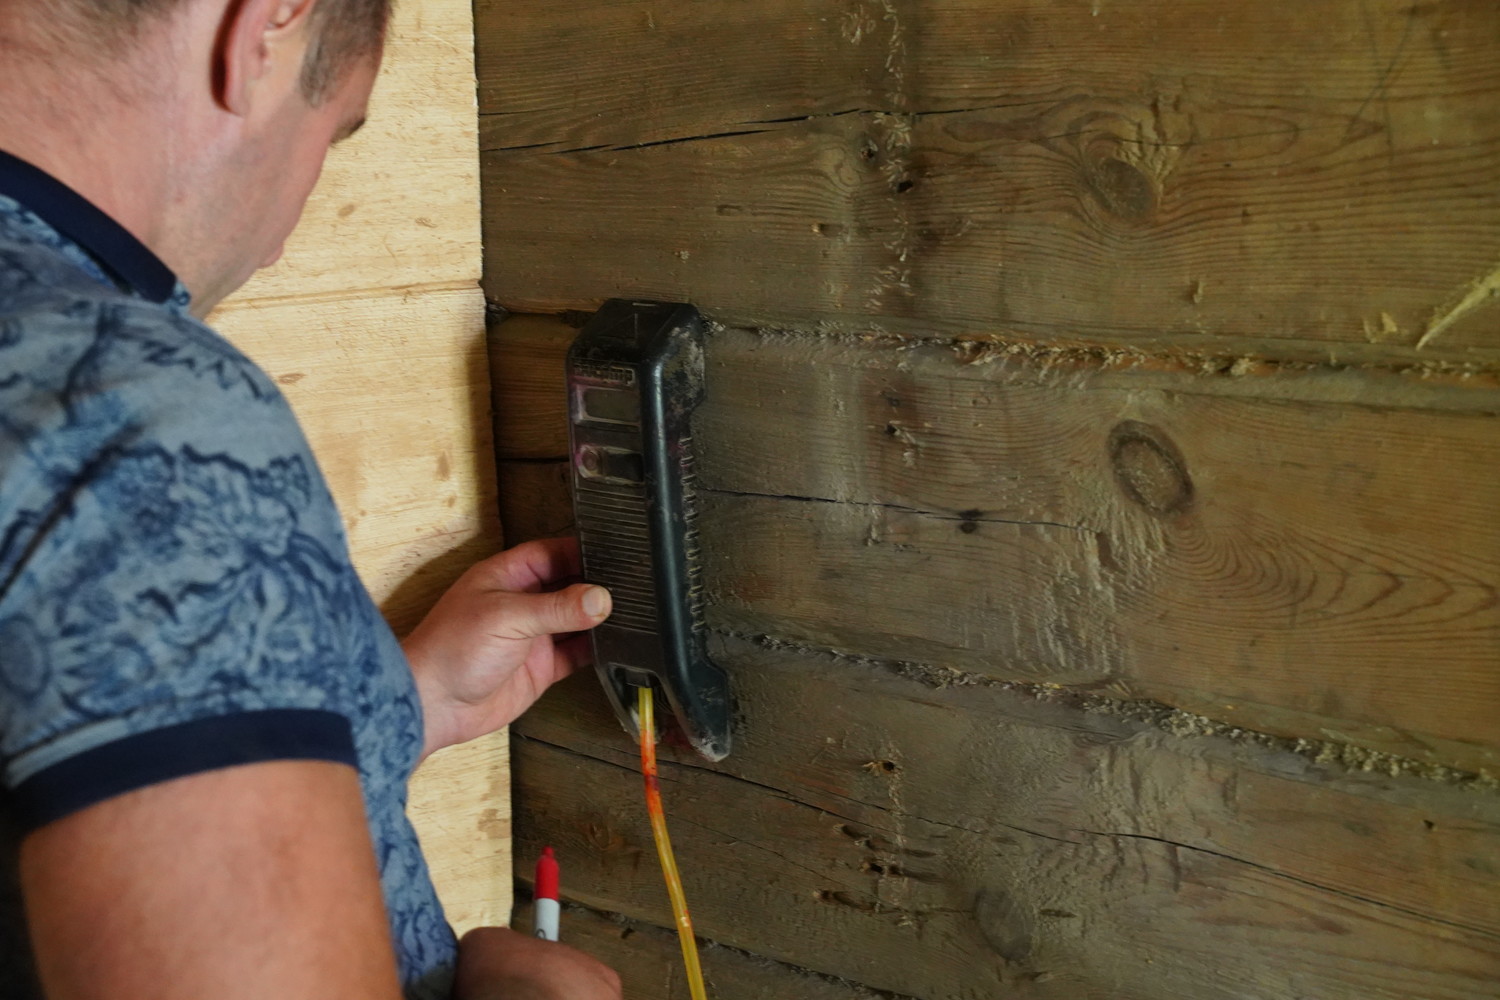
Floor base evenness is determined in a few ways. A popular way is using an electronic water level. By using it, you can mark the highest points of the layer in multiple locations of the room. A laser level can also be used.
Leveling the floor on the soil is a difficult job, especially if the area is large. Thus, if you have the time, it is quite acceptable to concrete the base. The cheapest material for concreting is concrete sand.
Leveling the base by concreting. The price isn’t high, the concrete can dry, as a lot of other interior installation jobs await. When the time comes to lay the floor, it will be enough to just sweep, take off the plaster or paint if it stuck somewhere, and lay the extruded polystyrene.
If the elevations and the roughness are not large, the top of the overlays are evened with self-leveling solutions. If the unevenness is bigger, expanded clay aggregate is used instead. A 2-4 mm fraction is best, with a humidity of no more than 1 percent.
Floor insulation
When installing the floor above a non-heated basis, insulation is a must. The most convenient material for floor insulation is extruded polystyrene. It is compression-resistant, long-lasting, doesn’t absorb water, doesn’t change its parameters. The thickness of the insulating layer depends on the energy effectiveness parameters of the house. When installing the floor on soil in an A or higher class house, a 25-40 cm extruded polystyrene layer is laid. If it is a newly-constructed building, the exact floor insulating layer should be described in the technical project of the house.
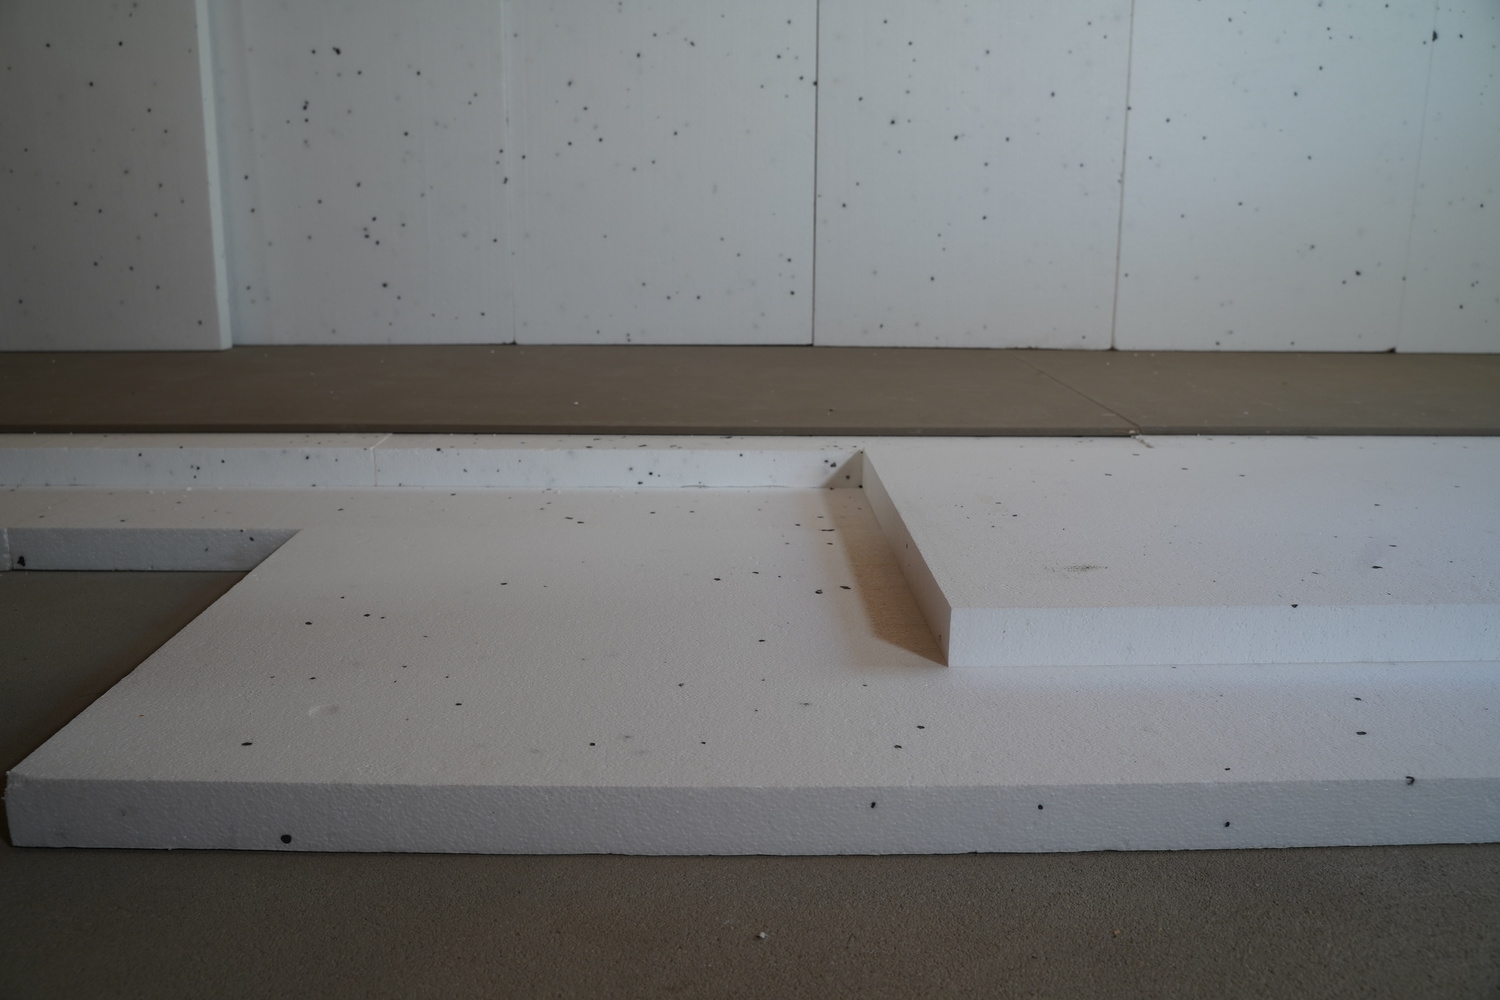
When laying the extruded polystyrene, it is important to make sure the seams of the boards do not overlap. This way, you can avoid having heat bridges.
A more compression-resistant extruded polystyrene is used for the floor. The compression resistance is defined by kPa (kilopascals). 1 kilopascal - 1 kg for one square centimeter with a deformation of no more than 10 percent. This parameter is defined on the extruded polystyrene marking: for example, EPS 100 means that the extruded polystyrene is resistant to a compression of 100 kPa (10 000 kg/m2). EPS 100 is most often used for the floor, at least for the top layer. Such extruded polystyrene should be more than enough for residential premises.
Water supply, sewerage, electricity, and other engineering communications are usually installed through the insulating layer. When renovating a multiple-floor building, ventilation air ducts can also be installed into the lower premises.
Plasterboard laying
Before laying the boards, you need to protect them from humidity. If soil or non-heated premises are below, they should be separated from the base construction with a vapour barrier membrane. For this purpose, a stabilised 200-micron polyethylene membrane. If the boards are laid on a wooden construction, they are separated with a vapour-permeable membrane. The membrane edges need to be overlapped for at least 15 cm. On the edges of the premises, the membrane needs to be folded so that it reaches the upper edge of the floor cover.
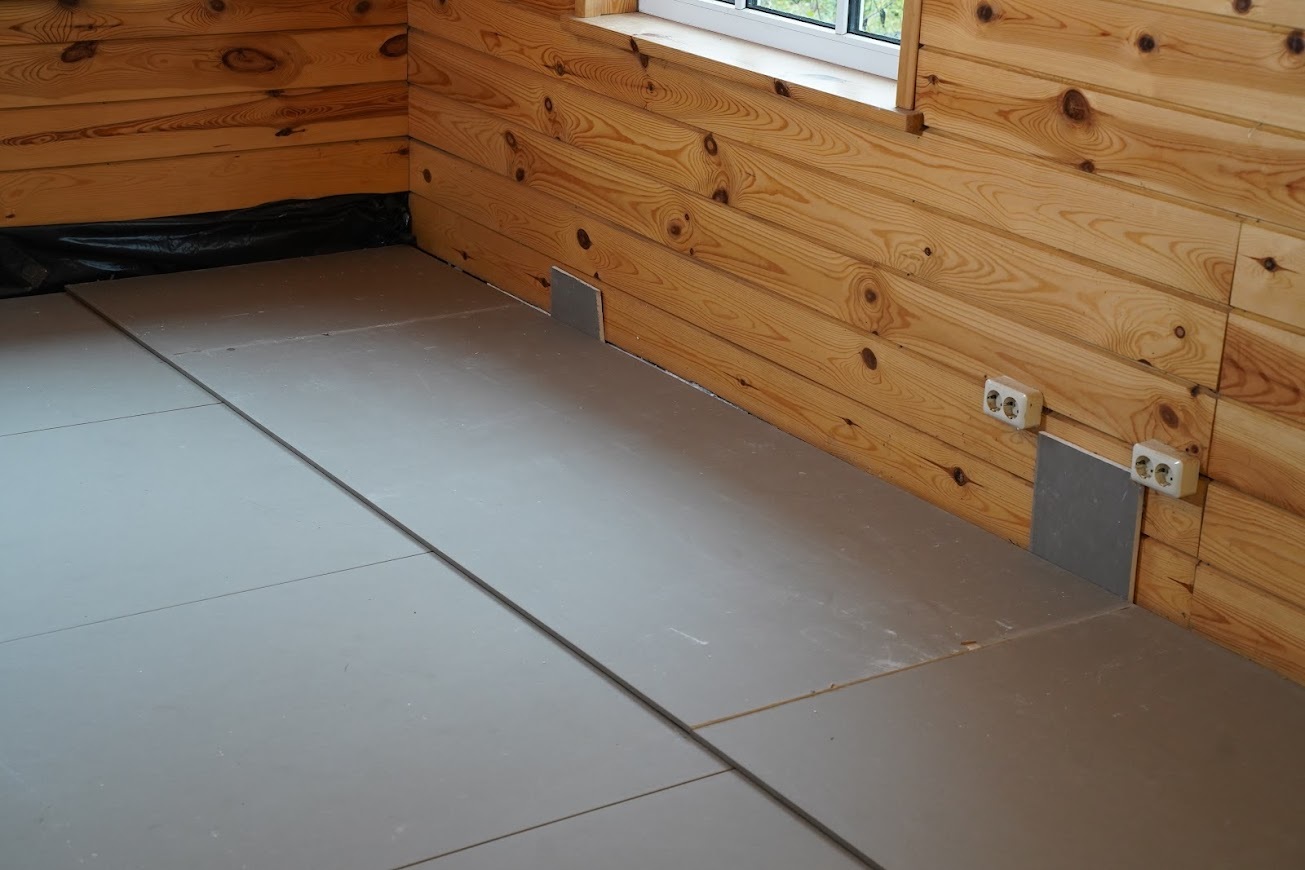
The first layer of the gypsum plasterboards is laid so that the layers have an overlap of at least 40 cm between the connections. You do not need to glue the boards together or putty the empty spaces.
I use a double gypsum plasterboard layer so that a reliable 24 mm thick floor can form. You need to stick the plasterboard layers together. The second layer needs to be laid so that the lower and upper layer junctions don’t align. The second layer boards are laid across. There are a few different ways to glue the boards.
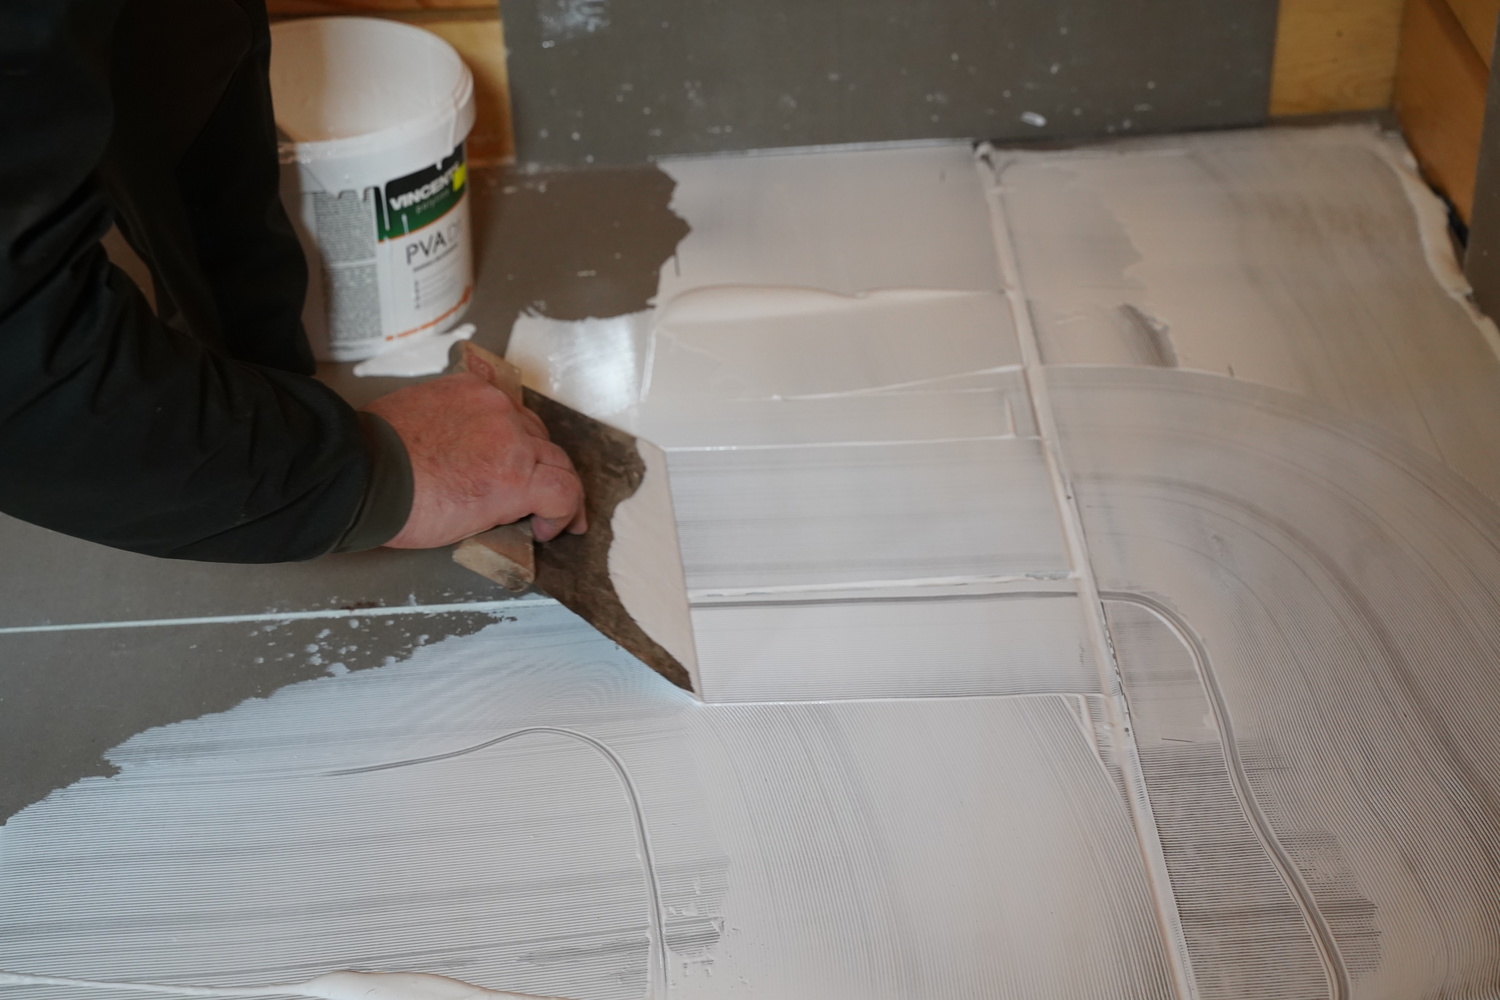
The edges of the plasterboard are marked, PVA glue is spread. The glue can be painted with a brush, a roller, or a palette knife. It is best to paint the area of a single board so that it is easier to access, especially when beginning the row.

The work can be finished a lot faster if spray glue is used. The glue needs to cover roughly 40 percent of the surface area (if you spray as shown above, the result should be achieved).
Before spraying the glue, the surface of the boards needs to be humidified a little so that the glue foam can stick better. After spraying, you need to wait for a couple of minutes until the surface is even and a very thin membrane forms. Then, you should lay the board on the floor and walk on it. You may put some kind of weight on it.
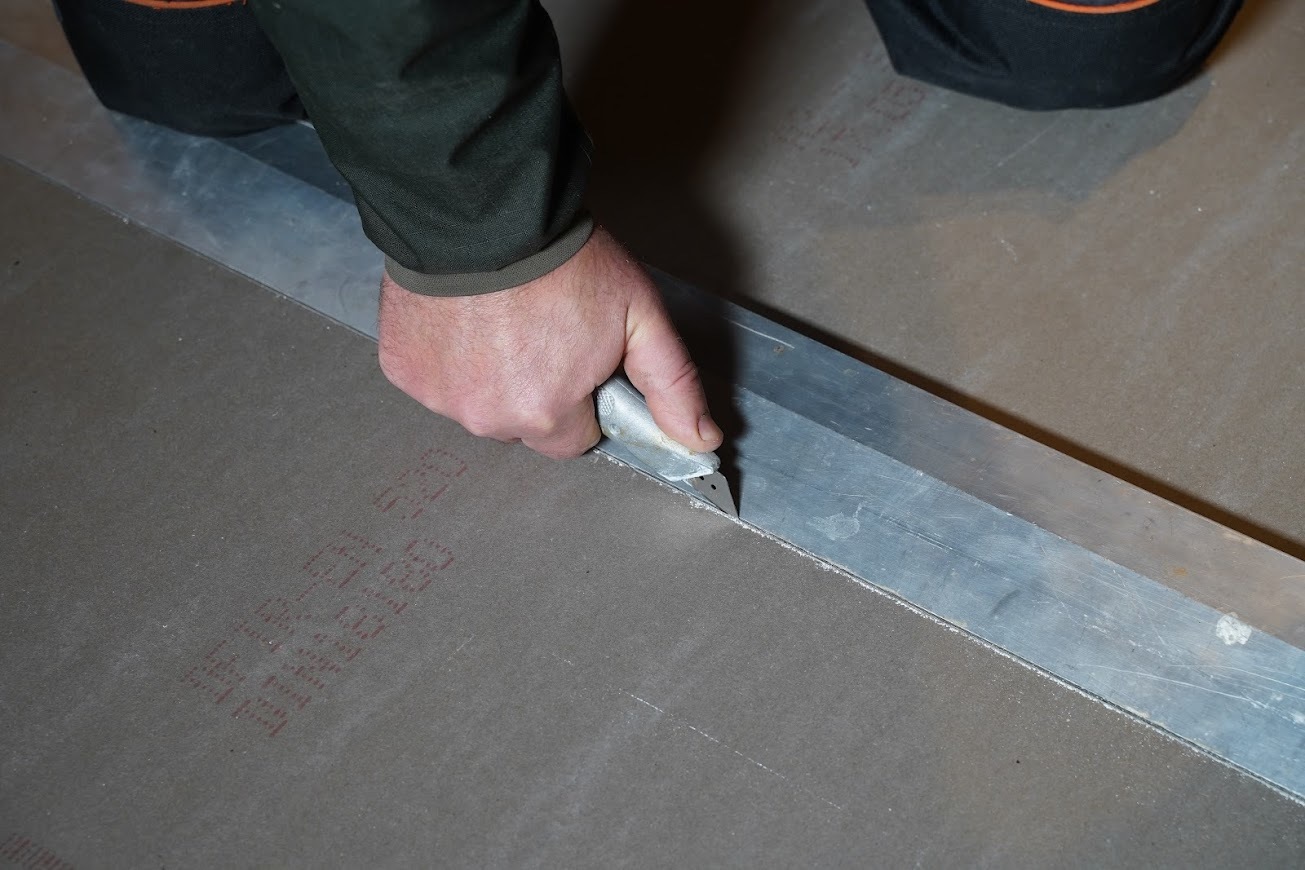
With a gypsum cutting knife with a changeable edge, a breaking line is cut. The part that is being cut is put on a platform and is broken off. One more incision from the other side - and the piece is ready.
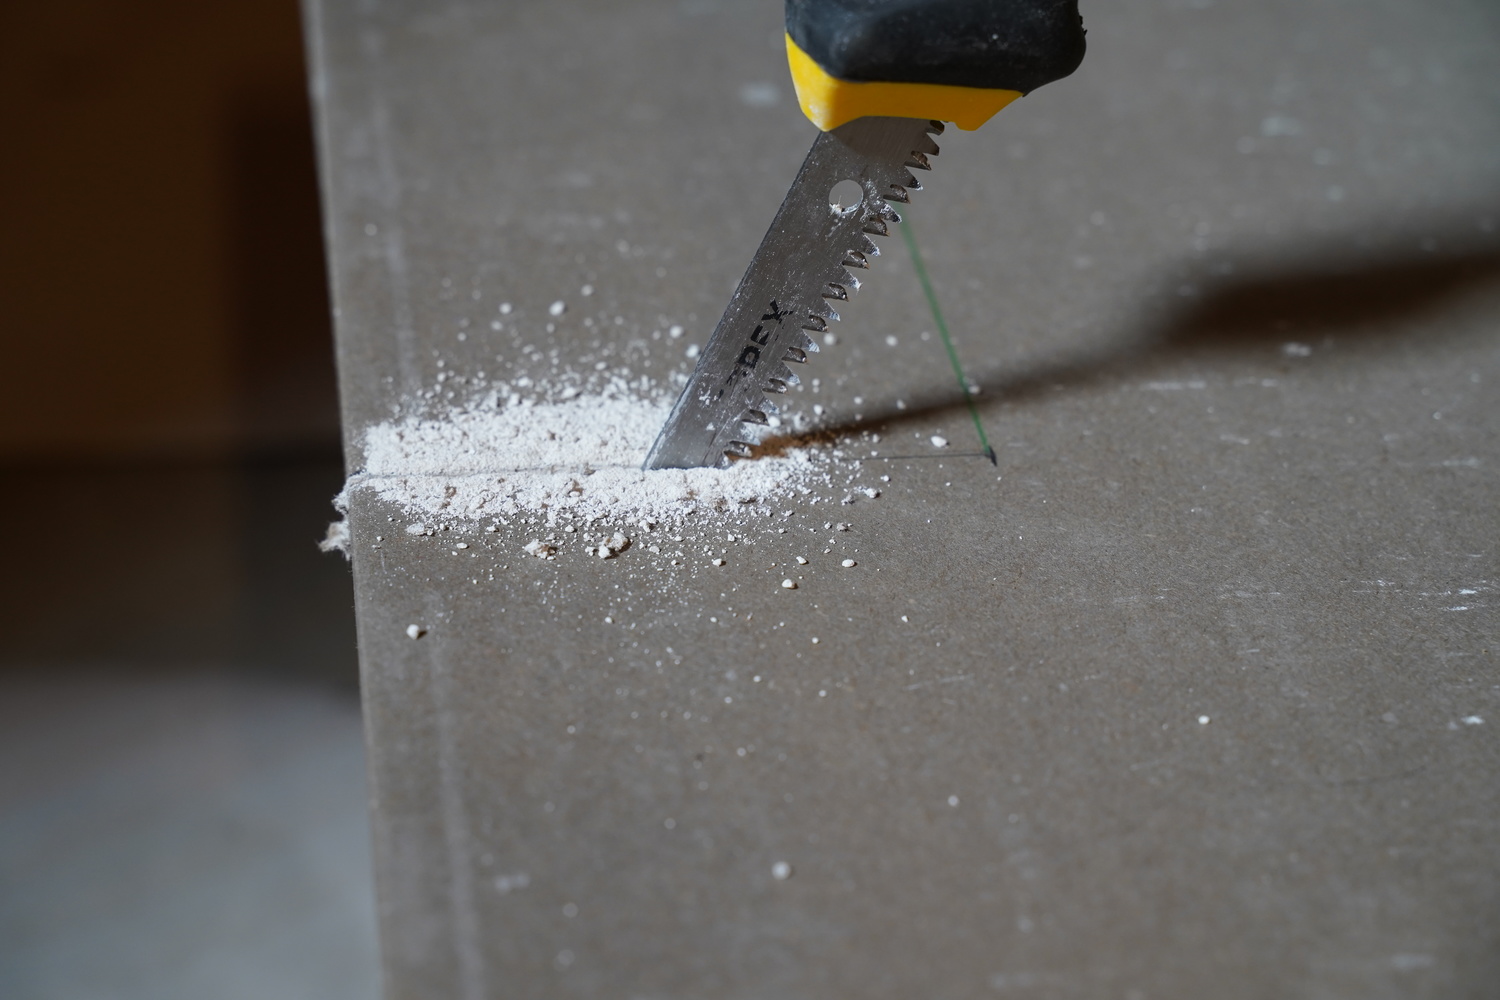
A gypsum cutting knife is used for cutting the corners.
When cutting gypsum plasterboards, lay a membrane below or have a dustpan ready. This way, you can always have a clean workspace. Gypsum dust isn't easy to clean - if you step on them, the whole area is going to be covered with footprints.
So that is how you can easily prepare a thick floor on which you can install every type of floor cover and heating.
Installing a heated floor
In a modern house or even when renovating an apartment it is worth it to install floor heating. You can install three types of floor heating. Those are electrical membrane heating under a floating floor, heating mats inserted into the glue, and hydronic floor heating in special gutters.
If the building is class A or higher (its heating efficiency is very high), electrical heating should suit it very well despite the higher cost of electricity. It is a better option than hydronic heating because of its ease of installation and low cost.
A dry floor is a good option for energy-efficient, smart houses. Because of the inertness of the system the heat doesn’t accumulate, it is quickly released into the environment, the system promptly reacts to regulation. Extruded polystyrene thermal insulation reliably protects from heat loss. Gypsum plasterboards are quickly and easily installed. Hydronic heating is an option, too.
Electrical mat heating is a good option for class B or higher buildings.
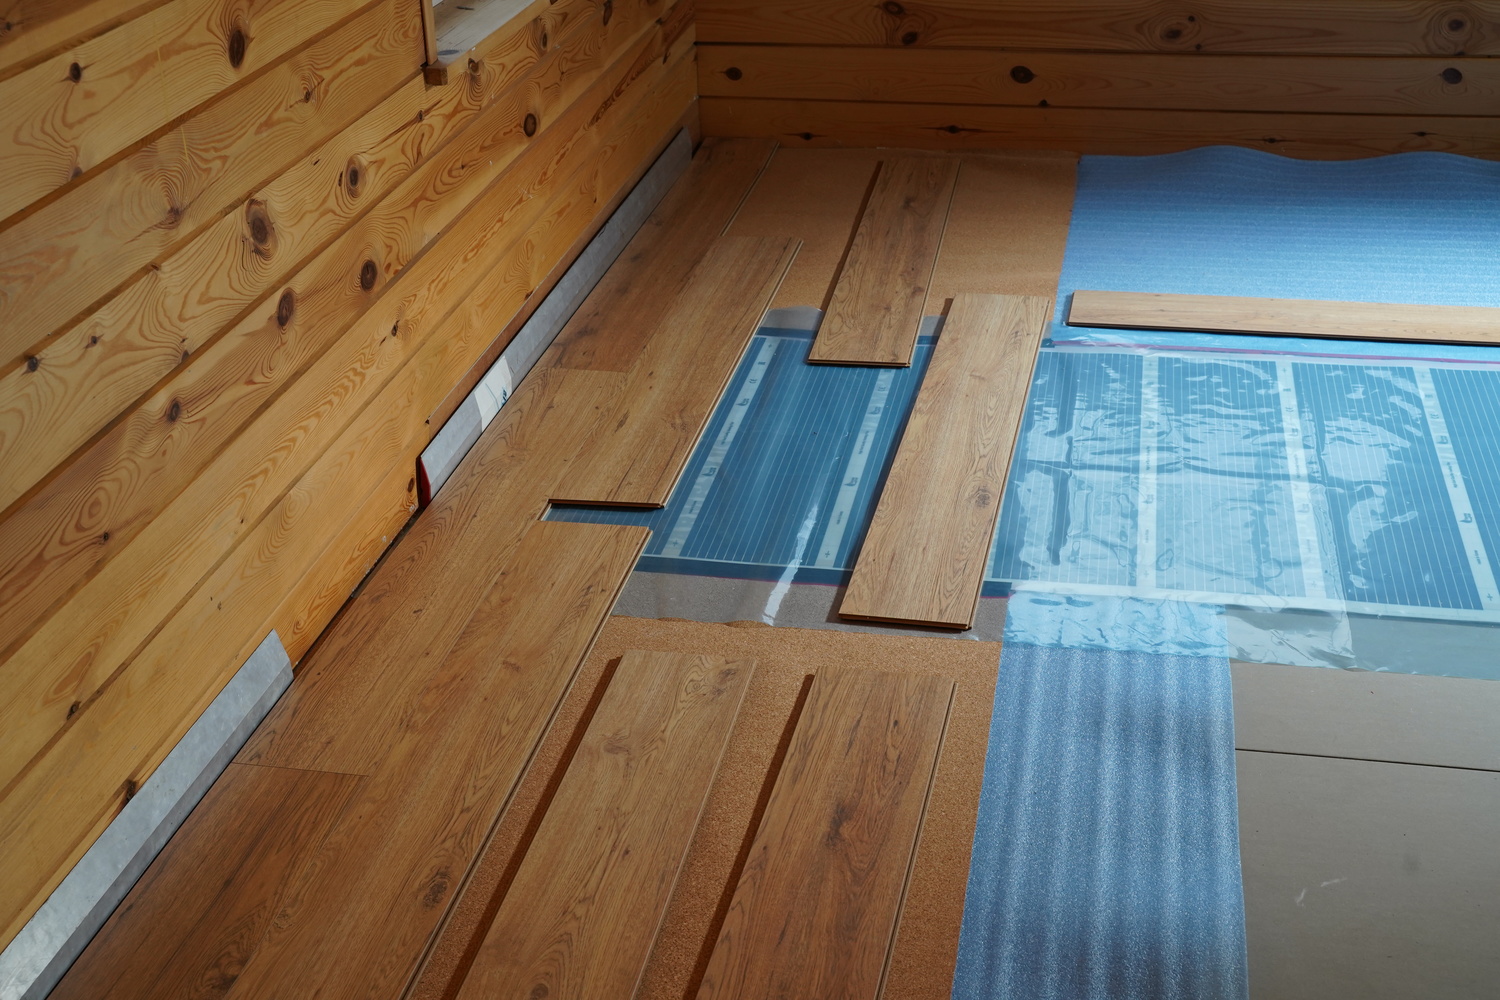
When installing the mats, a diffuser film is first laid on the gypsum plasterboard, and above it - an infrared heating membrane. It is protected from mechanical damage with a PVC membrane and then the laminate is laid. In this situation, special electrical heating film can be used.
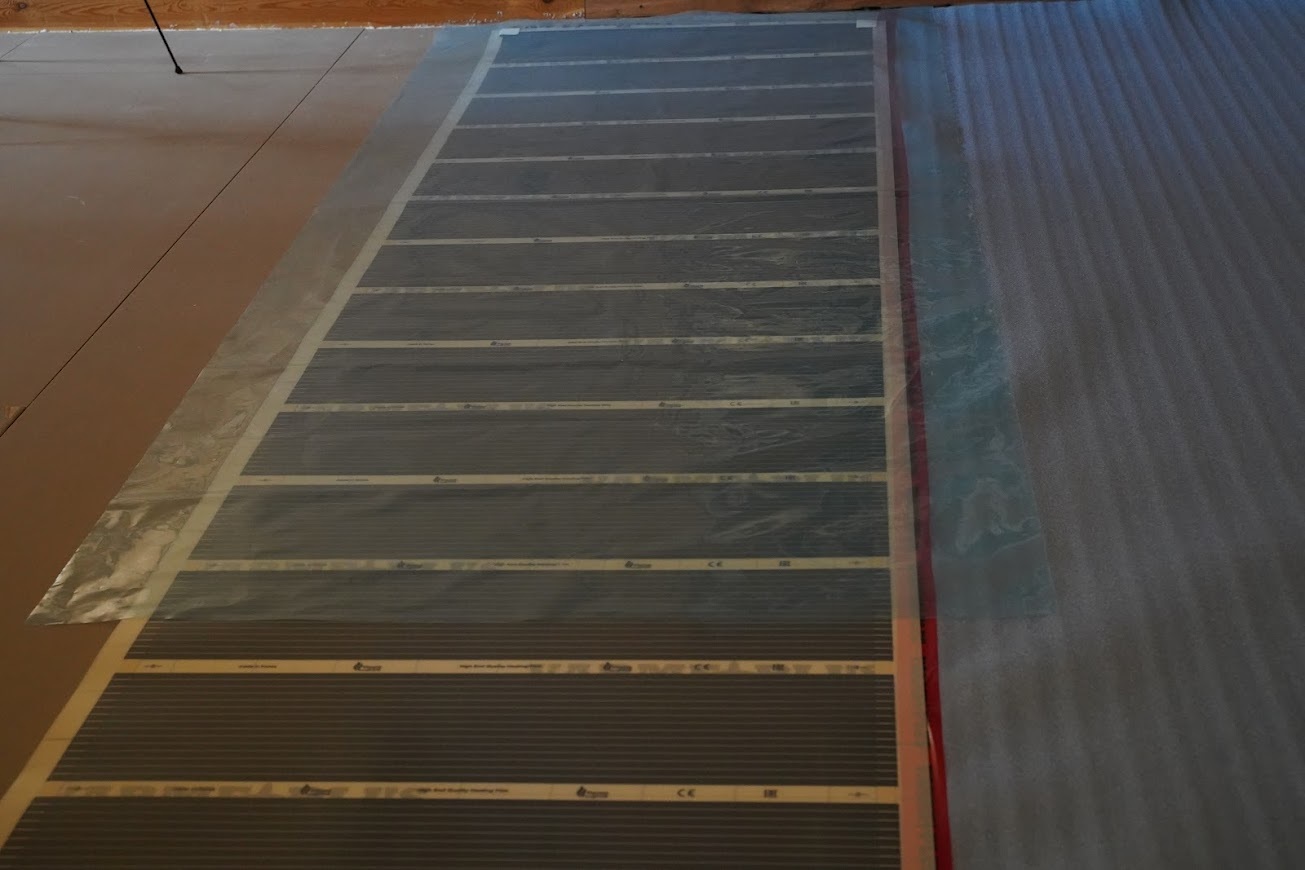
Gypsum cover works perfectly for an infrared heated floor.
If you plan to lay tiles, electrical or infrared mats are used. They are inserted into tile glue.
Using a vinyl cover is a little trickier. It replicates the unevenness of the surface and it cannot be glued on soft surfaces. Thus, a gypsum plasterboard construction of two glued layers is installed above the infrared film.
If the floor is on logs, gypsum plasterboards might make the installation cheaper. The thick floor is usually made from thick OSB or MFP boards.
It is a pleasure to lay laminate on an ideally even gypsum plasterboard surface.
Photos by Sergejus Jeriomenko
- griovikai
- 2024-02-15 14:20:25
