The most suitable location for sauna building is the one that is close to water sources such as rivers, lakes, ponds, founts or wells so that you would not need to take the water from a long distance. It is also important that the dirty water inclination would be proper and carefully considered. However, the water used in sauna should not get to water sources or contaminate those.
Ancient reeky village saunas used to be built beyond the granges to avoid the risks of fire. When the sauna has a chimney, the fire fear is being overestimated. Though, the sauna heater stove is heated at high temperature, that‘s way the fire can happen sooner than in other preheated areas due to bad level of supervision. For this reason, it is recommended to locate the sauna distant from other buildings, normally the sauna and other buildings are located at a distance of 12 m.
It is adviced to place a sauna downwing of most current wind, for example in the east part of the grange. It is not recommended to build a sauna in a very much open area or near the road, if there is no such availabity, plant some trees and bushes - this way you will suceed to create a cozier and more intimate space for recreation. Each of us enjoys to cool down in a fresh air after heating up - to have rest on warm summer evenings, freshen up, or cool down in snow during winter time.
The sauna can be also built in the vila itself, garden house, residential house. Specialist advice to build a sauna on the north side of the house for economic reasons.
Optimal size of sauna
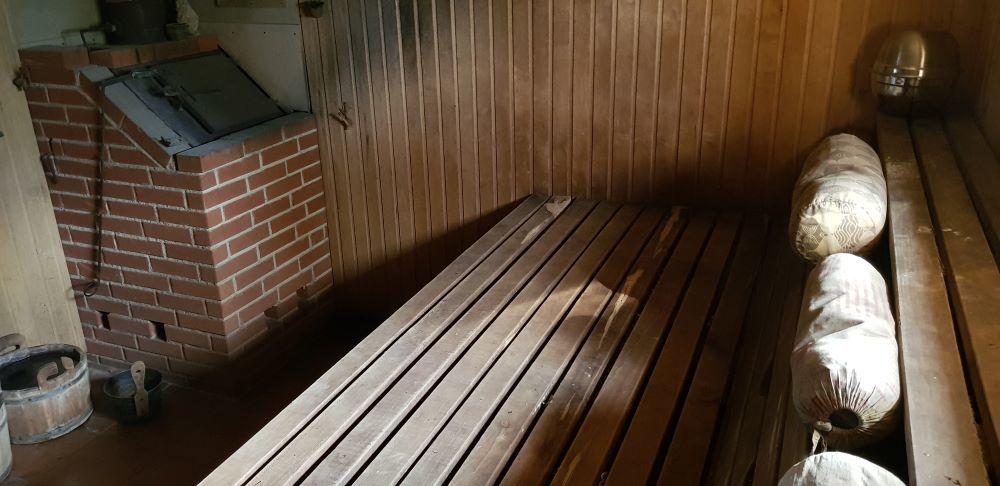
The simplest sauna is built from two areas - pre-sauna and the sauna itself. The pre-sauna is used for the changing, therefore, it should contain enough benches to have a seat and to hang the clothes - most often they are being hung on the hooks made in walls. The pre-sauna area should be heated to make sure you don't get a cold whilst changing. The pre-sauna area is warm when the stove of the sauna is placed in a way that the corner of the stove goes to it.
Profesional sauna for 10 people.
The size of a sauna can be measured as follows: the space or the ground area that one person requires in sauna is no smaller than 1 square meter. This means that, if the sauna should be able to fill 4 people at a time, the required area of the sauna is no less than 4 sq meters. What is more, the sauna should also contain a stove and barrels or tubs of warm and cold water. All of this can take from 3 to 4 sq meters. Thus, the sauna of one family should be no smaller than 7-8 square meters. The pre-sauna area required should be also added.
If you are thinking of larger saunas which contain three or more areas, you should carefully consider what will be the flow of people in the sauna so that people in the sauna, after one and resting ones would not go in the way of each other. The rest room should be more for the rest and cooling down, not the large regales.
The sauna inside should be no lower than 2-2,25 meters as the ceiling of the lower area makes difficulties for the trimming with shrouds, wehereas the hot fumes make the heads of people too hot. The sauna which is too heigh is also not recommended as a heigh sauna can be hardly heated up. Before building a sauna, you should also find if there is no restriction on the size of a sauna according to the rules of your country.
The specialists say, that the size of the sauna and the project should reflect on the individual needs of the owner, therefore, it is not worth discussing the question of the best project. The cheapest sauna will always have four walls. The extra corners or more sophisticated shape will require extra expenses.
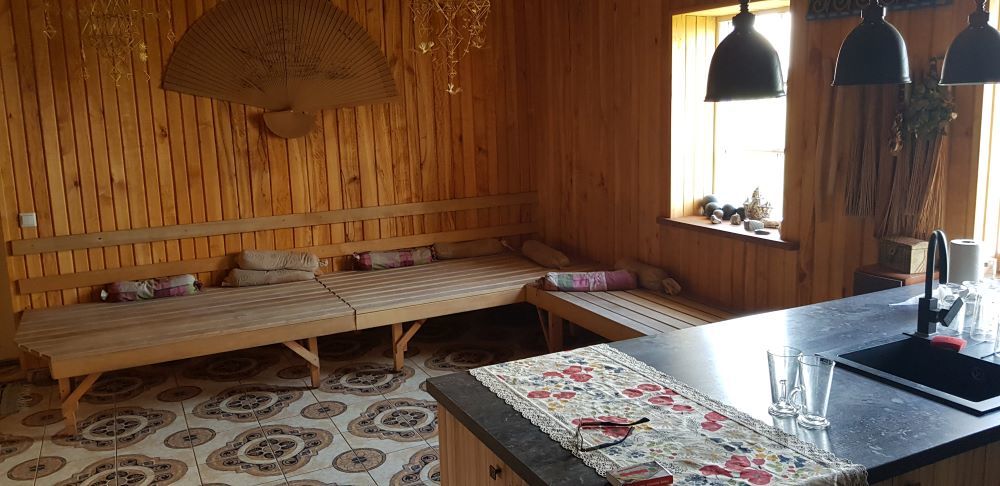
Big rest room in sauna
Sauna ventilation
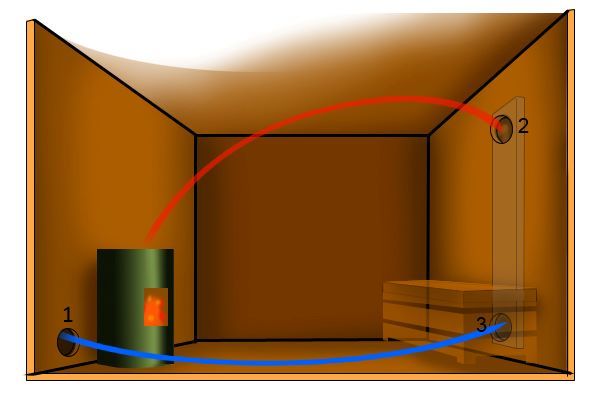
Most important is sauna ventilation. Most of new saunas use mechanical ventilation
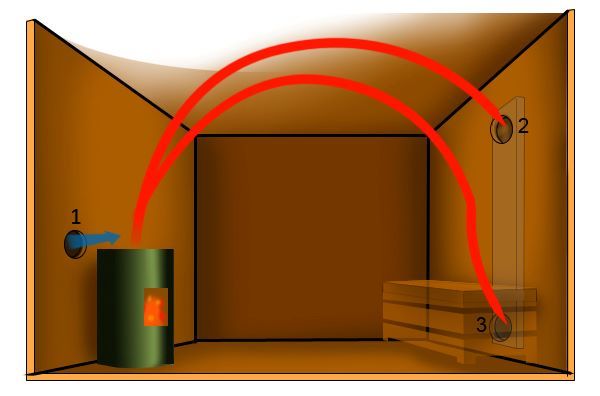
1. cold air from outside coming throw pipes. 80 - 100 cm high.
2. Open when sauna finish
3. Using when be in sauna
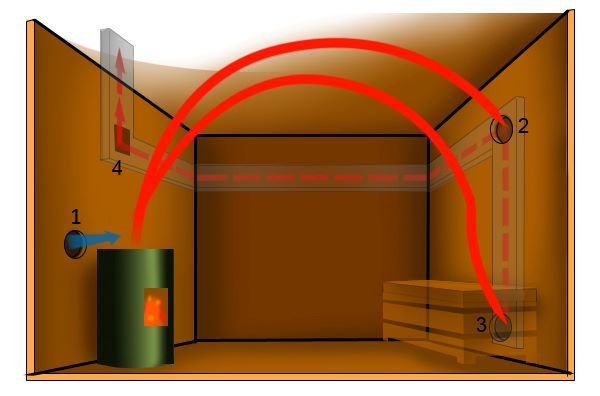
"Turbo" ventilation in sauna.
4 open pipes ( not hole) make better pull
Wrong ventilation when outside air come near floor
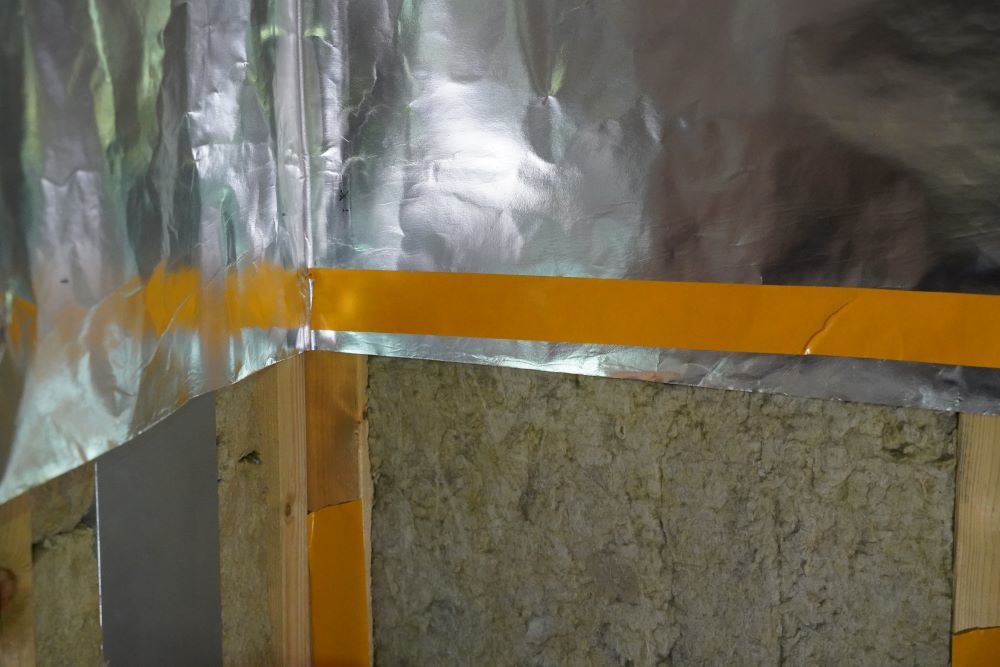
Tightness and insulation of sauna walls
The sauna should have a warm front so that the heat would not be able to get away and would require less firewood to heat it up. Outside walls from cut, cube or round logs should be rigged hermetically. Still, it should be remembered that the ancient saunas didn‘t use to be hermetic, especially between the substructure and the log circlet leaving possibility for the natural ventilation. There is no need to plaster the walls, as plaster does not stay, whereas the walls get decay due to a moisture saturated air.
The outside sauna walls require a substructure (stone or concrete) fixed into the ground till a freeze free depth, i.e. one meter. It is recommended to have botton circlet impregnated into the wall and secure the substructure from decay this way. A separate substructure not connected to the sauna substructure is built for a sauna stove, especially if its massive (it is recommended to leave a 15-25 cm width gap between them, which can be covered with sand.
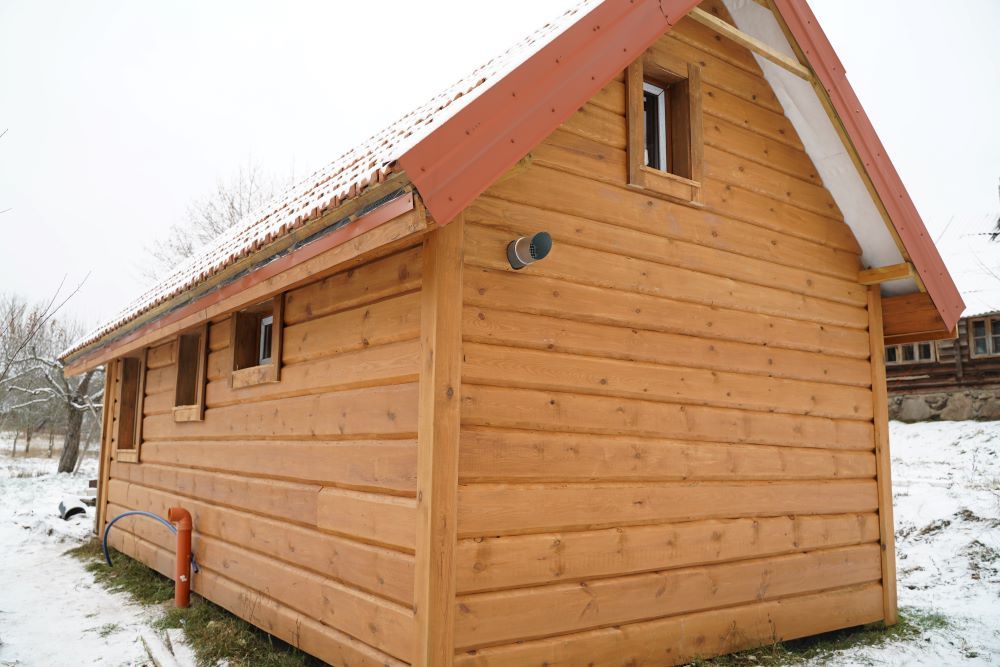
The most suitable logs for the sauna walls are the piny ones as they are resinous and do not get decay so quickly. If piny ones are not available, firry or other logs can also be used. Other specialists give priority for the linden wood, which has easy "breathing" characteristics. For example, Finns always build saunas from wood. Walls and ceiling are also wooden. They create a specific atmosphere of the sauna.
The most typical sauna in Finland is built from logs, such sauna does not require ventilation equipment as logs "breathe" - the air gets in through the wooden walls according to the scientific investigation.
To build a great sauna from bricks is harder than from wood. Wooden building are always more alive, „breathing", permeable to air - the advantages of timbered log saunas have been confirmed by decades. Naturally trimmed, shaved or even refurbished logs can be used for the building of the sauna. Some use a grinded blank of wood as the log imitation.
Normally, the walls of 16-18 width logs have a reasonable suspension of heat when the sauna is being heated. In order not only to bathe in sauna all year long, but also make events, the sauna should be aditionally heated from inside.
Log imitation
Ceiling and roof
In older days, the sauna would have a hip-roof, covered with straw only, or sometimes even with canes or bulrushes in lake outskirts. Nowadays, there is quite a wide choice of roof shapes and construction. The most suitable roofs for saunas are considered to be pent-roofs or span roofs. Pent-roofs are recommended for the saunas which have the area of no bigger than 12 sq meters. If the sauna is bigger, it is recommended to go for span roofs. The sauna roof is covered in a similar way that other economic huts are being built. Of course, it is better to go for a substance which does not burn. The roof can be covered with tin, tiles, tar-paper, wood, straws, canes, etc.
Saunas can be with a shelter or without it. Doors should be made to climb the shelter as it is is suitable for the shrouds. It is most easy to make the ceiling smashed above the beams.
It is of a high importance to have the ceiling carefully heated. Sauna ceiling should be heated with a foil or other isolating substance that does not absorb the fumes.
Sauna flooring
The sauna flooring gets the hardest conditions: lots of moisture, water, high temperature changes in winter time. The sauna floorings can be found in three types: WPC, concrete and wooden ones.
Basins and sudatoriums in areas are more practical if they are made of concrete with wooden lift-up grids which can be easily taken away, dried and greased with antiseptics from time to time as they are the most hygienic ones. Concrete flooring can be layed with ceramic or stone mass tiles.
Whilst laying the concrete flooring, the base first of all needs to be hardly rammed down with a covered cementum layer, hydro isolating and heat isolation layers.
It is recommended to lay the flooring in a way that the water on the top of it would get whipped through the whole in a substructure outside. In pre-sauna it is recommended to lay wooden flooring as they are more pleasant for the bare feet.
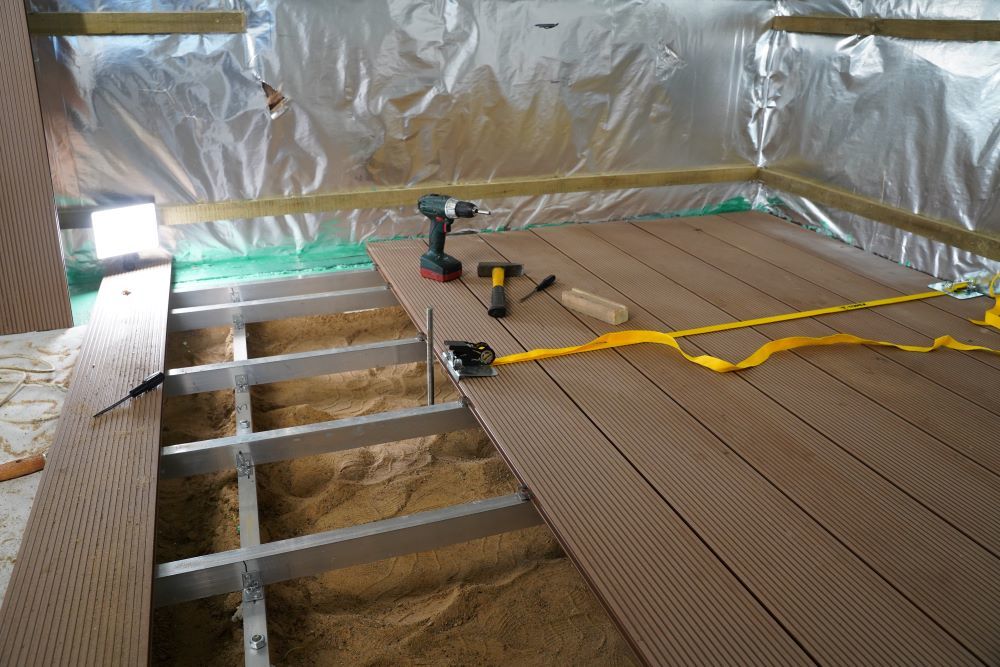
Sauna flooring from WPC deck
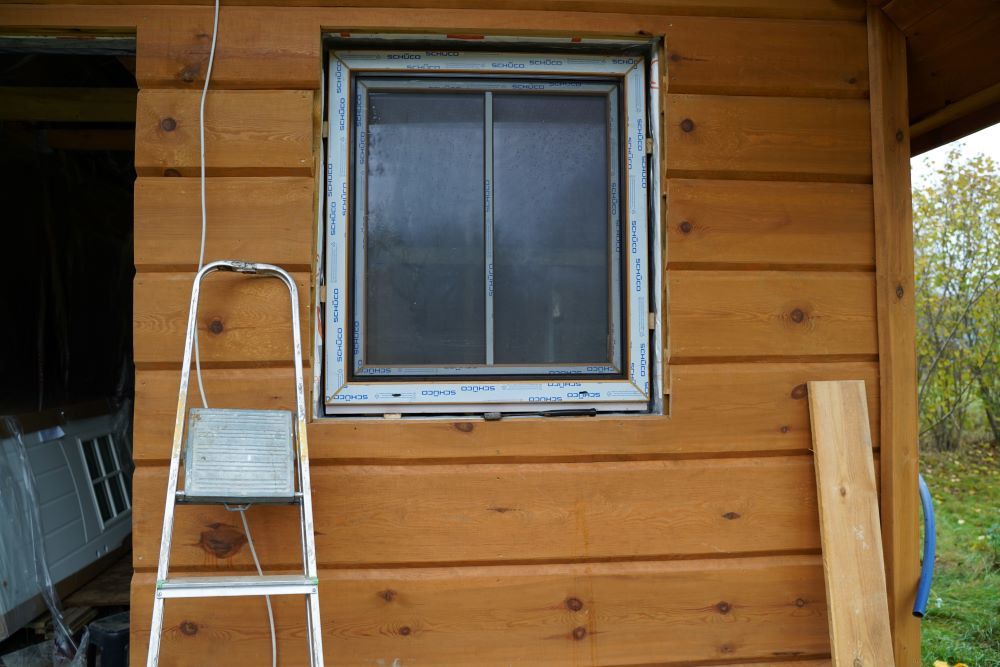
Sauna doors and windows
Saunas normally have outside and inside doors. All of them are opened to the outside. To close the doors, it is possible to fix various latches, though inside handles should be wooden ones as metal ones are not convenient and get very much heated. Manufacturers offer various sauna interior doors - from totally wooden ones to the ones made of one-piece glass.
To light the sauna as well as pre-sauna, a window is being built. A large sauna area enlightening isn't required, however windows are needed. In order to save the heat, windows can be also glazed with double glazes. Some specialists suggest to build a window on the west side wih a 60-80 cm distance from the roof ridge. In this way, the use of daylight will be more efficient and the loss of heat will be reduced.
Old sauna experts advice to build in steamy doors with the height of no bigger that 150 cm whereas the step height could be as big as possible - up to 30 cm. In this way, whilst opening the doors, the heat would not get outside so quickly and the cold would not get inside. All the doors should be opened to the outside. Steamy doors should be manufactured from 6 cm width logs.