Although parquet and laminate flooring are becoming increasingly popular, the most appropriate for a rural homestead are floors of solid wood. Most frequently used are 12-15 cm wide and 30 mm thick pine wood boards. Wider boards look better, yet gaps between them may appear, especially in close proximity to heating appliances. Less prone to movement are larch wood and compound boards. Many prefer boards with bevelled edges. In this case, board height variation is avoided and sanding not needed. Gaps between well laid boards are unlikely to collect dirt. Manual bevelling is not recommended, for beginners in particular: the edges can hardly be made level by means of a sanding machine or a hand plane.

I found the widest selection of wooden flooring boards in the shop Eituma, Verkių str. 44. Also, the prices of most product groups are comparatively lower here than elsewhere. I intended to install them in the bedroom (of a rural homestead) with significant variations in both temperature and humidity levels, therefore I chose boards of the lowest width - 12 cm. For the living room, I would pick much wider boards - of about 20 cm.
In a homestead room of 10 square meters the wooden flooring became rotten. Its cause is very simple: new boards were laid on old, fungus-infected joists. In two years the fungus ate 40 mm thick boards, virtually turning them to dust.
The homestead stands in a hollow; therefore, melt-water, released by the melting snow, rises quite high, in which case good hydro insulation is necessary. Once the priming was smoothened, hydro insulation film was laid, polystyrene foam layer formed and the floor concreted. One of the hardest tasks is levelling the battens, so if the concrete itself was made perfectly level, the process becomes a lot easier. The cheapest concreting method is to use a German technology, when a lightweight concrete is mixed and prepared on location. In cases when concreting is not an option and the supporting surface is not level, battens must be levelled in all directions from the highest point.
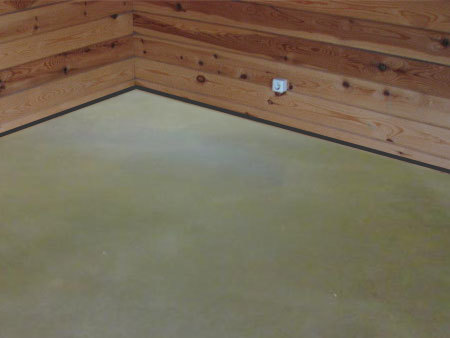
A perfectly level floor can be achieved by concreting
By means of a bubble level, horizontality in all directions is measured, and, if a discrepancy is found, battens are levelled working from the highest point by elevating them as required. Commonly, battens are attached to angle brackets. Angle brackets are firmly fixed according to the batten length, and then battens are attached to them using screw-nails. For simpler levelling, when discrepancies are small, wood shims or OSB plywood scraps will suffice.
Battens for wooden floor
For a level concrete floor, experts recommend 5x7 dry wood balks. Battens should be laid on their thicker side. In cases of high humidity, battens should be impregnated. The most reliable impregnation method is soaking; brushing and spraying, however, can also be used.
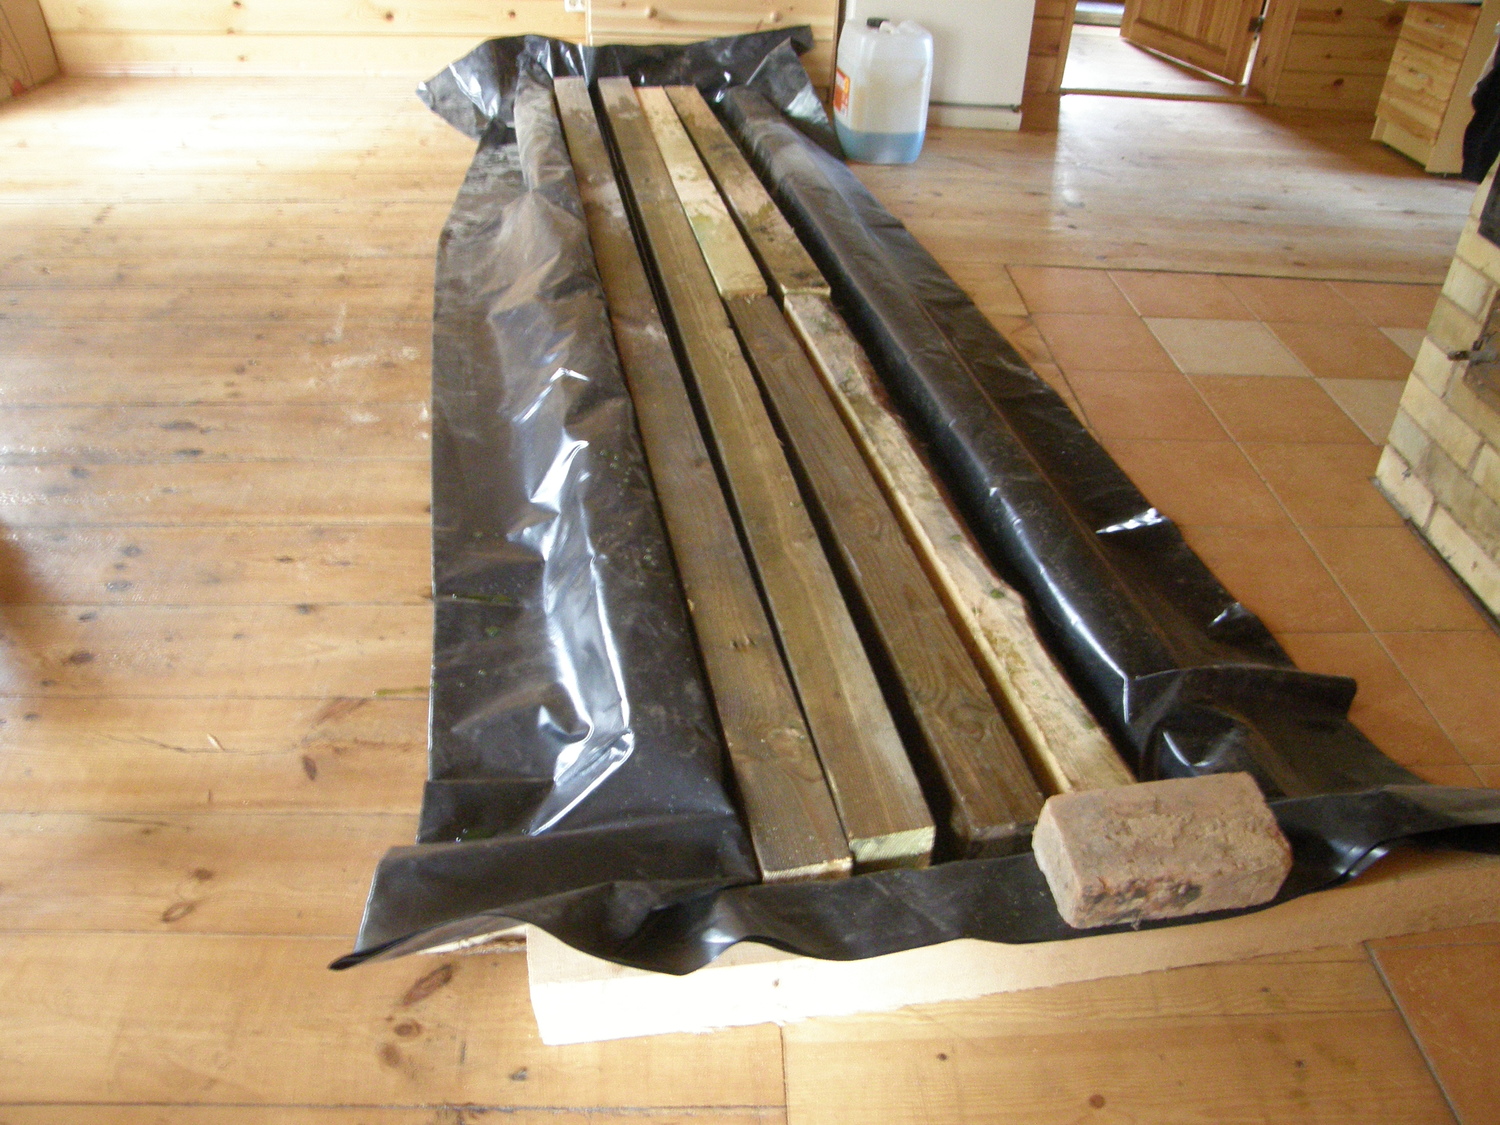
Batten impregnation.
Domestically prepared was a small cellophane bath, with 10x10 balks on its sides. Wooden balks were laid into it and the impregnation solution for domestic use, 'Asepas 2', was then added. Balks must be overturned after 24 hours. Impregnated battens will resist humidity better, and, as a result, will move and squeak less.
Installation of battens for hardwood floor
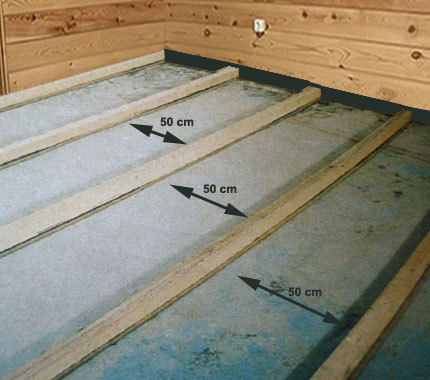
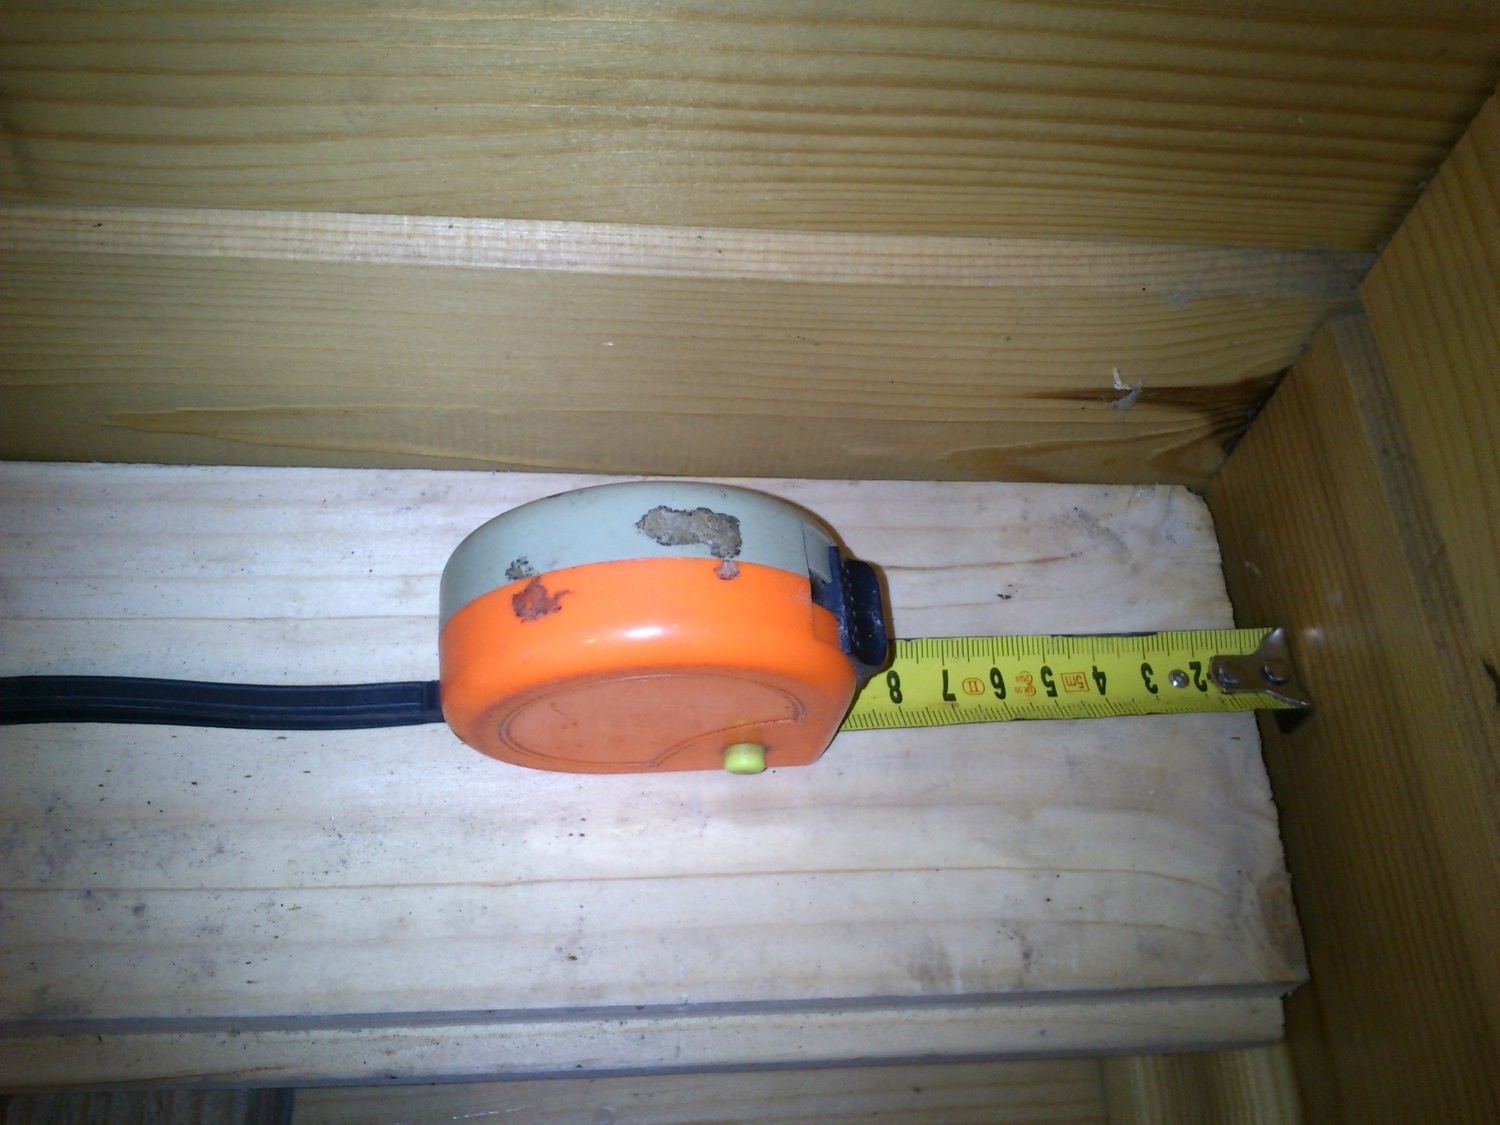
Battens should be laid 40 to 50 cm apart. The exact distance depends on the thickness of the flooring boards: for up to 30 mm boards it should be reduced to 40 cm, while 50 cm may suit thicker ones. Local hydro insulation is laid under the battens, using the insulation roll cut into strips. If the floor is directly above the living space, experts recommend laying sound insulation. Sound insulation is prepared by cutting acoustic insulation slabs into strips.
Battens are attached by screwing them to the supporting surface, experts recommend using steel anchors.
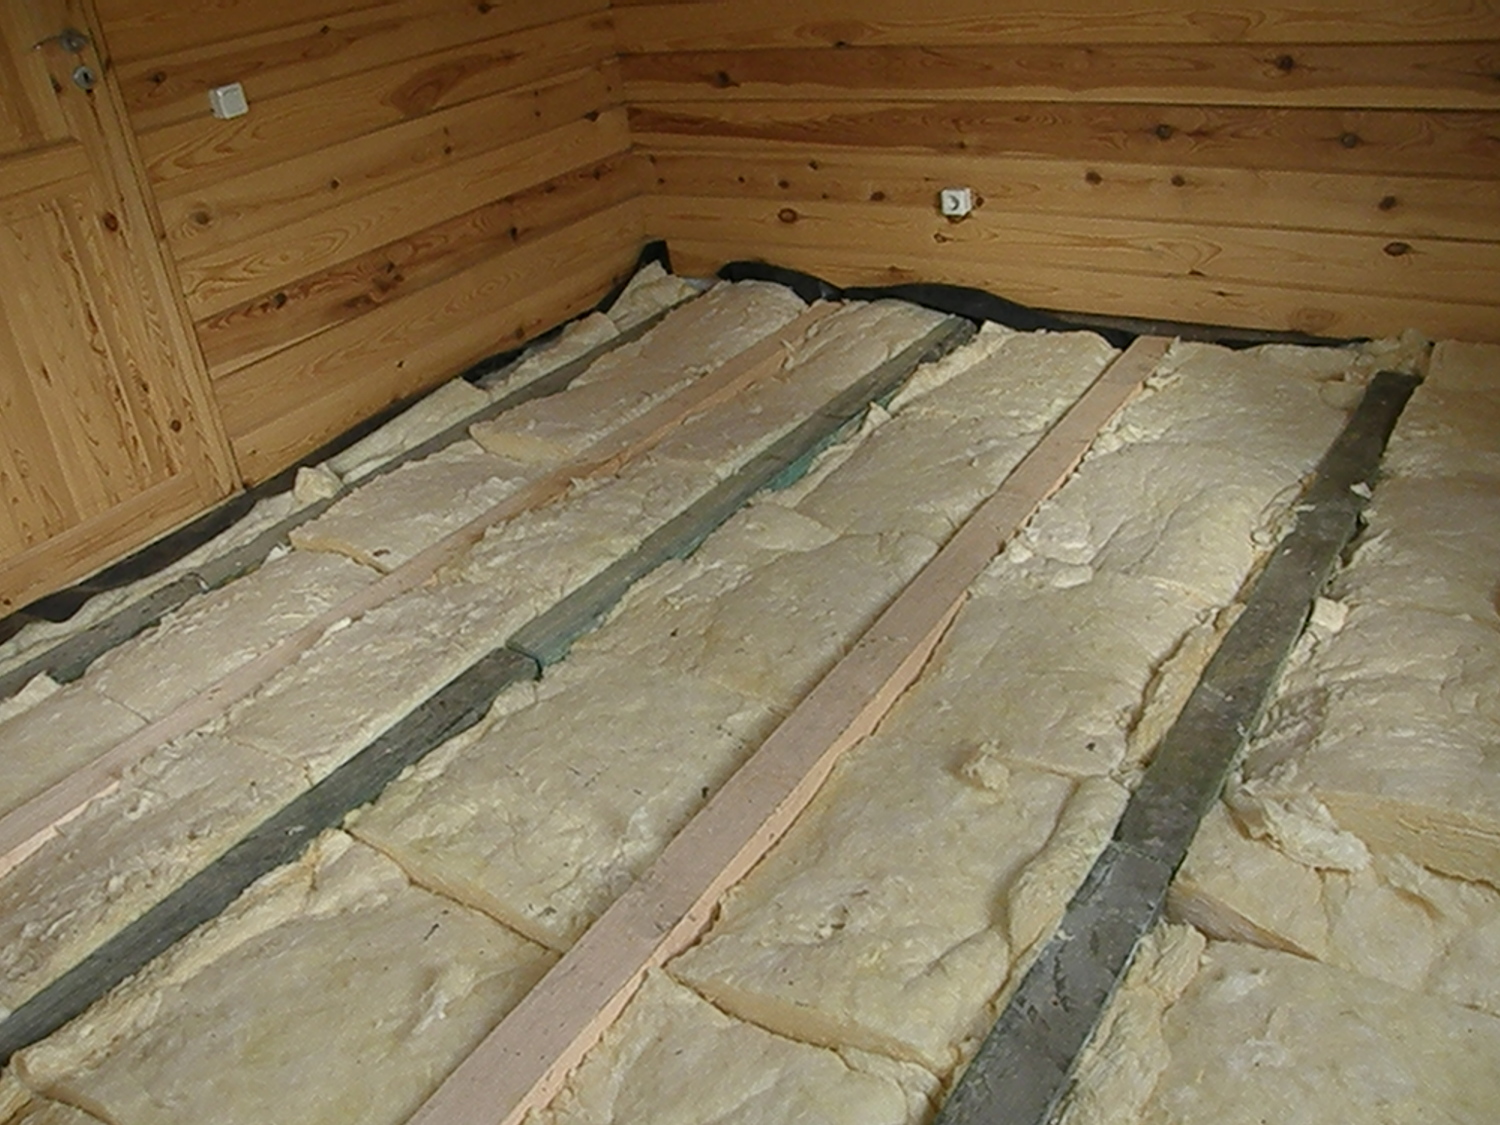
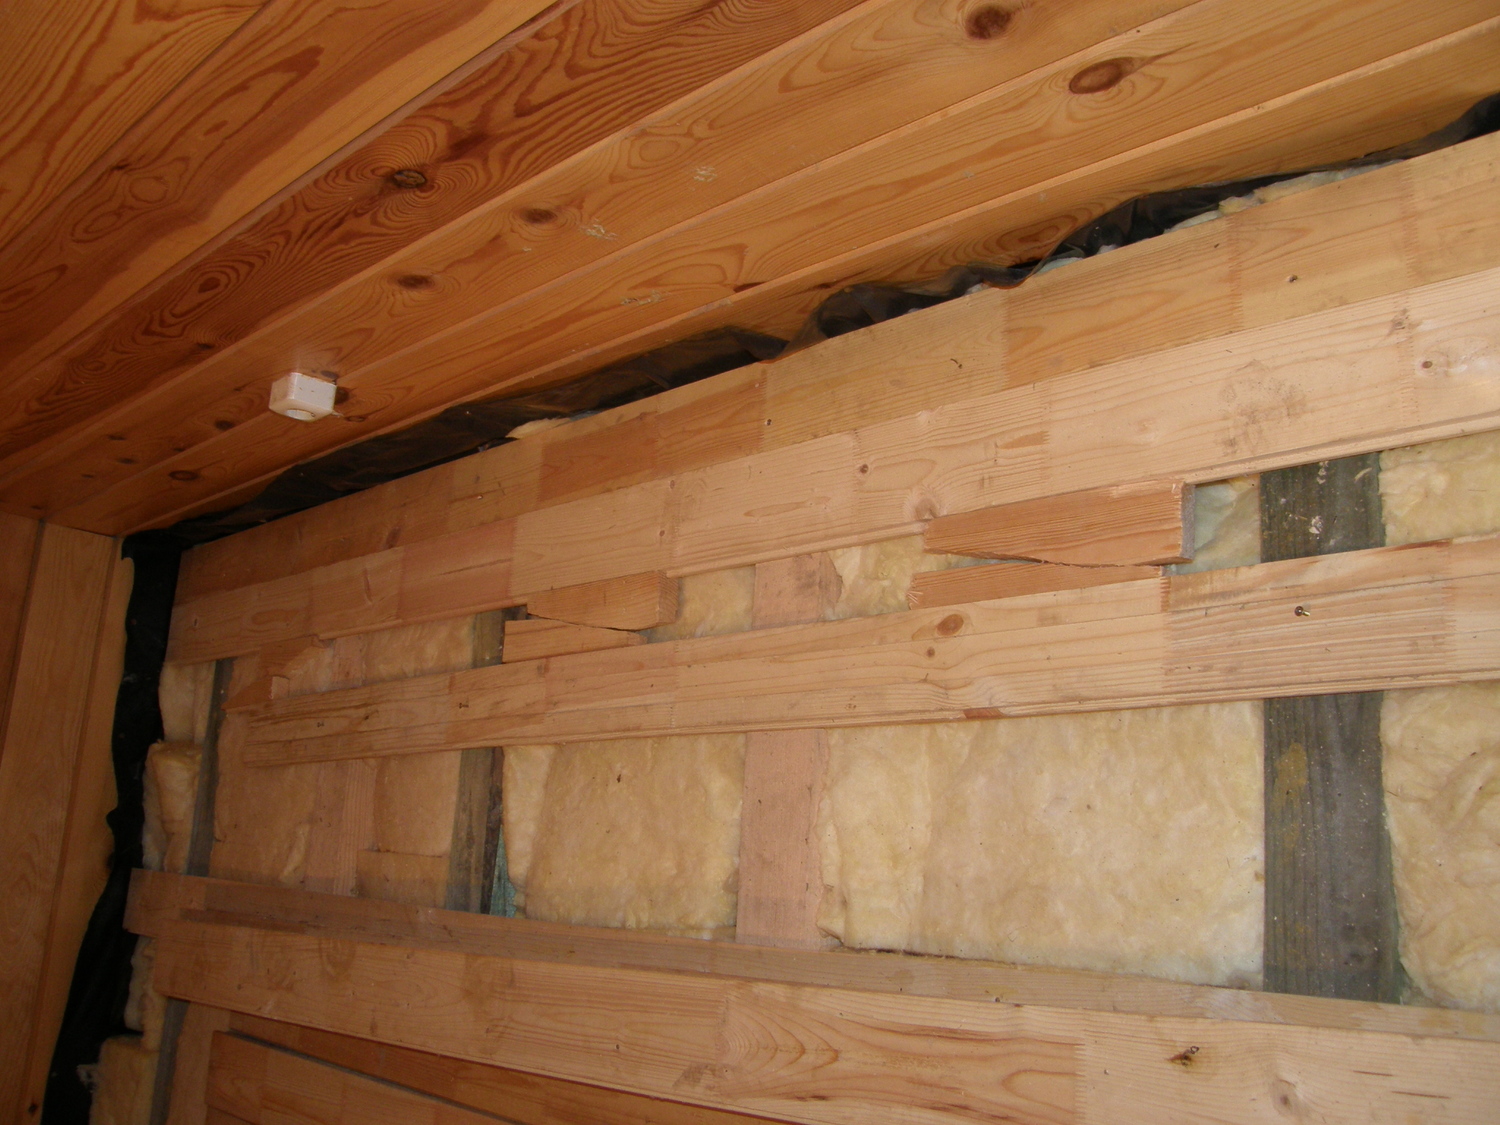
Thermal insulation is laid: 5 cm thick stone wool is used here. It also prevents the echoing of the footsteps, which would otherwise occur in an empty cavity.
Flooring boards installation
Boards should be laid along the main walking direction, for best results - along the main source of natural light. This way, the visual length of a room is increased. The durability of board's protective layer decreases when one walks across it.
Flooring boards may differ in shades or in number of knots. It is advisable to examine all of them before use, so as to put them into groups or to figure out the pattern that you would find most attractive.
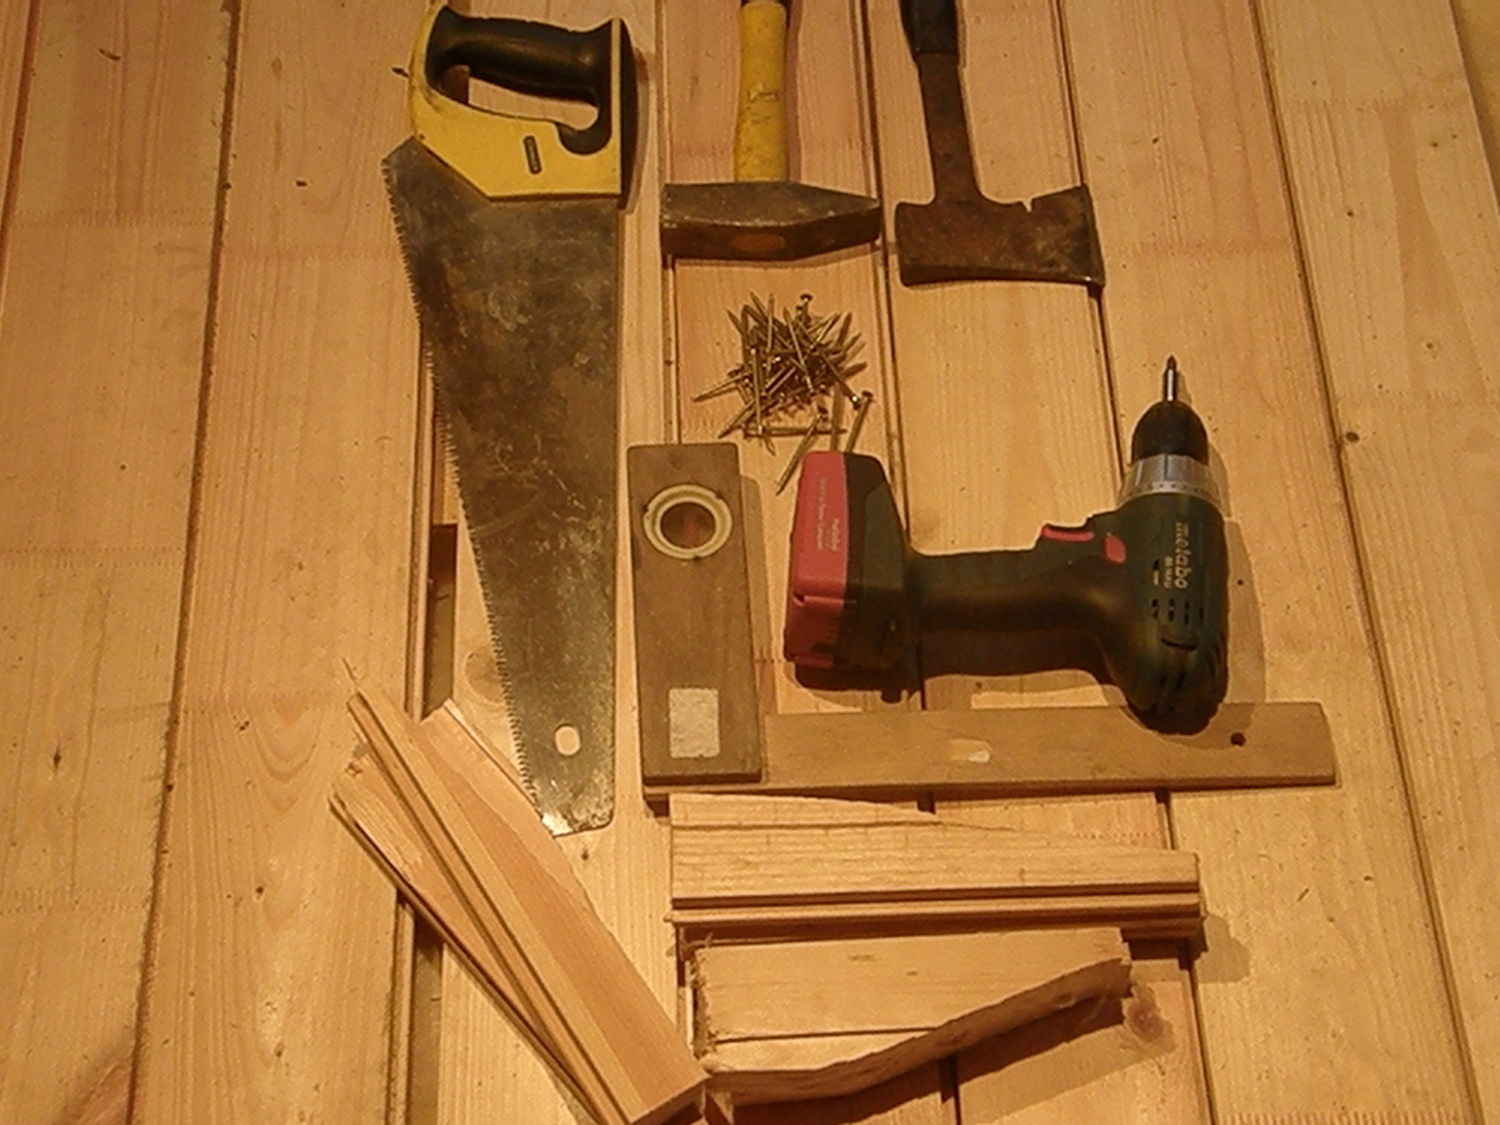
- Hand saw
- Hammer
- Electric screwdriver
- Bubble level, angle meter
- 4x60 screw-nails
- Wedges
- 6x130 screw-nails
- Screws with steel anchors
- 6 mm concrete drill bit
- Regular or rotary hammer drill
- Ruberoid strips for levelling
The groove of the first board should face the wall, leaving a 1 cm gap around the floor. By an outer wall, where the humidity effect is likely to be stronger, the gap should be increased to 1-1.5 cm. Temporary spacers may be used to ensure an adequate gap is left. The board is secured with 2 screw-nails: the first one goes straight through its surface, approx. 20-30 mm from the wall, recessing its head. It should later be covered with skirting board. The second screw-nail goes diagonally (at 45 degrees) through the board's tongue at its beginning, recessing the screw head.
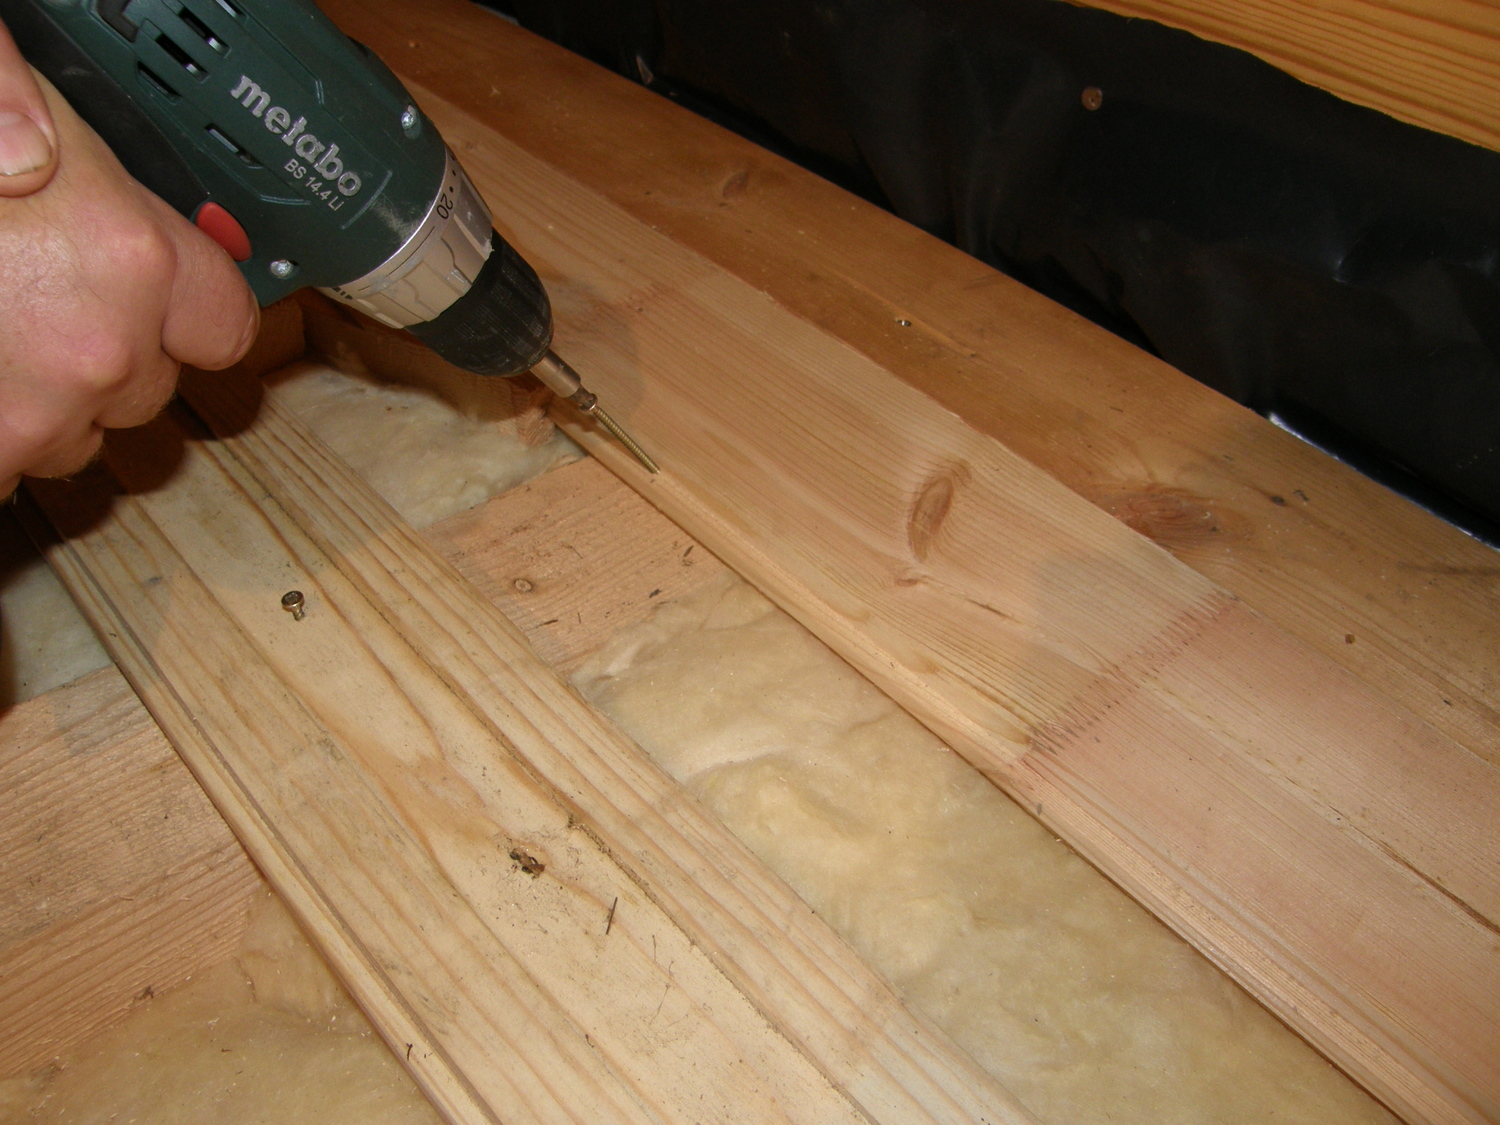
Slide other boards into place, securing each of them with one screw-nail diagonally through their tongue at its beginning.
Using the tapping block and a hammer, carefully knock the boards together.
In practice, however, only high quality larch wood boards can be expected to fit as easily. Pine wood boards, as they dry, tend to warp, and the installation of this kind will not ensure that the boards fit together tightly enough. To keep the boards tight, various tension mechanisms are used. Professionals often employ tension straps, attaching one of the clasps between the first board and the wall, the other one to the opposite side of the newly fitted board, and then ratcheting the straps tight.
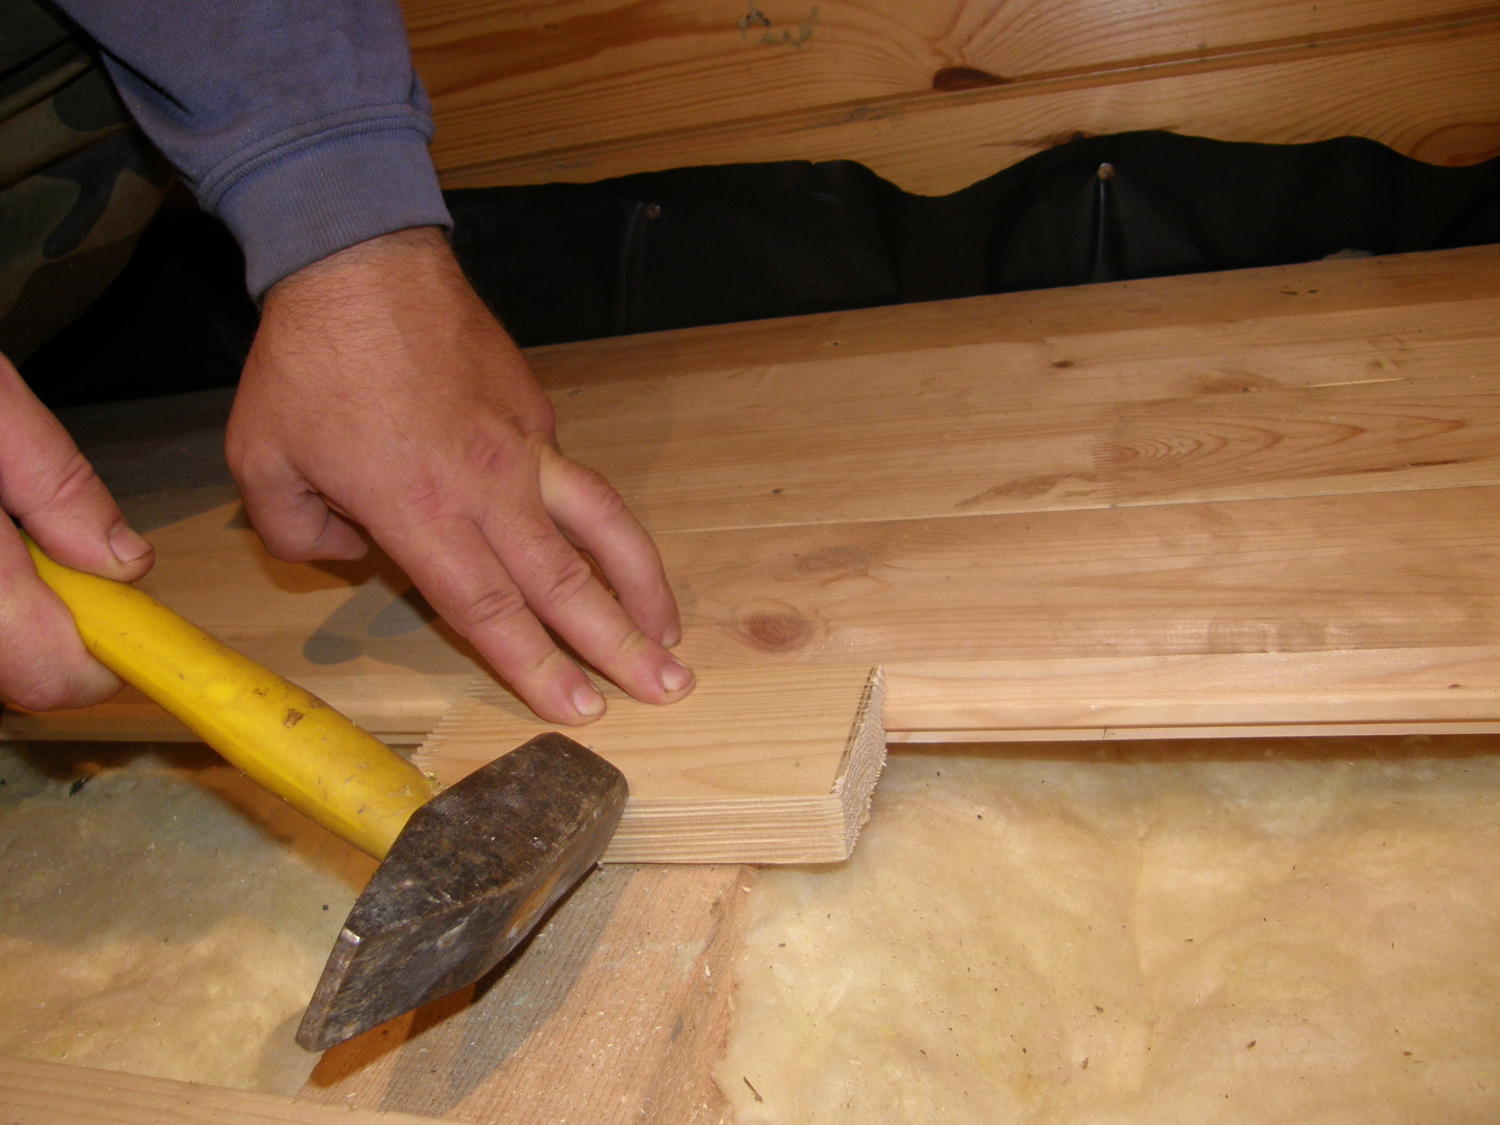
Wedges, produced from flooring boards' scraps may also be used.
At a distance of 80 mm from the fitted board, temporarily fix the supporting one. Wedges are made from 20-30 cm board, cutting it longitudinally in half and narrowing each piece down towards one of its ends. Hitting with a hammer carefully at their thicker ends, the newly fitted board is pressed tightly against the already secured one.
There should remain a gap of 1 cm between the final board and the wall. In my case, there was a gap of 4 cm; therefore, the board had to be broadened. A longitudinally cut board was attached to the final one using screw-nails. The tongue is put into the groove at an angle to be cast down to a horizontal position. The board is fitted tightly into place by means of wedges between it and the wall. It is secured by a screw-nail at a distance of 20-40 mm from the wall to be later covered with skirting board.
Floor preparation for polishing
For sealing imperfect fits and gaps between the boards, wood filler can be used: fill the screw-nail holes, recessed heads and board gaps.
After several days the floor is sanded. This is done by hand, since significant surface irregularities are uncommon. Larger irregularities (of up to 2 mm) can be quickly removed with sandpaper No. 60, while normally sandpaper No. 100 is employed. Sponge No. 200 is used for the finish. Sandpaper is put into the manual sanding pad. In this case, sanding belts with pads inside were used. Sanding is done along the board. Before polishing, all the dust should be carefully removed with a vacuum cleaner.
The floor is polished three times. Once the first polish layer has dried thoroughly, the floor is sanded with sponge No. 200. This will remove any sturdy burrs caused by polishing. The surface is then carefully vacuumed, wiped with a damp cloth and polished twice more.
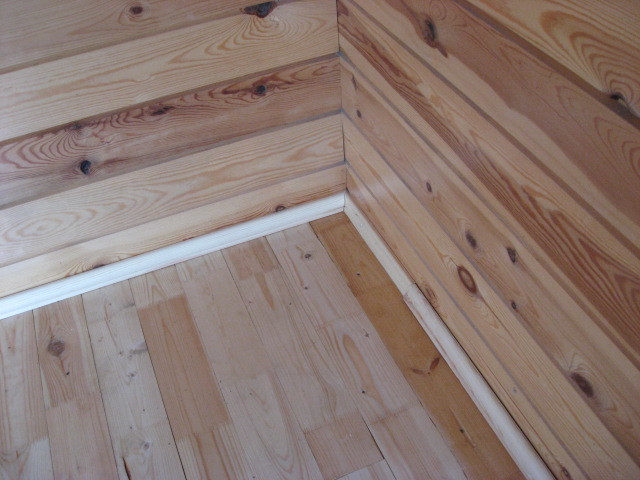
Attaching skirting boards
When selecting skirting board, do not look for the cheapest option, pay attention to the quality of its cut, and choose those with fewer knots, especially if the knots are black.
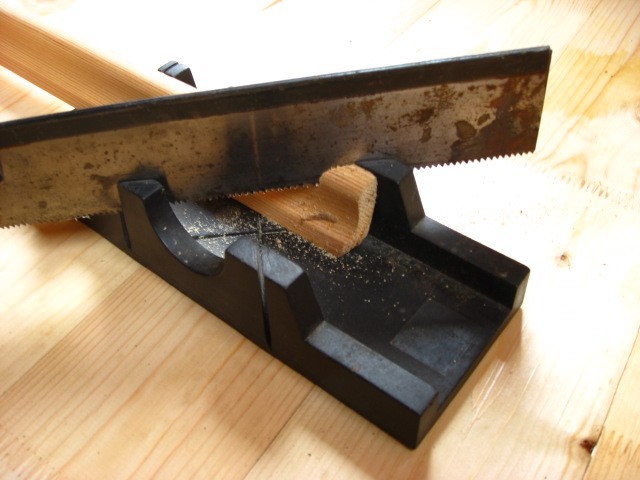
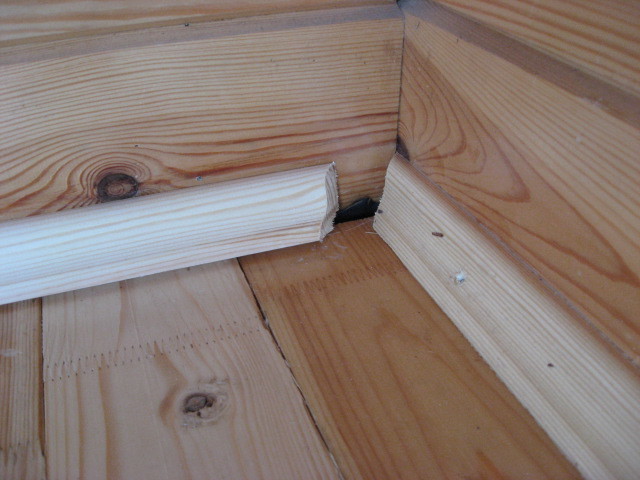
Skirting boards are fitted at an angle of 45 degrees. It is cut using special mitre boxes that contain slots of the required angle.
Skirting boards are secured using the same screw-nails (4x60) as in the case of flooring boards. They are attached to the wall.