Underfloor heating is popular with many people due to its natural heat distribution. Heat rises from the bottom up, spreading more evenly throughout the room. So far, water-based underfloor heating remains the most popular option. However, based on all parameters—ease of installation and cost—electric underfloor heating should be more popular.
With the increase in building energy efficiency, much less energy is needed for heating, making electric underfloor heating a cost-effective solution. The installation costs and materials for electric floor heating are significantly cheaper compared to water-based systems. Electric underfloor heating can also be installed more quickly, especially when using a dry-lay subfloor method. When renovating or installing flooring in an apartment building or a countryside house, electric or infrared heating is one of the best solutions. Electric and infrared heating can also be used as supplementary heating, creating comfortable warm floor zones.
Electric heating can be of two types – with a heat-emitting mat or with an infrared-emitting mat. The mats can come in the form of mesh or film. Mesh mats are installed during screeding or embedded in tile adhesive, while film mats are placed directly under floating floors.
Base Preparation for Electric Underfloor Heating
Electric underfloor heating systems are significantly easier to install. They can be installed using the traditional method of embedding in concrete or using the increasingly popular dry installation method.
If the floor is being concreted, the process begins with compacting the soil base. A layer of gravel is added and also compacted. Then, a geotextile or vapour/moisture barrier is laid, typically using a 200-micron-thick stabilised polyethene film. On top of this, a layer of polystyrene foam insulation is placed. For well-insulated floors, this layer usually ranges from 15 to 40 centimetres in thickness. The polystyrene used is typically EPS 70–100, meaning it has a compressive strength of 70–100 kPa. A concrete layer is then poured over the insulation. While reinforcement is possible, it is not always necessary. After concreting, time must be allowed for the concrete to dry—on average, about one week per centimetre of thickness. If the layer is thicker than 5 cm, even more time will be needed. Once the concrete has dried and been levelled, the heating system and final flooring layers are installed.
When installing floors using the dry method, the installation time is significantly reduced. This method is especially suitable for renovations or replacing floors in apartments within multi-story buildings. It is ideal for installation over a flat, solid base.
On top of a layer of polystyrene foam or expanded clay (keramzit), boards are laid. The most commonly used and well-suited boards for this purpose are Knauf Brown gypsum boards. For damp areas, fibre cement boards are used instead. The boards should be installed in two layers, with the second layer laid in a perpendicular direction to the first. The boards are glued together for stability.
All types of floor coverings can be installed on the prepared subfloor.
Layers of Electric Underfloor Heating
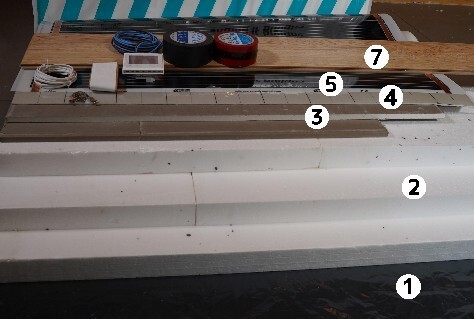
- Specialists recommend laying geotextile on the ground. It prevents soil from entering the upper layers. Vapour or water insulation (film) should only be installed if the base is not properly prepared. If drainage is not done, there is a risk of moisture rising from below.
- The thermal insulation layer prevents heat loss. It is best to use polystyrene foam for floors, as it does not absorb water, which can reduce its insulating properties. For household rooms, EPS 50 - 70 is sufficient. This means that without deformation, polystyrene foam can withstand 1300 - 2500 kg/m². In household rooms, the typical load is around 150 kg/m².
- Plasterboard subfloor is one of the easiest options for installing heated floors.
- A heat-reflective film is used.
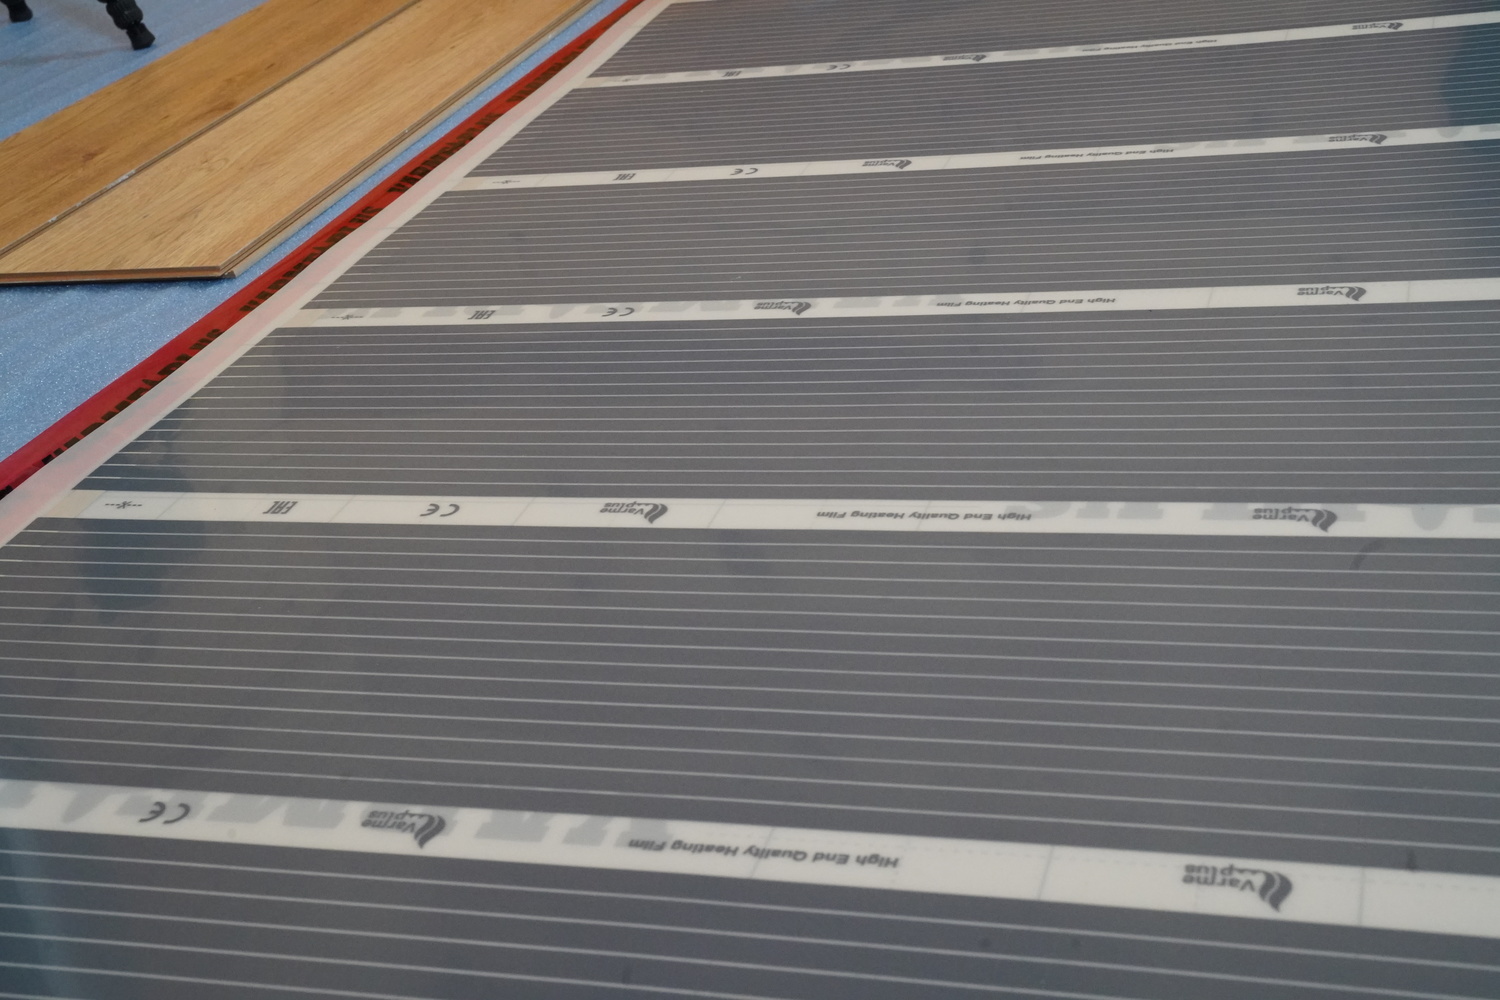
- 150 W/m² infrared film is placed with the copper surface facing down.
- Protective film made from stabilised 200-micron film. It is very important that certified film is used, and only certified materials should be supplied.
- Laminate flooring is preferred. It is better to use denser (850+ kg/m³), mid-range/premium class.
Calculation of Electric Floor Heating Power
The regulation of the heating intensity of electric floor heating is done by adjusting the voltage. If electric floor heating is the only heating method, it is necessary to ensure that the available power is sufficient for room heating. The required amount of heat depends on the building's energy efficiency and heat energy losses.
Previously, it was roughly calculated that 1 kw is needed to heat 10 square meters of area. However, this was applied to buildings with energy efficiency classes C and D. In buildings with energy efficiency classes B and higher, heating consumes 2 to 3 times less energy.
The required heat quantity is calculated based on the limiting cold conditions. The outdoor design temperature is determined by the average temperature of the five coldest consecutive days from the 8 coldest five-day periods in the last 50 years. Based on this, the building's heat loss and heating needs are calculated. In Lithuania, the typical calculation temperature is -20°C or -23°C. It is not necessary to install heating systems with maximum power, as such low temperatures rarely occur, and additional heating devices can be used during these periods.
Electric and infrared heating mesh and films have a specific power rating, which is calculated in watts (W) per square meter. Currently, the most popular heating systems use 150W/m² mesh and films. By installing them over 20 square meters, you create a 3 kw heating system. This is sufficient to heat a large room.
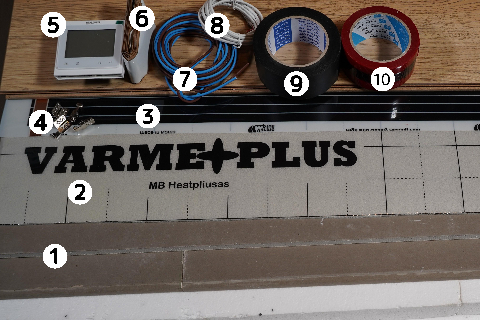
- Black floorboards
- Reflective coating
- Infrared film
- Terminals for connection to copper strip. These are compressed with special pliers, although regular pliers can also be used by pressing several times.
- Thermostat to regulate the temperature mode
- Butyl tape for contact insulation
- Power cables
- Temperature sensor and cable
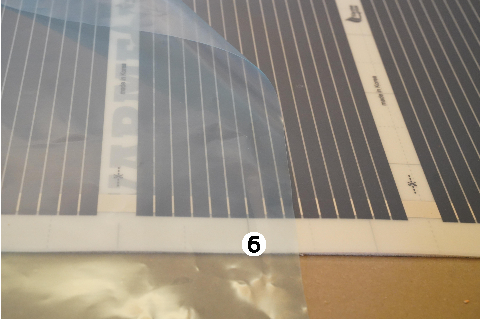
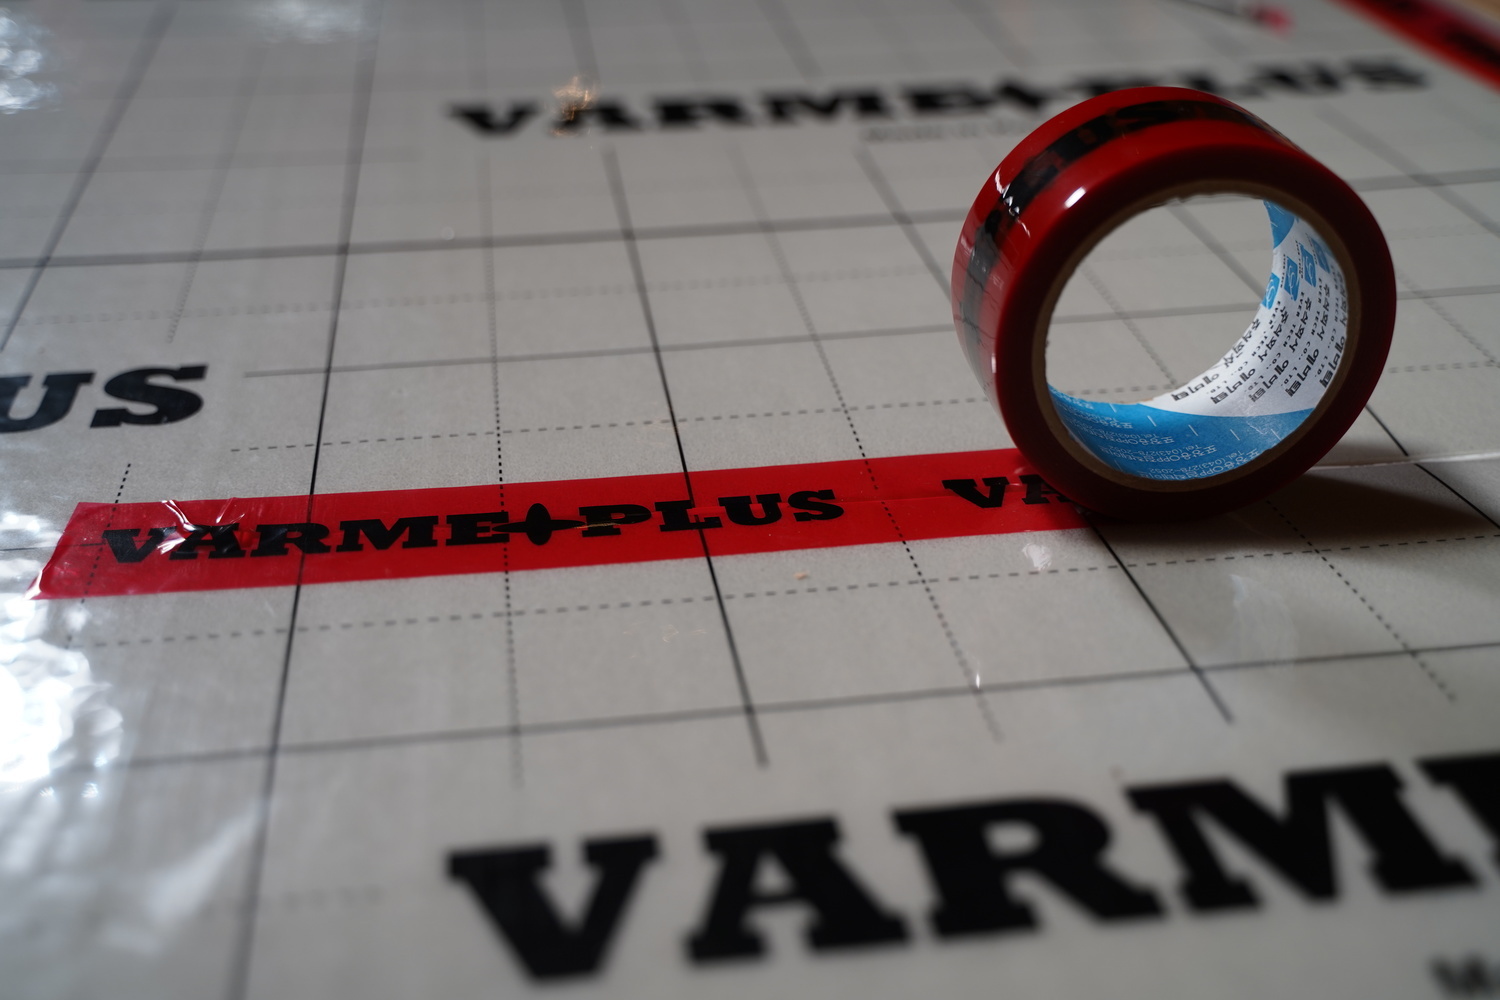
- Adhesive tape for connecting infrared film
- Adhesive tape for heat-insulating film
Installation of Electric Heating Under Laminate Floors
Electric underfloor heating on a dry-installed base is suitable for energy-efficient buildings where the heat demand is not high. Heat and cold non-accumulating layers are created. Heat quickly enters the room, and it is easy to regulate.
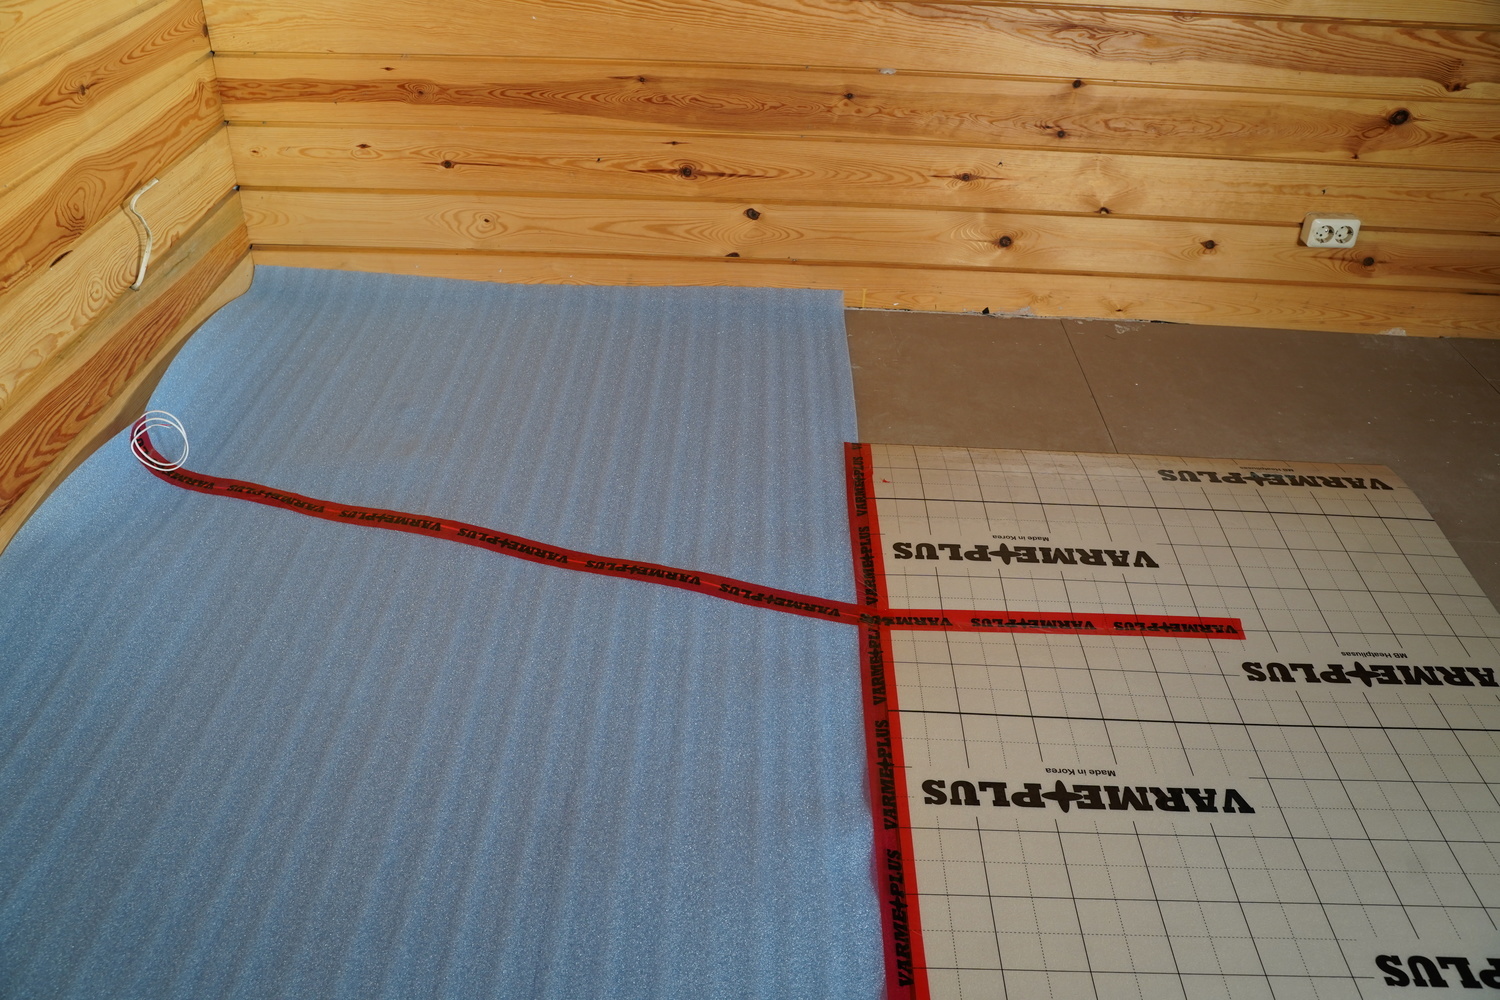
A heat-reflective underlay is laid on the subfloor. The pieces of the underlay are glued together with adhesive tape. Underfloor heating should not be installed under stationary, heavy furniture. It can be installed under tables, sofas with high legs, and chairs.
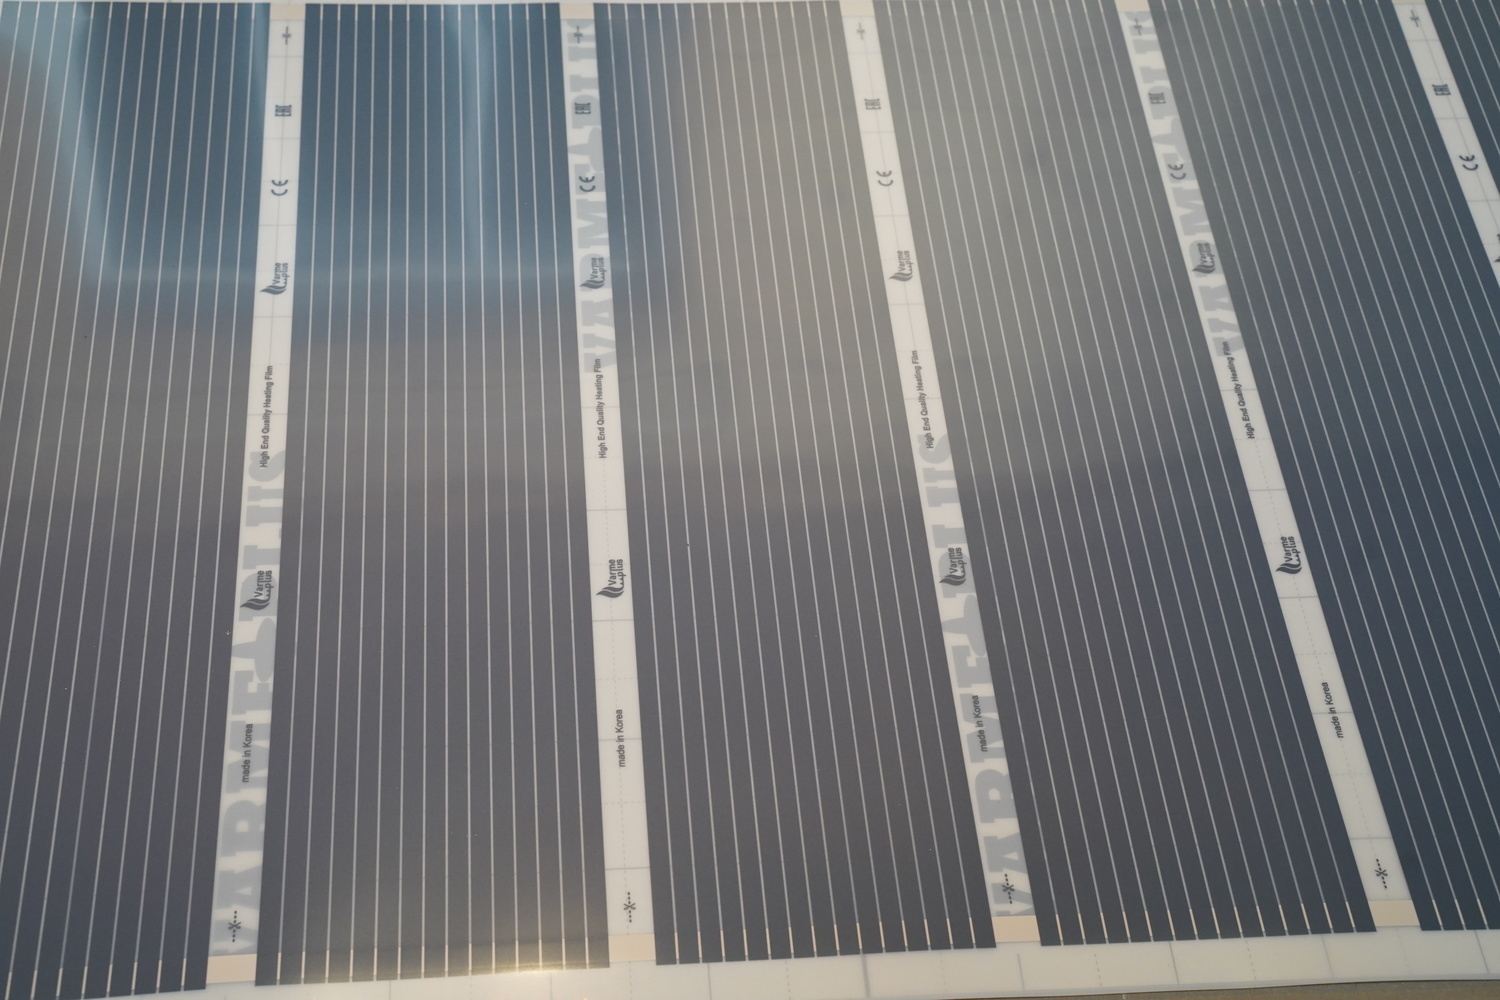
On top of the underlay, the film is laid. The film is placed with the side containing the copper strips facing down.
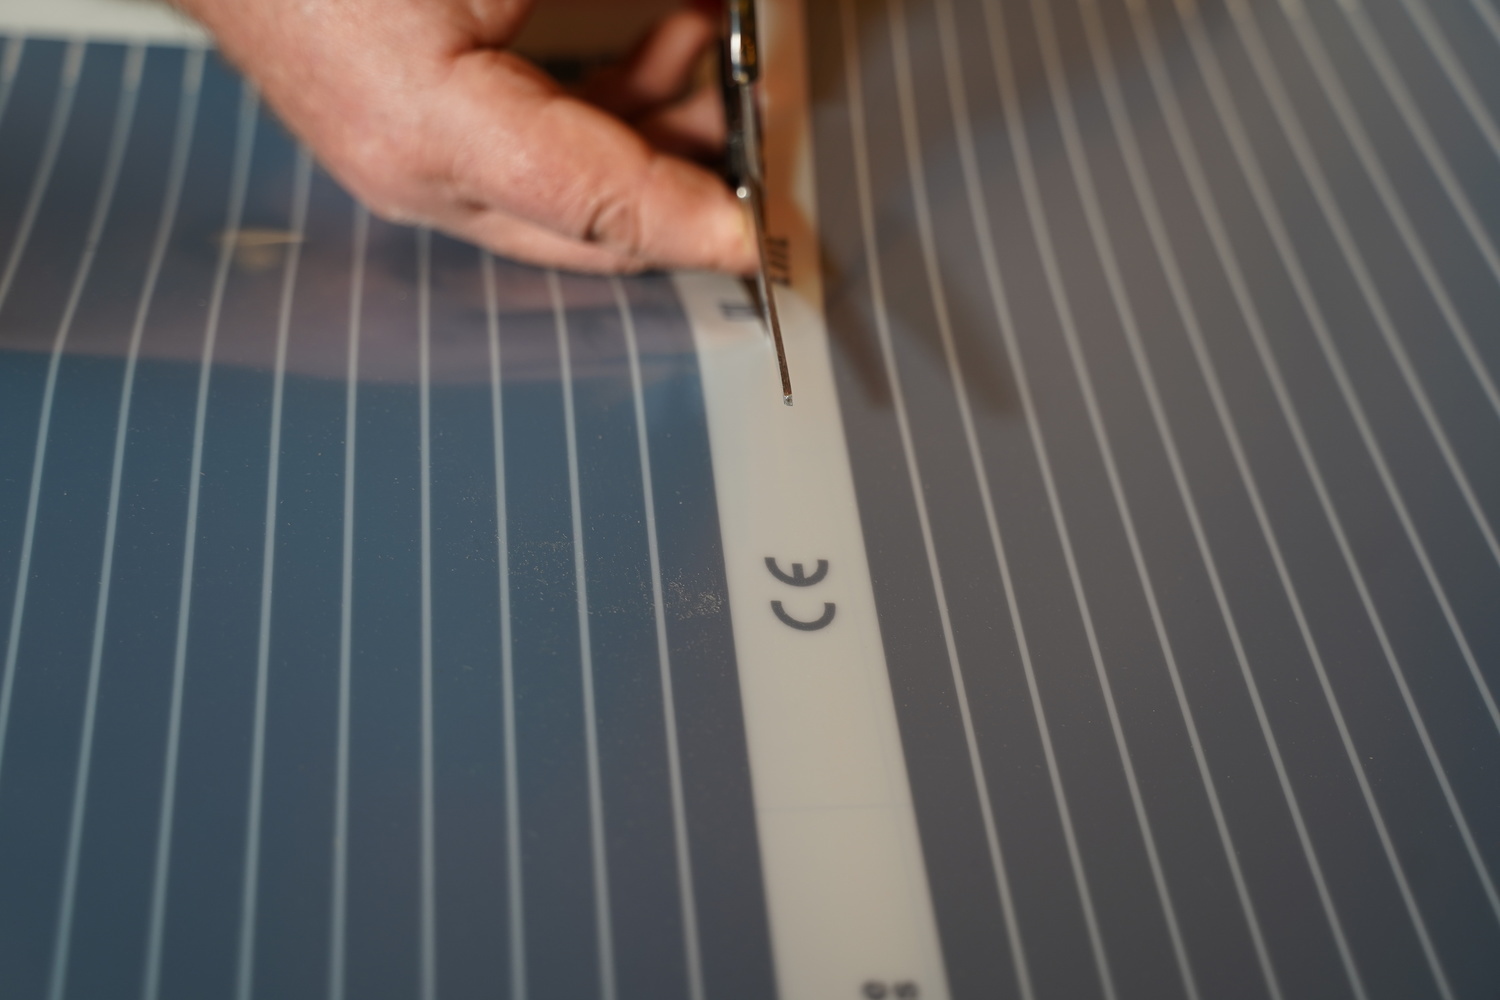
The infrared film can be cut at the indicated places.
A temperature sensor is inserted into the centre of the infrared film. The sensor and wires are embedded into the underlayment and secured with adhesive tape.
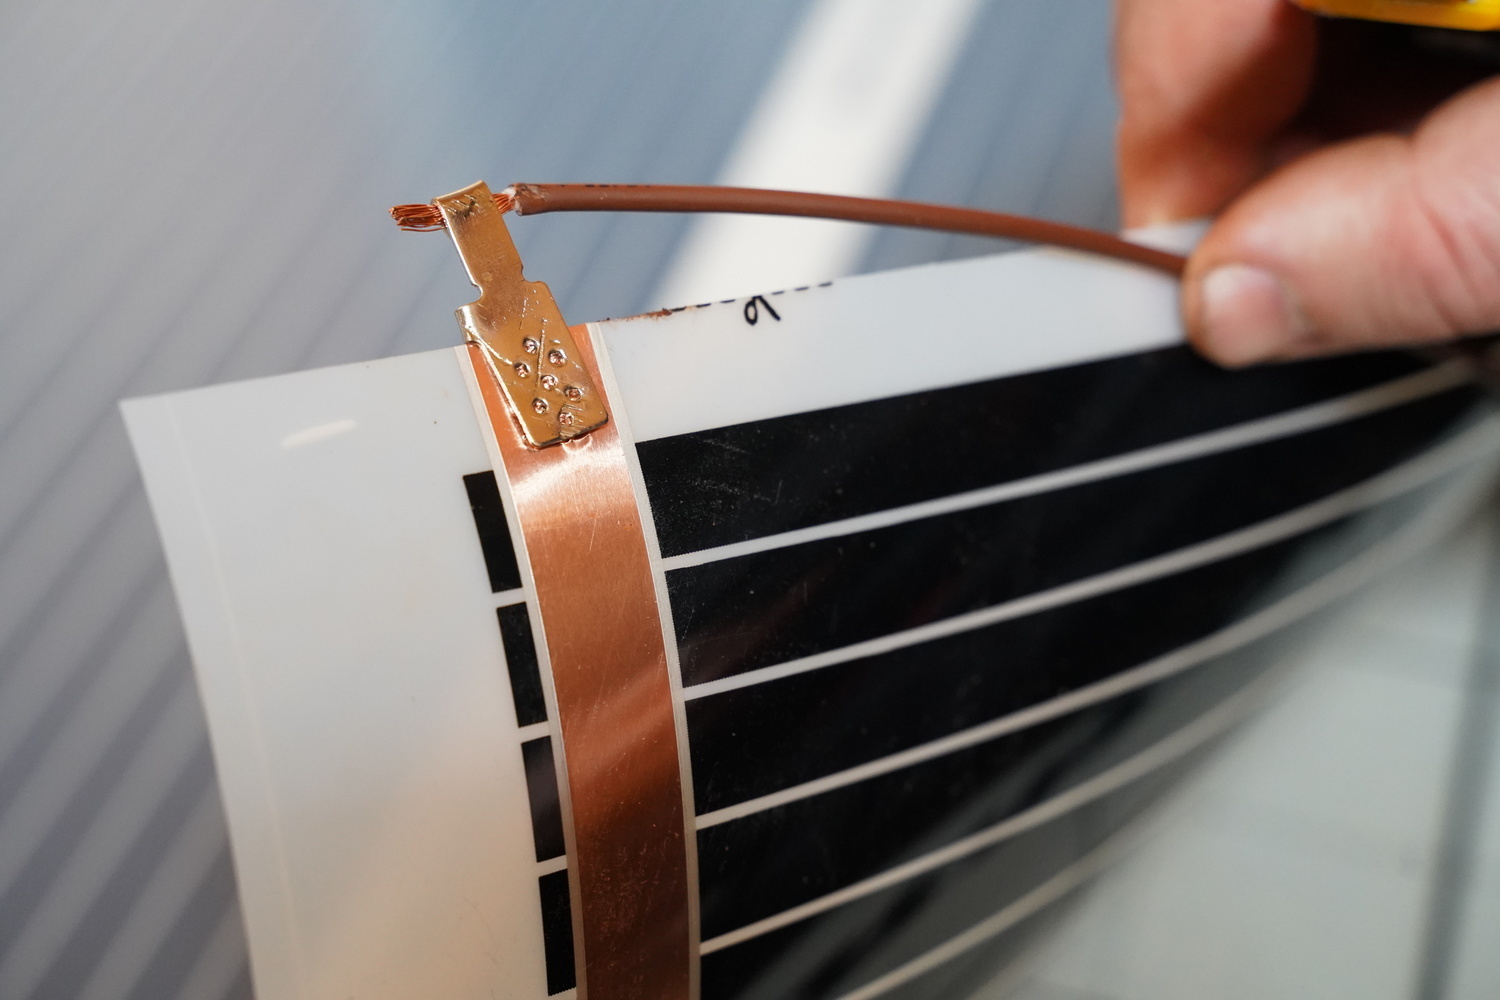
We press the terminals against the copper strip and connect the power cables. The colour of the wires is not important.
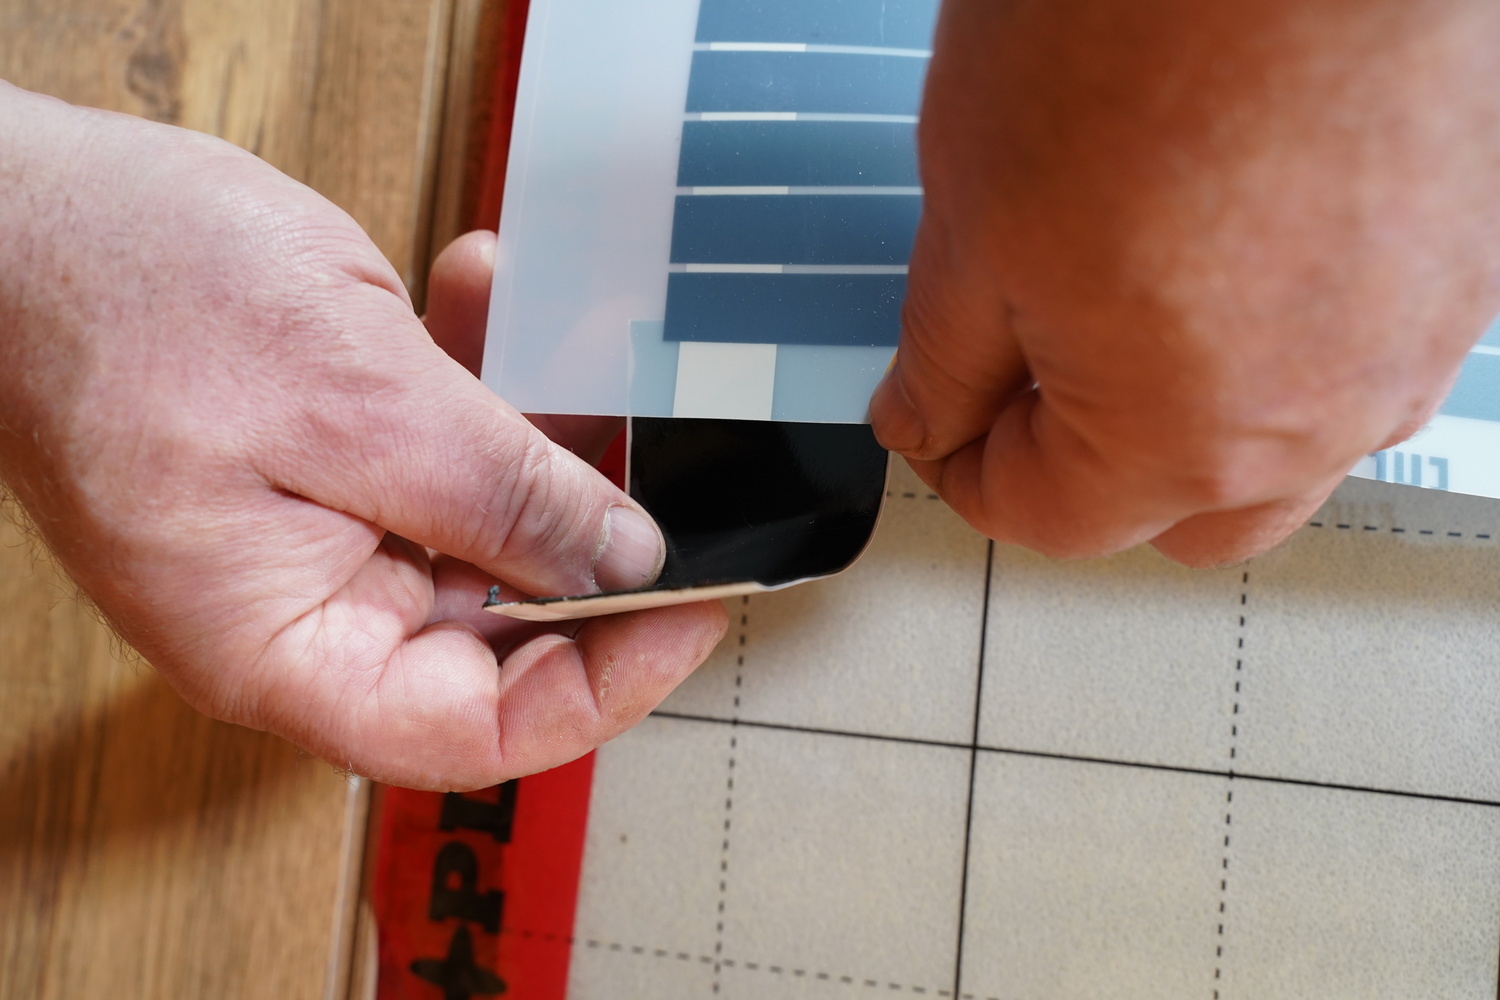
We insulate the wires, terminals, and the exposed contact on the other side of the film with butyl tape. Then we embed the butyl tape into the underlay.
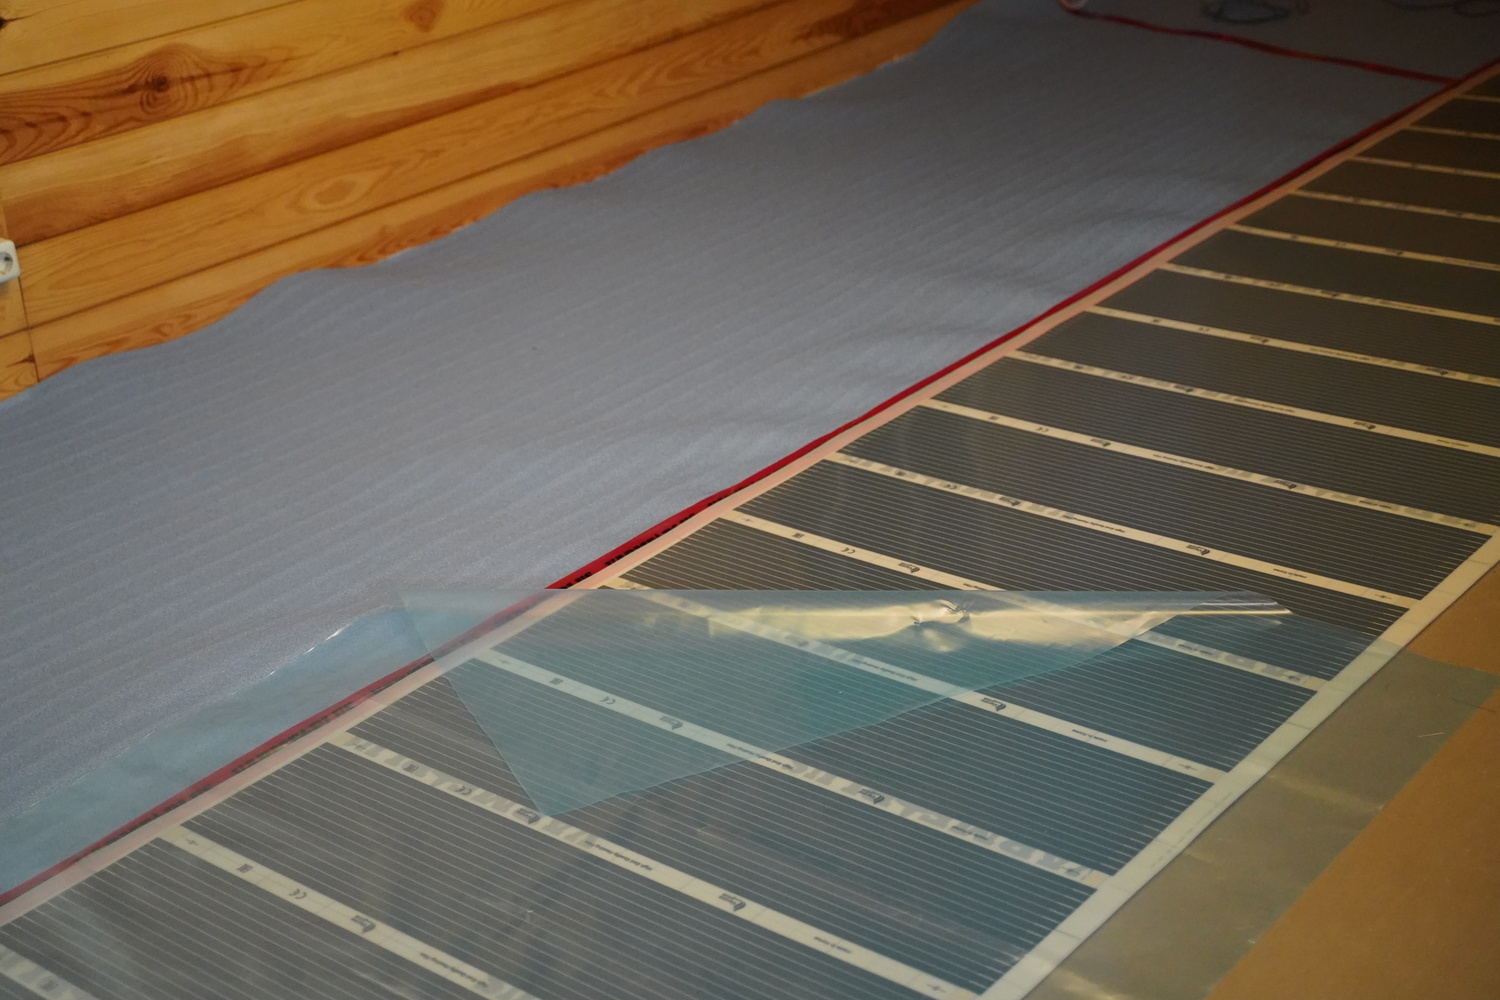
We cover the infrared heating film with a protective film. During installation, it will be necessary to step on it initially, but walking directly on the film is not allowed. We place laminated material on it so that the weight is distributed over a larger area. Later, we proceed with the installation of the laid floors.
Regulation of Electric Underfloor Heating
Compared to water-based underfloor heating, electric underfloor heating has the advantage of easily achieving uniform heating across the entire floor area. With water-based systems, the temperature gradually cools down, and constant circulation needs to be maintained.
Regulating the temperature of electric underfloor heating is very simple. A sensor is inserted into the mesh or film, which sends temperature data to the thermostat via wires. A room temperature sensor can also be used. Both sensors can be used together in the same system. The room temperature sensor is less reliable than the floor sensor, as it is more affected by external factors.
Thermostats can have many different functions. The price of an electric underfloor heating thermostat depends on the number of features. Economy-class thermostats turn heating mats or films on and off and allow manual temperature setting. Mid-range thermostats can be programmed according to daily and weekly schedules, usually manually.
Modern thermostats can be controlled remotely and connected to the internet. These thermostats can be adjusted remotely, which is very convenient for cottages, allowing you to turn on the electric underfloor heating before arriving.
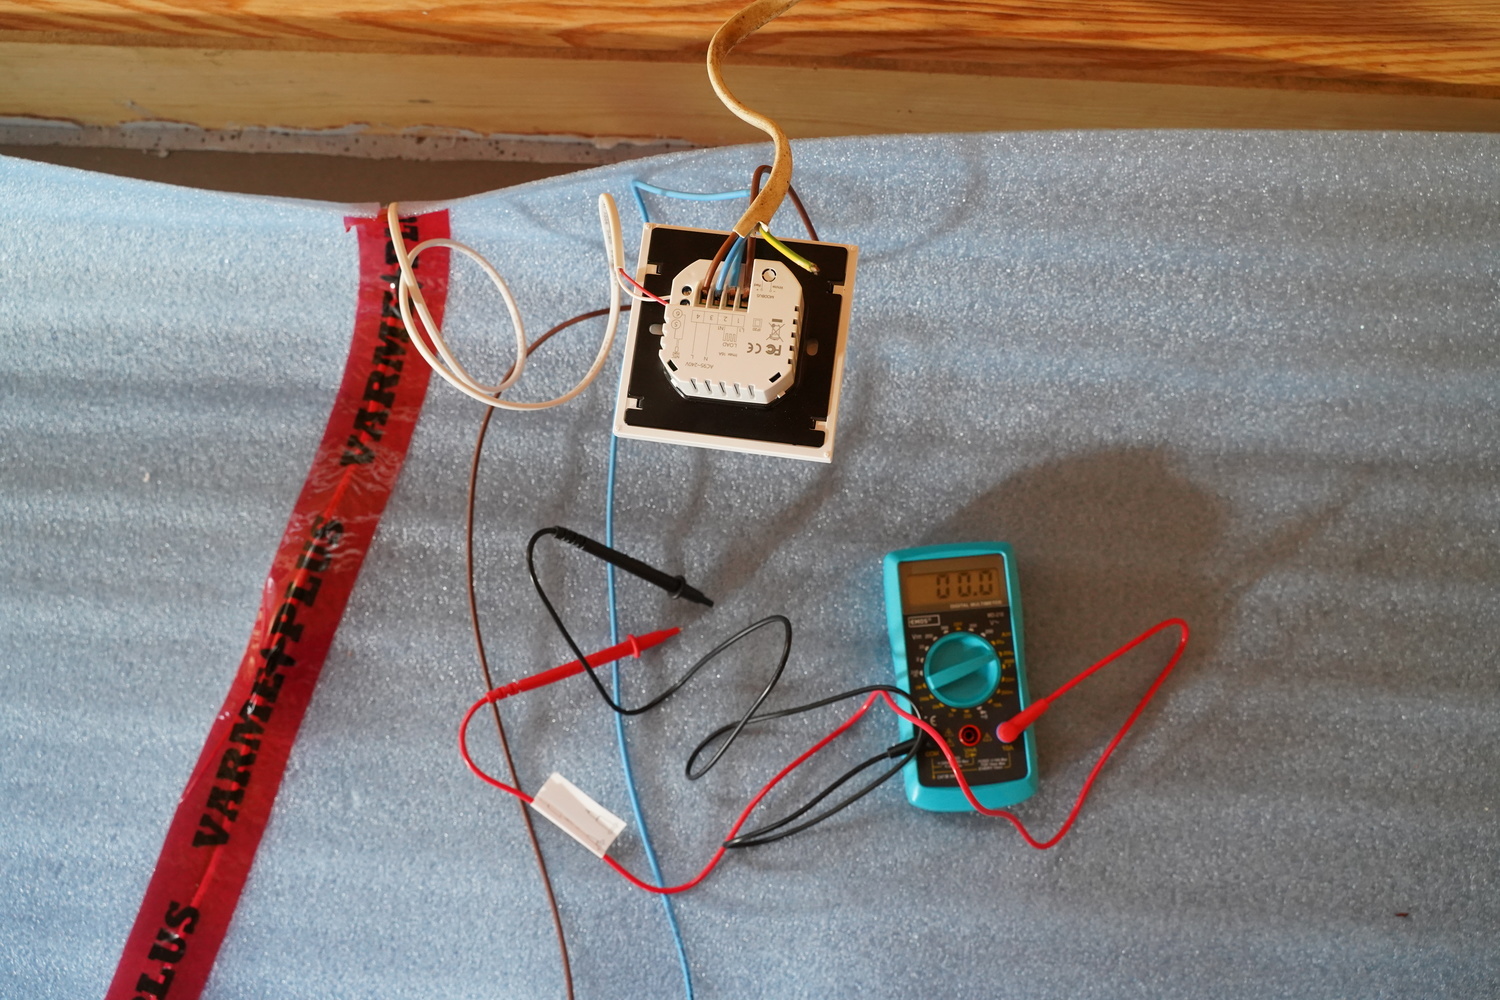
The thermostat connection is effortless. The holes for the sensor wires are marked; we insert them and screw them in. The power supply and electrical current supply wires for the infrared film are also connected.
Installation of Electric Underfloor Heating Under Tiles
Under tiles, heating or infrared mats are installed. The mats are embedded into the adhesive. Tiles are then applied on top of them.
