How to create brick walkway
Updated: 2022-01-21
Author: James Kronefield
The use of Bricks or Pavers to create a walkway or patio complements a home in a way that is unmatched. It adds a level of quality and elegance to a home entrance that can not be achieved with either concrete or asphalt. Brick and Pavers also come in many different colors and shapes allowing for unique color schemes and patterns to be achieved. In addition, installing a Brick or Paver walkway does not necessarily require a pro. With some basic knowledge and a relatively simple walkway plan, a homeowner is capable of undertaking such a project.
The key to installing a Brick or Paver Walkway is to first properly prepare the area where the pavers are to be installed. The area should be dug out at least a foot down, removing all topsoil and clay soil. In addition, string lines should be strung on each side of the walkway. The string lines indicate the finished height of the walkway.
Once the area has been dug down, 3/4" gravel stone should be laid in and tamped down tightly. Then 2" of sand, or stone dust should be spread over the gravel. Again the stone dust should be tamped down. Stone dust is preferred. The height between the tamped down sand and the stringline should equal the thickness of the brick or paver.
Now that you have a stable base, place a 1" pipe or ledger board the length of the walkway on either side of the walkway. Then using a flatedge, e.g. a 2"x4" board, slide it over the two lengths of the ledger board. In doing this you will create a level surface area to lay the pavers.
Now place on the level stone dust strips of plastic brick borders. Install a run on both sides of the prepared area. These strips will act as your walkway border and help to maintain the integrity and shape of the walkway. You can get these plastic strip borders at most home improvement stores. The strips should be anchored down with 12" galvinized nails. You should sink these nails into the ground and through the strips every foot.
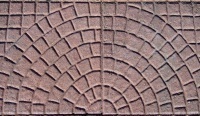
Once this is done, you can then begin to lay the pavers. There are many patterns you can lay. I particularly like the Herring Bone pattern. The key to laying the pavers is to ensure that they interlock with each other. Always stagger adjacent rows of bricks by 1/2 of a brick to interlock them. This will again help maintain the integrity of the walkway.
Inevitably pavers will need to be cut or split when building the walkway. Unless you want to buy or rent an expensive wetsaw, I would suggest purchasing a simple paver splitter. It is basically a chisel with a wide end that is the width of the pavers. To actually split the paver, lay it in a bed of sand and place the chisel at a 75 degree angle over the spot where you want to break the brick. Then using a hammer strike the butt end of the chisel firmly. You may need to do this a couple of times. You may also want to flip the paver over and strike the other side of the brick using the hammer and chisle. Within one or two strikes the paver should break cleanly. If your walkway has curves you will need to buy or rent a wetsaw.
After installing the bricks, build up the outside edges with additional sand, and then shovel in the topsoil and pack down firmly.
Finally, spread stone dust over the new walkway and sweep into the cracks. Repeat this process a couple of times to ensure the cracks are fully filled. This will complete the interlocking of the bricks and help to eliminate any weed growth. Just add grass seed to the outside edges and you should have a beautiful entrance to your home within a couple of weeks.
Comments (0)